Whether to weather
Following on from the last posting the BSV's have done a couple of laps around the layout and now is the time for a weathering.
For a few reasons I haven't been down the shed as much as I would have liked recently. With the cold weather and another project which is coming to a close more time can now be spent on the layout.
I decided to weather a BSV with the tried and trusted isopryl alcohol used as a thinner for the Tamiya paint. The first I heard of using the alcohol was through the AMRM and the excellent article by James McInerny on weathering. It works very well and dries quickly. (I am still waiting for James to do an article in AMRM on how he takes his brilliant photos in the magazine, or maybe its a trade secret?)
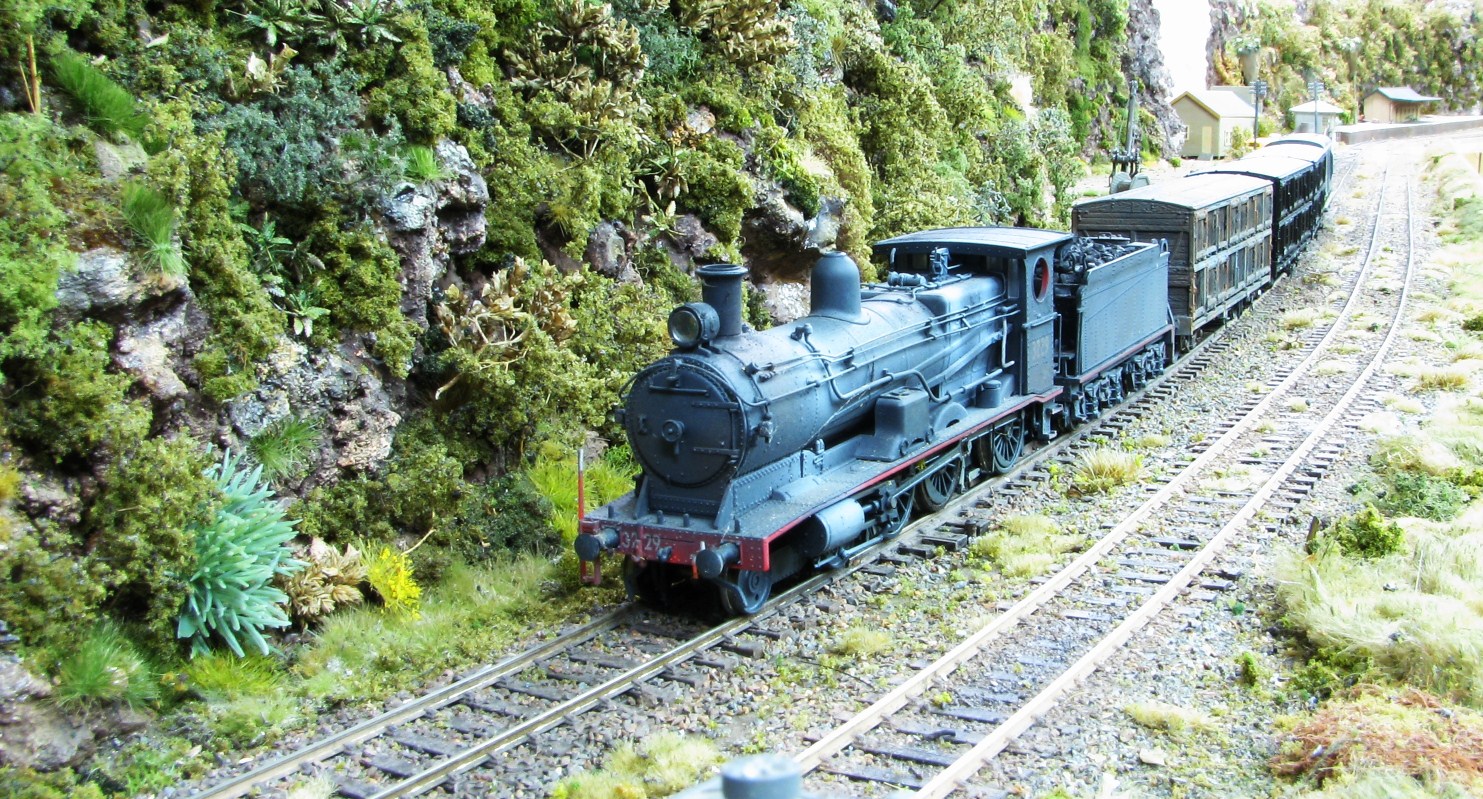
The photo above shows 3229 out on a run down at Bodalla with the weathered BSV up front. I think the rust is a bit overdone as I couldn't find the smaller brush. Even allowing for the rough job I have done it is an improvement over the out of the box models. If I have only one critisism of the models it would be the over accentuated wood grain on the ends of the cars. I might have a go at smoothing it off on the next weathering job. Although I have read how to dismantle the cars to get to the inside at this stage it is not that noticeable that the inside is still black. Will be interesting as to how modellers model sheep inside.
This is a closer shot showing the differences between the weathered and virgin out of the box model. The bow on the solebar on the right hand model is explained by having the halogen lights too close and on for too long. Will need to put the light back on and have an unbending moment.
With the batteries fully charged I took the opportunity to snap of a few more shots around the layout with the 32 and the BSV's.
One thing I get caught with every time when taking photos is I forget to go around the models with a brush to get off all debris and spider webs which my shed is a home for. I'm sure they get together outside and reccomend my shed as a good place to live. So forgive me with some of the shots that have webs on the loco. I'll make sure it doesn't happen next time.
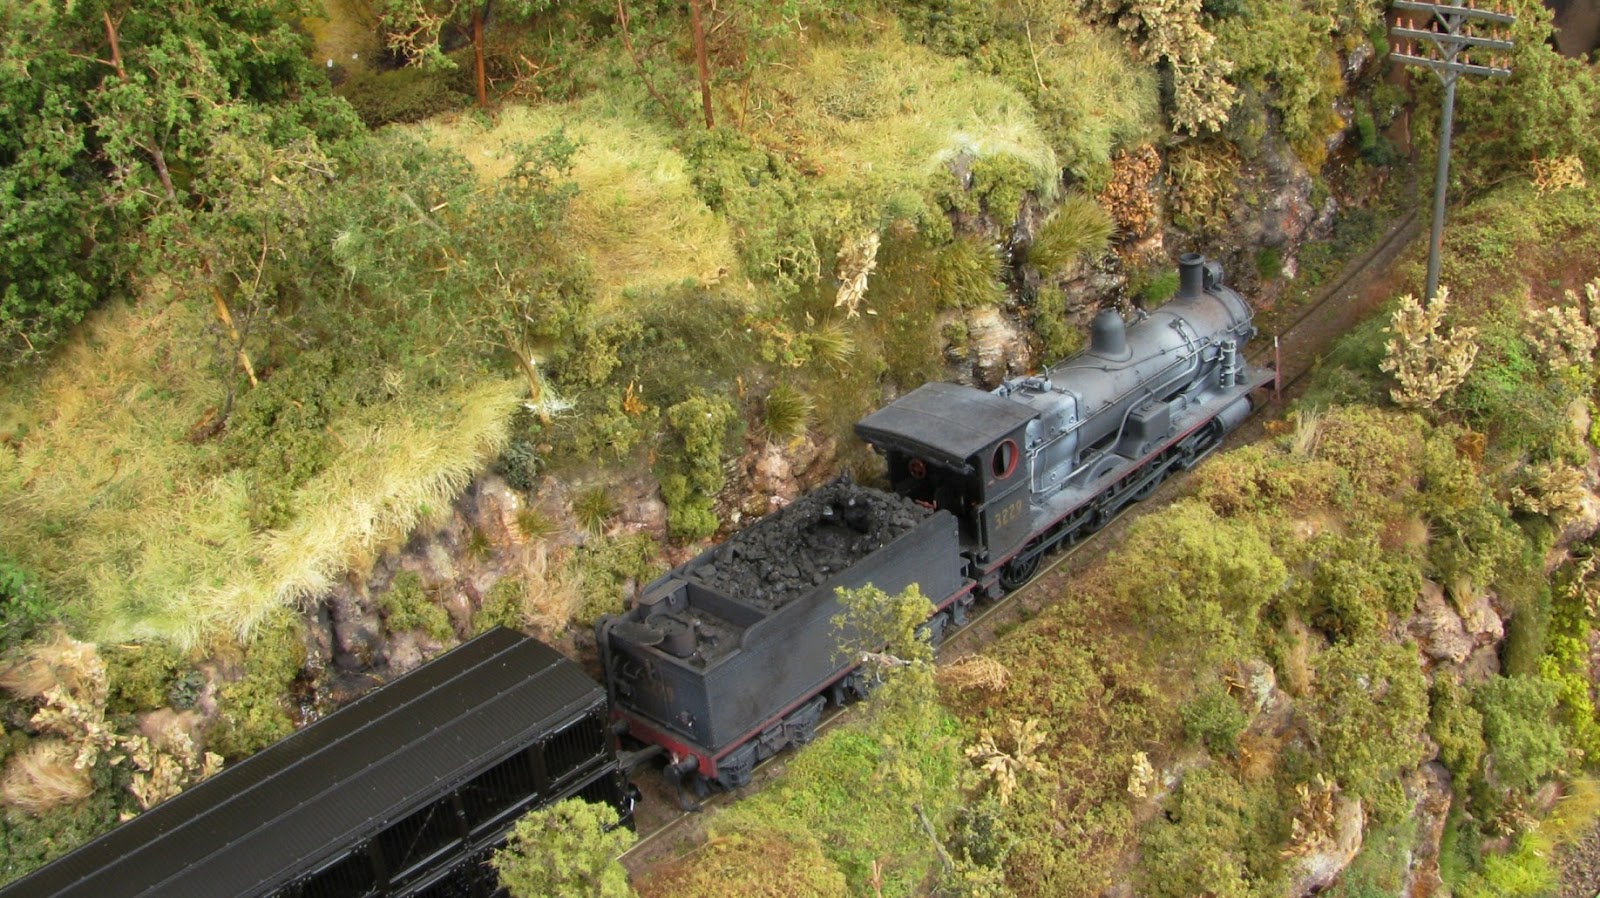
The 32 class was waiting at Bodalla for a 44 class hauled freight to come by. The BSV was shunted off into the siding.
32 and BSV in the goods siding at Bodalla.
4429 arrives at Bodalla with yet another similar train to what the 32 class was hauling.
In a few more weeks the Liverpool exhibition will be in full swing and I am looking forward to getting some more models.
Sunday, 9 September 2012
Sunday, 12 August 2012
First off, all's OK. It seems like its a long time between blog these days. I have had a few other projects on and the cold weather on at the moment isn't helping.
Its been a while since I have been down the shed.(Its hard to walk around the layout with a blanket wrapped around you). Ever try operating your throttle with ski gloves on? So progress is slower during the colder months.
But I had reason to go down there today when a package arrived in the mail this week. I was a bit concerned had the postman been watching the Olympics and tried discus throwing my package from Uncle Ron up the driveway.
I knew the BSV's were due but have now resolved as with many other models not to worry about when they will arrive. Its become a dying hobby in more ways than one. That Bee Gee's song "Staying Alive" becomes more relevant as each day rolls by.
Friday was spent drooling over the BSV's and Saturday wiping it off. I was always reluctant to buy the Bergs bogie sheep vans as they were not a well done model.
As I model the 50 to early 70's era (allowing for the 422 class when ever it gets here) I haven't been interested in many of the recent releases. The Austrains 4 wheelers will fit the bill and I hope in future JE will release these a single wagons for purchase.
So to celebrate the BSV's arrival I managed to get the 32 class to take the new wagons on a trip around the layout. The following shots were captured at the usual gunzel spots, so I hope you enjoy.Sunday, 1 July 2012
"WARNING" Read this before operating your layout.
Well from today Sunday 1st
of July 2012 will be the day railway modellers will well remember.
Yes welcome to ‘Carbon Tax day’. This
is a sad day we were promised we would never have.
It has been made sad because from now
on electricity along with a host of other things are going to be dearer.
Now this can have a very detrimental
effect on the model railway hobby and I will try and explain why with a few dot
points:
- Most layouts are lit by electricity. Now to save costs bulb wattages may be reduced. I take a dim view of this.
- Candles might be brought in to replace electric lighting creating a fire risk where you may end up burning the layout down.
- When you say to your wife/partner “I think I will go down the shed for a few hours and run some trains.” Now you won’t be able to afford the electricity and surprise her by returning early.
- There will be no more double headers run on the layout. All trains will now consist of single engine loads.
- To overcome the above dot point, locomotive manufacturers are going to be hounded to supply dummy units to be able to replicate double headed consists at minimum cost.
- E bay is going to be flooded with model railway equipment as operators can’t afford the electricity for the hobby any longer.
- A new found interest will be had for clockwork trains as they make a resurgence. The old trains will be found but not the key to wind them up.
- Sales of solar panels to power layouts will go up. Running days will in the future be held during the daylight hours. The number of locos brought along to these days will be dependent upon checking the weather before departing home. A bright sunny day will allow at least three locos to be brought along. Rainy day just bring along the cakes and beer.
- Exercise bikes will be rigged up to generators. Each operator must do the equivalent of half an hour on the bike before being allowed to even consider driving a train. If your friends layout is generator driven and your not getting many invites to running days, it could be because you are getting too old and can’t output your half hour as you could when younger.
- For the above dot point there is the ACCC solution. Now those initials don’t stand for what you think but “ A Carbon Cake Credit” Call it a bribe if you like but if you bring a cake along then this allows you to bypass the bike/generator ride. This slightly resembles how the real carbon fiasco will work. (But not with cakes)
- You start playing with your son’s Thomas the Tank engine trains as you realise it costs nothing to play with. You still find it hard to accept the smiling face at the front of all locos having been accustomed to the fine detailed models coming out of China. (None with smiley faces on them)
- In the future replacement ‘carbon brushes’ for the motors will become an under the counter product. They will go under the code name ‘motor brushes’. An email is soon to be sent to all hobby shops in Australia advising them of this name change.
- A shortage of point throw levers will happen when owners convert back from electric powered points to hand thrown.
- All headlight and marker lights on locomotives will be disconnected and as for the new craze of lighting your passenger carriages – forget it. Let them travel in the dark. Why bother anyway, most of the carriages run empty.
- Electric colour light signals will be backdated and replaced with semaphore signals. How you refill the kerosene lamps is your problem.
- You run a train up the branch but decide to terminate at the previous crossing loop. The loco runs around and heads back to town. Passengers are left to walk in to the terminus.
Well I'm sure you will be able to add to the list above, and I hope this tax doesn't have too much impact on the hobby. Enjoy.
Sunday, 17 June 2012
Yet More Scenery Work
Its one of things you have to keep at to make some progress. Saturday night saw a few hours 'attacking' the hill that was in last weeks blog.
This involves planting greenery to get rid of that solid wall of plaster. I am happy with the progress and a few more weeks and I'll move onto somewhere else.
I used some gloss spray onto the rocks to represent wet rocks something that generally happens around tunnel mouths and rockwalls. The spray didn't seem to stay glossy on the rocks but during the week I purchased some acrylic gloss medium and painted it onto the rocks. The results can be seen in the photos.
You can spend too many hours on scenery making fine detail that is only obvious on close inspection, and the beauty of us getting older is that our eyesight is not up to seeing fine detail anyway. As long as you are happy with your results that all that matters.
The scenery this weekend was above the tunnel mouth and just to the right of the tunnel. Being at the base of the cliff a more lush growth was taking advantage of plenty of moisture.
Here are a few shots as I just happened to be near the tunnel with a camera when two freights, one hauled by a 44 class and the other a 421 class went by.
Sunday, 10 June 2012
Say Cheese.....
Mention the far South Coast of New South Wales and probably 13 out of 100 people will nominate 'cheese' as a product of the region. You would probably have gotten 82 out of 100 to mention the dairy industry.
But how many towns down that way are named after cows? There is no town called Hereford or Fresian. (although it does get quite nippy). Right so how many towns are named after 'cheeses' At least three I can think of. There is the big one and still going strong 'Bega', the lesser known 'Bodalla' and there is 'Kameruka'. And not by accident these three towns are modelled on South Coast Rail.
Nearly everyone knows the Bega brand and it being the most well known brand happens to be the largest town on the layout.
The above photo of the dairy siding is situated right behind the platform at Kameruka. You would have to be pretty dumb not to realise that the building was not a Kameruka icon. Now to reinforce the point. I recently had given to me a wrapper from a slice of Kameruka cheese. Although the slice of cheese was long gone it was the label that had me interested. I thought if I could scan the label then this would make an authentic sign that could be stuck onto the building. And what would be the greatest accolade would be if a real Kamerukan person was to see and recognise the label on the building.
The donor of the label Wayne was also modelling the same area as me so we had a common interest. He was going to include Eden as one of his stations. I suggested he should have a 'garden' as the main feature as I don't think anyone make HO scale whales at this stage (Go Google if you don't understand the link).
I guess this is the beauty of modelling a ficticous region. This area is so close to the Victorian border and with all the Vic models now flooding the market this is a great reason to justify modelling two systems.
This Monday I will wander down to the Epping Model exhibition and hopefully pick up my cheque from the second hand stall. I had a clean out of some models to raise coinage for recycling into new models. I resisted the temptation to visit the second hand stall cattle crush/stampede on the Saturday morning and will enjoy the more relaxed time on the last day.
Some time ago I had an ex work collegue bring over his sound Eureka 38 class. I then thought I wonder if the two sound locos would work OK together and what would it sound like. So we coupled them up and run them up from Bodalla over to Bega on a short freight. I did a quick video and put the result here. Not a great video but a record in time.
Saturday, 2 June 2012
Hi, I'm Cliff.........
Well so far the weekend has been great. It started off well Friday night when my team slayed the dragons in the NRL. Well not exactly slayed, but beat and got the two points.
Saturday saw me join three of the engineers that were involved with the operation of the huge NZZA 800 wagon when it was in operation on the NSWGR hauling six stators from Sydney and Carrington to the northern and western power stations. We all jointly worked on an article that has been printed into the June issue of the Australian Railway History magazine. Two of the three hadn't seen the article until today and they were very happy with the results. So if you want an interesting read go grab a copy.
There was a small section that needed to be finished and my method of using small lumps of foam to fill in the gaps can be seen. Under some of the white foam I placed strips of green florist foam. This was to allow the easy placement of bushes later, all is needed is to push them into place.
A small batch of plaster was then mixed up ready to dip the foam into. I have found that to get the rocks with rough edges it is essential not to have the plaster mix too wet. The more water that is in the mix then the smoother the finish will be. I have also tried putting white vinegar into the plaster which slows down the setting rate. I have an aerosol can lid that I use to measure out the plaster and generally use only three lid fulls at a time, other wise it will dry too quickly. This is a messy job and in between mixtures I usually crunch up the previous residue into the next mixture, this also ensures a rougher texture.
The original cliff face was left there and the new one was placed over it. (Will need a jack hammer to remove when SCR is finished). Although the plaster dries very quickly I am impatient and want to see results straight away and not have to come back next day. Even if it means getting out the hair dryer to dry it out.
When the original white plaster is done, the result usually looks terrible but as soon as a diluted wash of oxide is bushed over it, then it starts looking a lot better.
The next step I do is to get some brown oxide (used for cement colouring) and paint it over the rocks. In the photo above the right hand side shows the first washover then to the left is another section that has had a second heavier coating. It is important not to go too heavy with the first washover, it can't be reversed and made lighter.
I also used a black oxide again is initially put on lightly. You will get the feel of the colouring as it goes along.
One last thing I do before finishing up for the night is to apply some greenery. This can be many of the Woodland scenic products and some of the newer excellent scenic bushes that are now available. The light coloured bush in the above photo is a piece of dry oregano herb that I got from the local vege shop. So please don't ever use lichen bushes that we all used in the 60's, 70's and 80's. It is too coarse looking.
After the base coat of brown and black oxides are used then I use the dry brush method and highlight various rocks as can be seen in the above photo. This gives it an almost 3D effect.
The above rockwork still needs more work done to it but you can see progress is being made. As said in blogs before the layout has many cliffs and very little flat ground, this makes layout progress a lot slower. The towns of Kameruka and Batemans Bay are at the extreme levels of the layout.
Much more work has to be done on this area, but you can see progress is being made. I will post more photos when this area is more 'finished'
And only another week to go till the Thornleigh Model Exhibition, looking forward to it. We might even have some new models released.
Saturday, 5 May 2012
That long ago....??
Considering April was very quite on the blog front and May hasn't been much better, I was looking back in my folders for an older photo to post and came across the December 2006 folder.
In it was some photos of my garrett. Quickly doing the sums it is now over five years since I have owned it. It came pre weathered which I thought was a pretty crappy job and had it re weathered later on to a much more satisfying look. And after the five years it is still running although not that much.
Another issue I have to tackle is the gathering of mould on the ceiling no doubt after all the rain we have had lately. I would rather use that excuse than to think my roof was leaking.
Another issue with the wet weather is that I have an opening swinging section to get into the room. It has two tracks across it one low and the other a higher level. It seems that being of timber construction it absorbs sufficient moisture to prevent it closing properly to line up the tracks. The rail is soldered to a section of printed circuit board on each side but lately they haven't been able to close and line up. Oh well as soon as it drys up some more I might be able to resume running.
Sunday, 1 April 2012
Finally some good news for modellers…
Track forms a major part of a model railway, without it we don’t run. When I started with model railways many moons ago I began with Hornby clockwork trains. It was O gauge and comprised of sectional track. Each section of track had a grand total of three sleepers per length. The mob at Hornby must have worked out that it was sufficient to have one sleeper at each end and one in the middle. It didn’t matter if it was straight or curved three per length was your lot.
I think my interest in the clockwork vanished when the key was lost and the new kid on the block Tri-ang trains originated. Now they started off with a track which had a grey moulded base but I went straight to I think it was Series 3 track. Triang were a bit more generous with their sleepers and you got a lot more than three per section. Its funny looking back now but that issue never worried me, I was more interested in what ran on the tracks than what was under the train.
Eventually the Tri-ang system was abandoned and I progressed over to Peco track. Like the proverbial Model T ford, Peco track came in one size – code 100. Again this was the best track going at the time and became the benchmark for model railways. And you certainly got a lot more sleepers per length.
It didn’t seem to matter if the code 100 rail when converted to real life would have supported an iron ore railway. We were running Lima 44’s on the track and although they were the ants pants at the time later more to scale models would have us questioning what was under the train wasn’t as good as it could be. If you followed the logic of Hornby to save on materials and only give you three sleepers, then Peco could have reduced the rail profile and saved on metal.
We also had the issue of the pizza cutter wheel flanges which probably explains the high rail profile.
I think I will credit the American NMRA who introduced new finer standards in all aspects of model railways. The introduction of RP25 code wheels made the flanges so much smaller that we started to question why finer track couldn’t be introduced.
Shinohara introduced code 70 track and was readily picked up by modellers wanting finer track. Today we have Railcraft ,Micro Engineering Company and others introducing finer rail. The code 55 track certainly looks better on a branch than does code 100.
Peco to their credit eventually in HO introduced code 75 track and a complete range of points to match. Although priced similar anyone starting out should see the benefits of the finer rail and start with code 75. Peco also recognised the big American market and introduced code 83 track and points specifically for them. This track was built to the American standards and has readily been taken up and used there.
They have also made track in many other scales from Z scale up to 1 gauge.
As mentioned earlier the code 100 track is suitable for iron ore railways, code 75 is getting closer for main line trackage, but there is a hole in their products as they don’t produce suitable ‘branch’ line streamline track.
But fear not, Peco I believe will soon embark on an exciting new product that being OO/HO code 55 flexible track.
To give you the background on this product and my involvement, last year while looking at their web site I saw a mention re the Code 55 track. Basically it was a survey to see if there was a market for it. I immediately filled it in and thought no more about it until I later received a package from Peco. Strange as I hadn’t ordered anything but inside the package was a pre sample of their new code 55 flex track. I was lucky enough to have been picked amongst others around the world I believe to test it out.
Now if you have only ever used code 100 and had nothing to compare it with its OK. Compare it with code 75 and it’s a giant. Now putting this sample of code 55 next to the code 75 and it also seems big. I’m not sure if the branch lines in Britain were laid with a much finer rail, like here in Australia. I have had this sample for around two months and have till the end of March to respond back with comments. I suppose Peco will then measure the world wide response to see if this commercial venture is worth while.
There is no problem with flanges on my existing rolling stock so even though I would have like spikes holding down the rail this is s great step forward for Peco. Another great move by them is also to have the rail already weathered saving you the time. When did you last see a rail side in gleaming silver??
The survey said that anyone can respond by email and let them know if they are interested in the new track. The email address is info@pecobeer.co.uk
I’m sure as soon as all the info re interest in the product is gathered then it should be advertised on their web site. I sure hope I haven’t let the cat out of the bag by revealing this exciting new product.
Get behind it and we will finally have branch line track available. Let them know we want it! Great news.
Saturday, 24 March 2012
Good night...
I have written before about a group of friends who have irregular meetings in each other homes for railway purposes only.
They are held roughly every four months when emails fly around for suggested dates. These dates have to dodge shift work, social calendars and other excuses. So if we have three a year we are going good.
Luckily they are all hang out on the north side of Sydney and at least two of the boys follow the same football team although I can let on our team lost tonight.
It was Ross's turn and I looked forward to seeing his nearly completed layout.
As can be seen from the photograph the layout is around 12 x 10 foot and sits in the centre of the room with sufficient room to move around the outside. A centre access hole provides reach for the bits in the middle.
We have watched the layout grow over the years and there is little left to complete. Ross is a perfectionist in all aspects of his work. Even the wiring in the control panel is beautiful and neat compared with my panel on SCR.
On thing in my mind he has really nailed is the ballast work. He claims a lot of it comes from the garden in the form of soil but it looks great as the photos testify. He has also done a great job on weathering some of the buildings and he quickly pointed out the pub he had just won from ebay (cream building in above photo) was about to cop the treatment.
The layout consist of two double track folded figure of eights, with a single exterior 'branch track' making three trains running at once. None of in the group have gone down the DCC road yet and I don't think this layout would gain from the conversion.
After an hour or so gabfesting and photo taking we moved inside for supper which is always interesting and settled down for a dvd to finish off the night.
Part of the discussion around the table is who turn is it next and a rough date. We settled on July which accomodates two of the members making overseas trips.
Again I have nothing to report on SCR but I will attach a few other shots I took of Ross's layout.Tuesday, 6 March 2012
I see red......
Its just 6 days into Autumn and so far the plant is doing what it supposed to. Flower heads are forming and soon it should be full of red flowers.
Despite the crazy weather we have been having, the plant seems ok. It has been a case of too much water rather than the opposite of too little I apply to the rest of the garden.
I just hope at the end of this "gardening segment" that the plant converts to a tree OK.
Can't believe we are into March already, where does time go?
The modelling front has been a bit quite lately. I found an old signal box kit that I think was made by Rails North?. It is a two level, probably fibro (asbestos?) box completely devoid of all character. It was probably chosen because it was an easy kit to make. The material it was made from is that grey resin, the stuff thats can be straightened under hot water. The joints at the corners were certainly not finished as flush as I would have liked but I reckon I can put a downpipe from the roof in each corner and hide the rough job.
There are also very fine strips that have a thin layer of excess resin that has to be scraped off. So far I have had a 50% rate of getting the resin off the glass without breaking the ribs but I will need to either replace them with styrene ribs or maybe paint on white fine lines. Just thought of maybe you can get fine lining tape?
Subscribe to:
Posts (Atom)