Sunday 27 November 2022

Thomson River = 12

 This blog is where I came to the nervous part - pouring the river. I knew it was inevitable and much planning has gone into getting it right the first time.

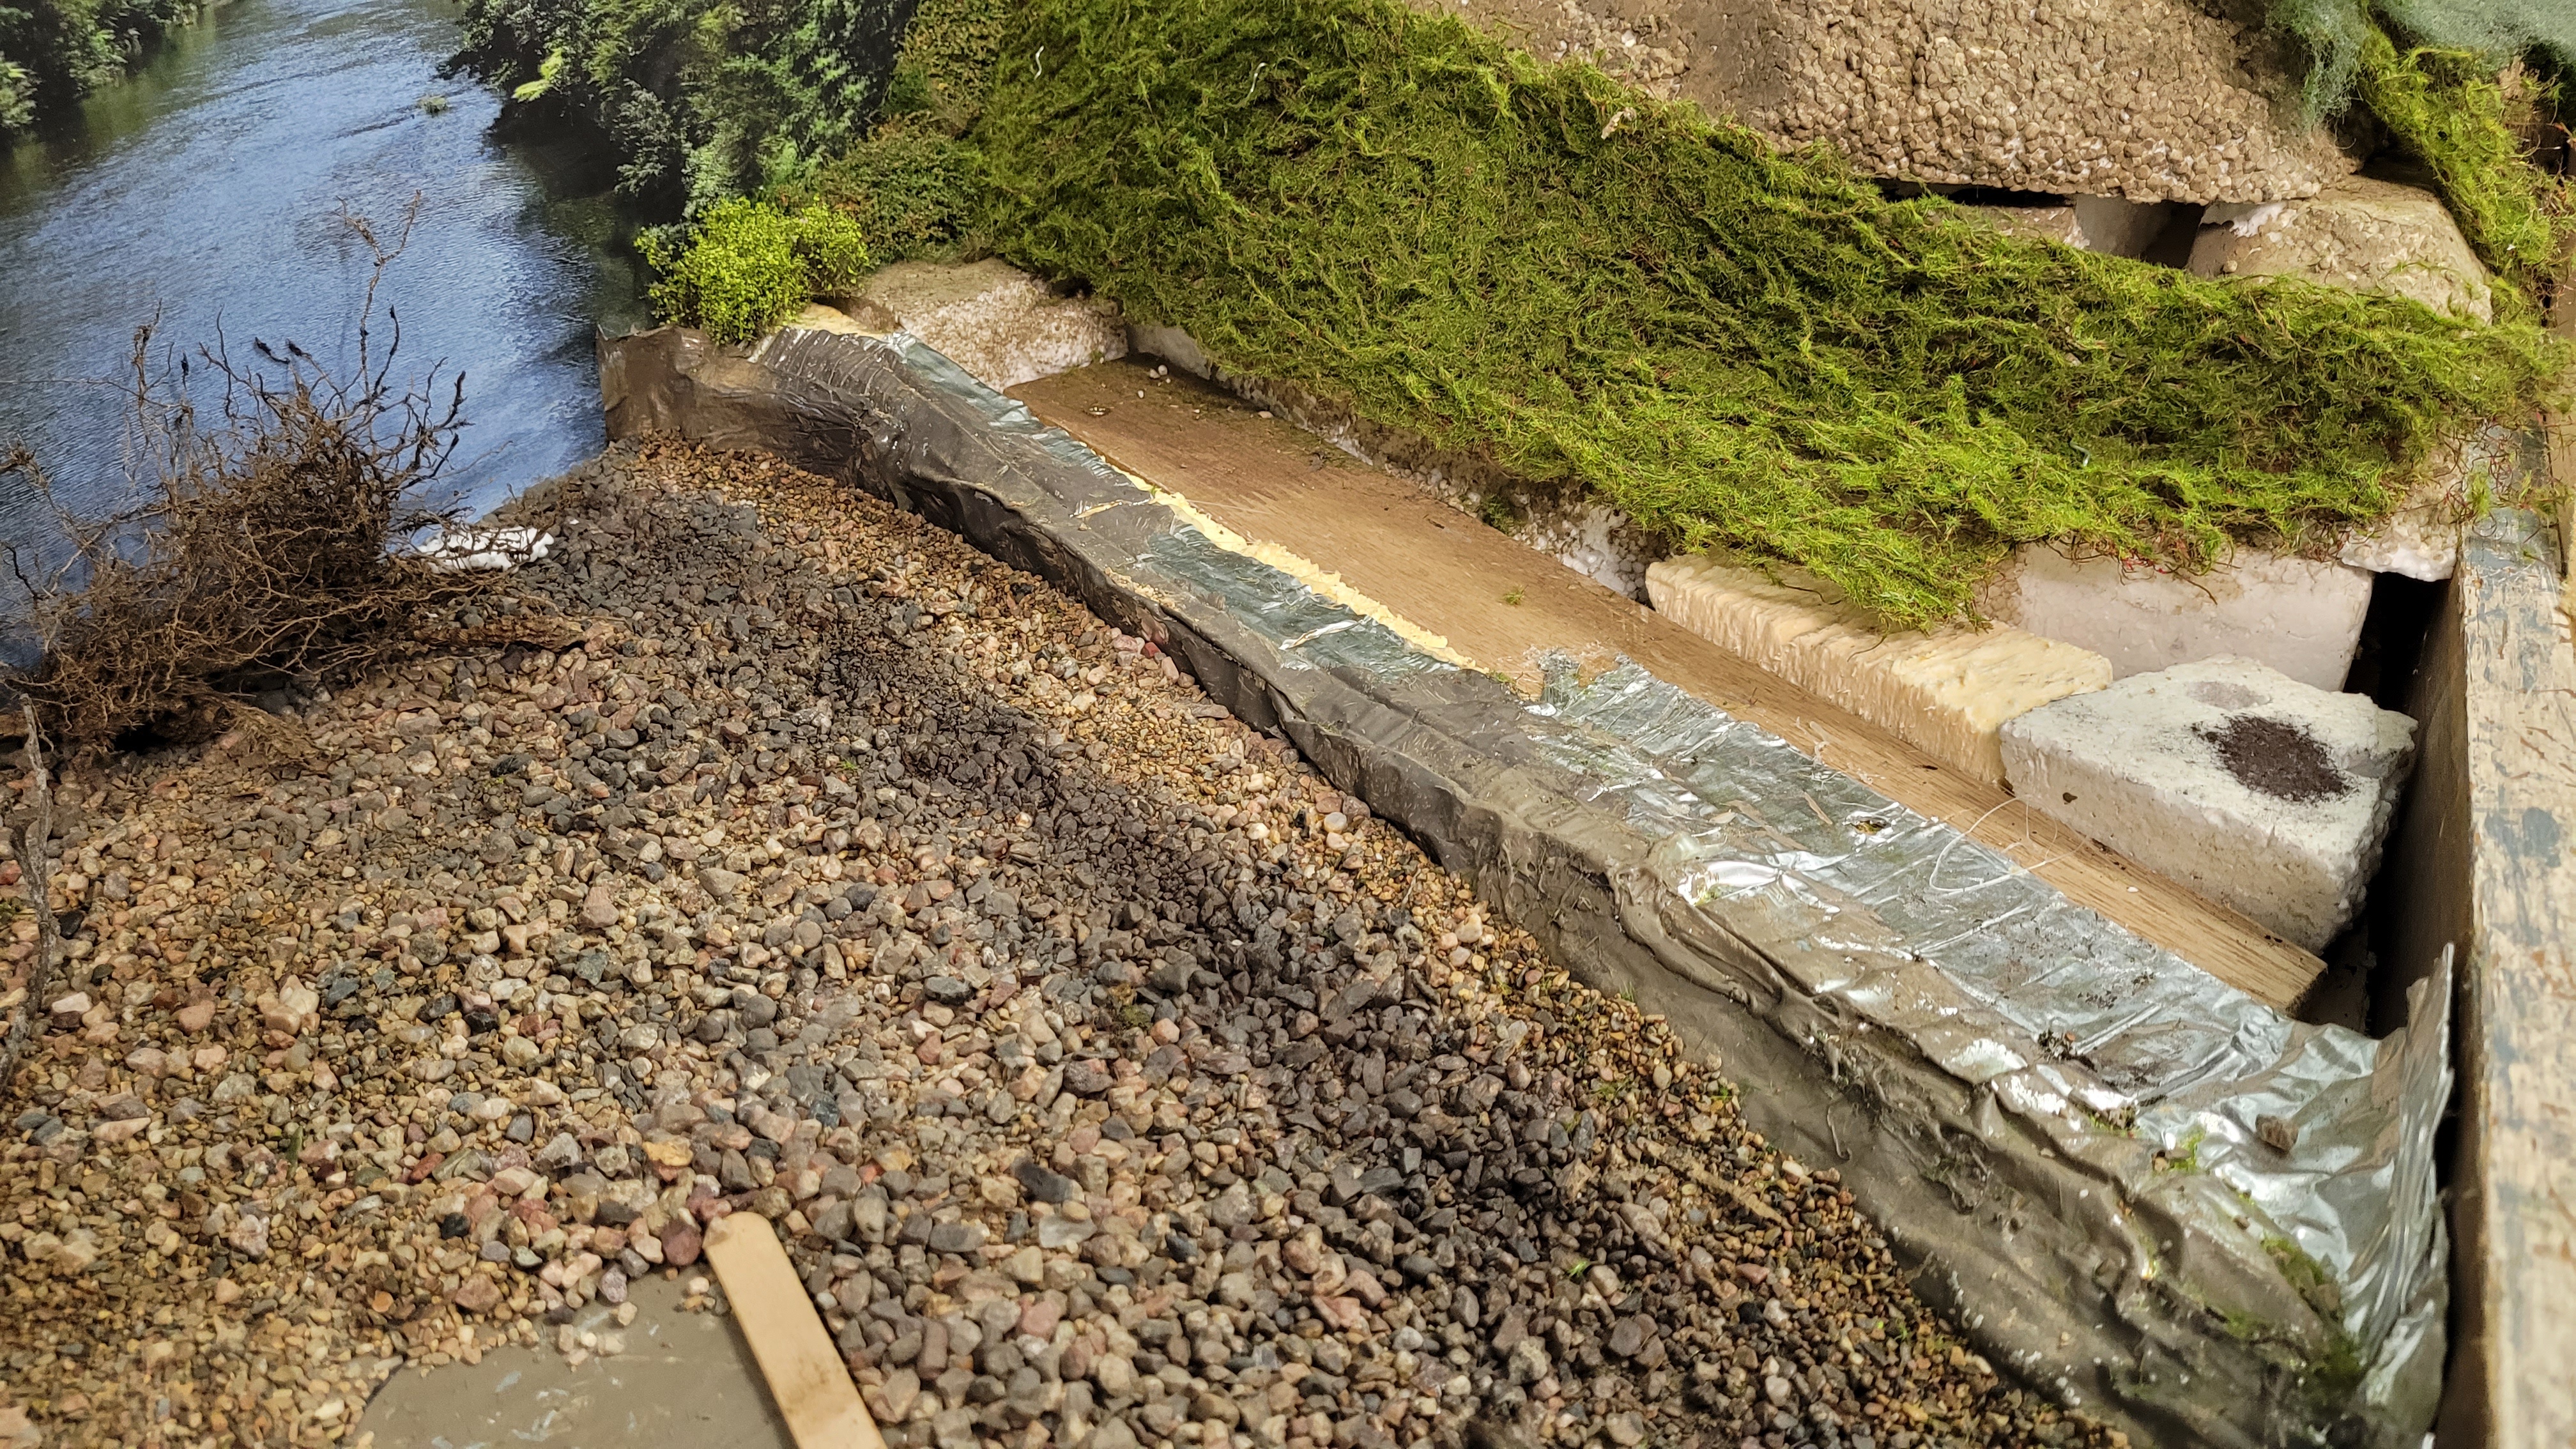
Just to make you extra nervous, I read river pour blogs where they said my river ended up on the floor. As I said on the previous blog I made the base from two aluminium baking trays the biggest I could find. I took some panel beating to get them to the shape I wanted and plenty of 'no more gaps' (because that's what I didn't want!) The base of stones were glued down on the river floor.


There were probably many suitable resins I could have chosen for the river but I got a box of Feast Watson resin to try. Again this was untried and at $75 per box I hoped this experiment would go well. Reading the box label and finding out it weighed 1.32kg and would run out to 1 square metre did nothing to let me know how much you need to form a river base! A visit to the $2 shop I purchased two measuring jugs to enable the mixing of the resin. I was a safer path to get my own jugs rather than chance 'borrowing' some from the kitchen. The best bit was the mixture was only two part which sounded fairly simple to do. One other thing I was concerned about was when I poured the river the resin might creep up the backdrop, but luckily this didn't happen.


One important thing you must do before pouring the resin is to make sure you have placed all the stray logs, branches, shopping trolleys and other items that can't be an afterthought. Luckily I live three minutes away from the National Park and with a suitable box, four minutes later I was right amongst it all. It was not just a matter of scooping up a pile of sticks, they had to be scaled right and look the part. So after a selection was made, four minutes later I was down the shed working out where all the 'sticks' would go. I glued them into place as I didn't know how the big pour might move them to where I didn't want them. The big root was placed up against the backdrop to ease the transition between river and the back scene. This item definitely had to be glued into place and it was hoped the resin would flow around it and hold it down.

Everything I could think of was done for the river pour and then the two bottles of resin and hardener were mixed together. I was expecting steam or some other type of vapour to be drifting over the sides but nothing happened. With the big jug of resin I approached the back area of the river and poured away. I was surprised how well it flowed and levelled out as it was poured. I don't know about other resins but the beauty of this brand was that there was no bad stinky odours. So recommended. One thing I did before the pour was to remove the bridge structure away from the piers to allow full access. There have been so many steps in this bridge build a little think time to get the sequences in the right order certainly pays off.

The first batch of resin poured.
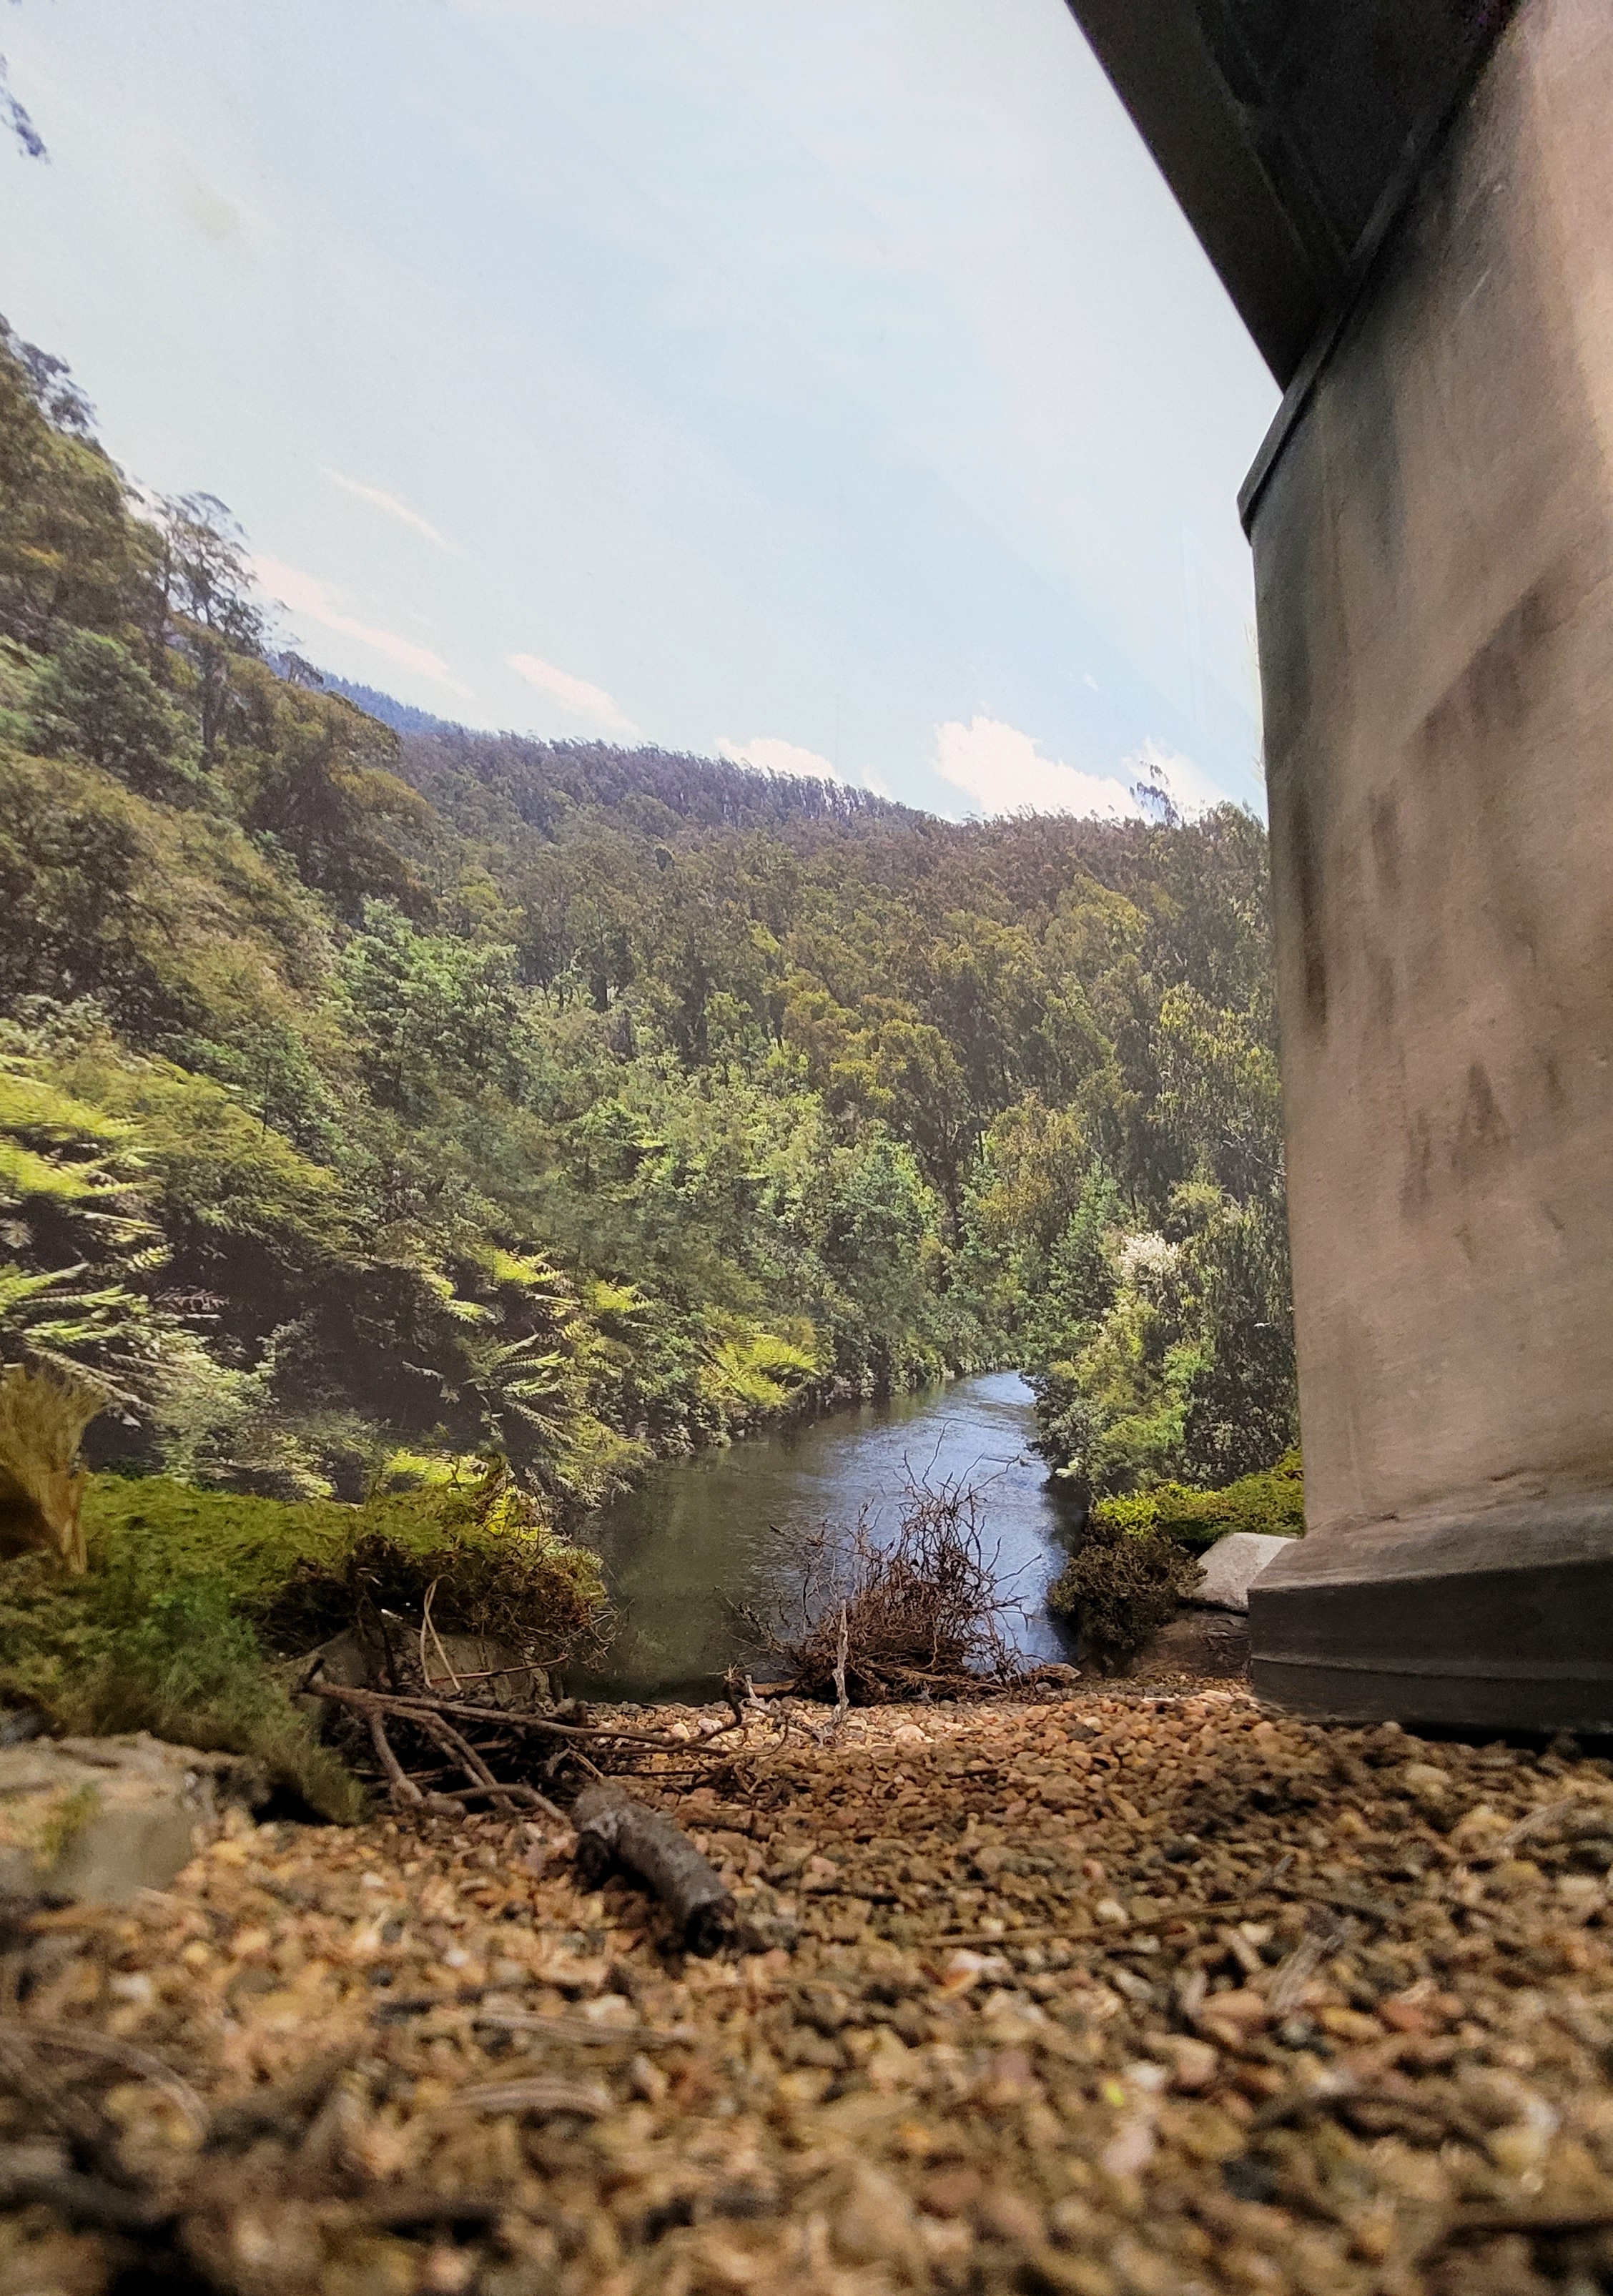
One thing I wanted to do after watching many videos of river making was to add some paint to the mix to form a small tinge when looking down on the water. And it  was only supposed to be just a dab, maybe be better to under do than over due with the colouring. Most river streams sighted and especially the Thomson River at the bridge location were fairly clear. The main idea was to be able to see the river bottom with the stones visible. As can be seen in the  above photo the product lives up to its name 'Glass finish'. I was able to take a few photos with the reflection of the piers showing in the river, but this wasn't going to be the end look.

In the above photo you can see that one pour wasn't going to provide enough resing to come up the centre river pier. So I had to fork out another $75 and go and buy another carton of resin. I had the choice of getting a smaller quantity but it was better to have more than not enough on the pour.

So I knew by now how to mix and pour and eventually was poured onto the first pour, again with some slight colouring. It was touch dry by the next day, I certainly didn't want to take the risk and stick my finger on it and find out it was still sticky.


 So after the resin has set, the next step according to all the videos I watched was to apply gloss Modge Podge onto the river surface to form the ripples. After admiring the nice gloss finish it seemed a shame to make this next step but no river sits still. The above photo shows where the mod podge has been painted onto the gloss surface. Again I had to re-read the label to make sure this stuff was going to dry clear. It did eventually dry clear and put a slight haze on the surface. I actually applied a second coat as the first didn't have enough 'wave' for my liking. So all up I was happy with the end result.

The river bank is blended into the river.  

Overall view of the river/bridge scene
The other thing I did was to stipple some white paint around debris sticking out of the water and along the river bank area, it just adds some more realism. I wasn't 100% happy with the transition of the river into the background picture but it was a matter of working with what I had on hand. The river photo was actually taken off the road bridge looking upstream. It was flipped to better suit the river flow and the photo widened to fit in. It is over two metres long.

So that is a brief description of how the river was made. I was pleased with how it went and that is experience gained. The river lacked some life around it and I had just discovered the English company 'Modelu' that had produced tow different types of fishermen complete with their rods. The figures are available in scales from N to G scale, you just nominate on the order form. It  was a quick production and within two weeks I had the boys here ready to do a spot of fishing. But I needed to send them to the Master painter Ian Fainges to weave his magic on them. So they were quickly returned and I set them to work to try and catch me some fish for dinner. I'll finish off with a few shots of the boys 'down by the river'


Friday 4 November 2022

Thomson River - 11

 You can't call it the Thomson River bridge if there is no Thomson River flowing under it? There has been much contemplating in my mind on how to tackle the river under the bridge. The slow build over the last three years has left me with research time particularly  how to do the river which I considered the most difficult part. As previously stated the idea is to have the river end up where it should be and not on the floor under the layout. Having checked the one main join between the two aluminium baking trays I was confident that the river pour would go OK.

When the trays were in position and having a look at the work done so far, it seemed like it would never come out well. It was a no turnback stage, the tray was well and truly glued into position and no second chances. You look at the raw aluminium and you think 'How am I going to make this all look pretty?' 

Would crushed concrete work?

Looking for roadbed material, I had some crushed concrete that I placed over the river bed even before I had painted the tray base.I realised that this didn't look right so I took it all up looking for something else. Now every modeller always has a stash of 'things' just awaiting their turn to be called up for layout duty. I have a lot of scenery material scattered around the shed collected over a long period. Luckily it was a trip down the other end I found a jar of small rocks that looked right. Initially I thought the colour appeared too light in colour but it later turned out OK. I thought that when the resin was poured over the rocks it could be coloured and cancel out the light rock colour.

The river work area
I reckon one of the brightest things I did was not to fasten down the bridge too early, thereby giving a clear workspace. The bridge having been built around a U aluminium channel piece was rigid enough to be able to lift the whole 194cm bridge away. This allowed the bridge to also be able to be put back into place to align the piers and get an idea how it would all look eventually.

The river stones are laid out
Luckily I just had enough of the rocks for the river bottom. I was also able to spread some of the smaller rocks Mick Bennie had brought for me amongst them. Just to complicate things a bit more one of the piers was located in the middle of the river. This pier that Roger Johnson 3d printed for me had the large concrete base attached. All the levels of the track versus the river baseboard level had been set around three years ago so I had to work along with what I had. I was able to set the bridge in position and then bring the pier up to its base to work out a final level. As you can see in the above photo there is some timber under the pier to raise it to the correct level. In real life the base is not now visible as the over hundred years of river flow, the bases are buried. Only in very early photos are the bases visible.

The river bottom is glued down
The next step was to glue all the rocks down in the river bottom. This step probably wasn't necessary but to make sure there was no movement it was done. I also thought having seen all the river making videos that it was recommended that part of the base was painted a darker colour to represent depth. It would have been hard to do that if the rocks were still loose, anyway it was not a long process.

Now is the time to add river debris
I mentioned earlier that every step of construction has to be thought out ahead of actually doing things. On most river making videos I have seen the author seems to enjoy putting stuff into the river before the pour. Make sense, but you just have to remember to do it. In this pristine part of the world, one would not expect to find shopping trollies or car tyres littering the Thomson River bottom. Luckily I live three minutes away from the National Park and I was able to sneak in there and come out with a selection of suitable river debris. One thing I did find in the backyard was a great plant root which was also waiting in my 'root selection' container. As you can see in the above photo the root is in place to reduce the visual effect where the river joins the river backdrop. It is certainly not a perfect match but I had to work with what I had. You can also see some of the other twigs and tree material that would litter the river bottom. 

A low level photo of the river
Looking at the photo so far you can see how the scene is progressing along from the raw aluminium stage. I was happy with how it was panning out. When it is all finished it is the bridge that catches the eye and the train on it and not so much what is around it. But that is not to say that the level of work shouldn't be any less. Some parts always turn out better than others. You can also see that other scenery work is taking place down the sides towards the river.


The right hand 'deep side' of the river

As previously mentioned, the dark painting of the river base represents deeper water even though the river level is all the same. It would be possible to actually have varying levels for the river but in the end this works well and saves extra work.

Very uncomfortable to get this shot, I was laying on the rocks!

 Well that is another stage for the river to be completed with just the pour to come. Again I am happy with how it it is going. I will be out looking for a suitable resin to finally make the river reality.