Time flies, last post was way back in October and here it is December. But I am not sure if I will get my dream to have trains traversing the bridge by the years end. If I don't get that goal done there is always next year. I always knew this project of the bridge would be a big time absorber.
I am happy that the bridge structure is basically done. The only other embellishment I could make would be extra supports underneath that would possibly be never seen. Maybe this is why we don't build model houses, furnish them with furniture and then wack a roof on.
The second biggest feature of the bridge module was always going to be the background image. In the early days of dreaming of the bridge this was just a future problem to be tackled at the time, so that was put on the backburner. As shown on the previous post I made the framework for the backscene out of timber I had on hand. I know now I should have gone to the timber yard and get some full length of the module timber. In hindsight it has probably worked out OK as at each end of the baseboard the scenery will taper downwards to meet the adjoining baseboards.
I rattled through my library of Thomson River bridge photos looking for ones that would show the river heading off to the horizon and ideally enough of the trees coming down each side to the river. I got ones that were close but would require a lot of massaging in Corel Photopaint. Luckily I sourced a high resolution photo taken by a friend Bob Taaffe looking up the river. This gave me something to work with.

The starting point for the backdrop photo.
The photo was 16mb in size so enlarging wasn't going to be a problem (I hoped) Although I have been using CorelDraw for ages, using its photo imaging package Corel Photopaint I must admit I was a bit rusty. I think I have worn out the undo button on the programme, this must be the best feature they ever designed. From the photo above I needed to stretch it to around two metres wide

After a bit of stretching
The above photo shows the result after stretching, cloning, undoing and luckily not too much swearing. The trouble with the original photo was that there wasn't enough sky so I had to copy sky from the middle and duplicate to either side. It was also hard to get some crisp trees to duplicate to the left of the river. The tree ferns went well as I could enlarge the clone tool and copy a whole tree fern into its new spot in one go. So the bottom of the picture was easy to clone as it was just bush as opposed to cloning a tree. If you look closely some of the duplication gets a little blurry but I wasn't worried about that aspect as there will be a forest in front and this will be well into the background. The white patch on the left hand side is where the landform will cover, so there was no need to do that area.
After the last printer gave up I decided to replace it with an A3 printer. This was lucky as I was able to just print off the section showing the river and place it where it would flow under the bridge.
I was happy with the trial photo, it was going to be a lot cheaper to do an early test than get a full length photo and find out it was not right. One thing that I needed to change was the actual direction of flow of the river. The upper shot shows the river flowing across to the left, but the flow direction had to match the piers direction on the board. So again it was trial and error to work out how to cut and paste and reblend with the leftover photo. Maybe all I needed to do was to flip the original photo? All good practice though.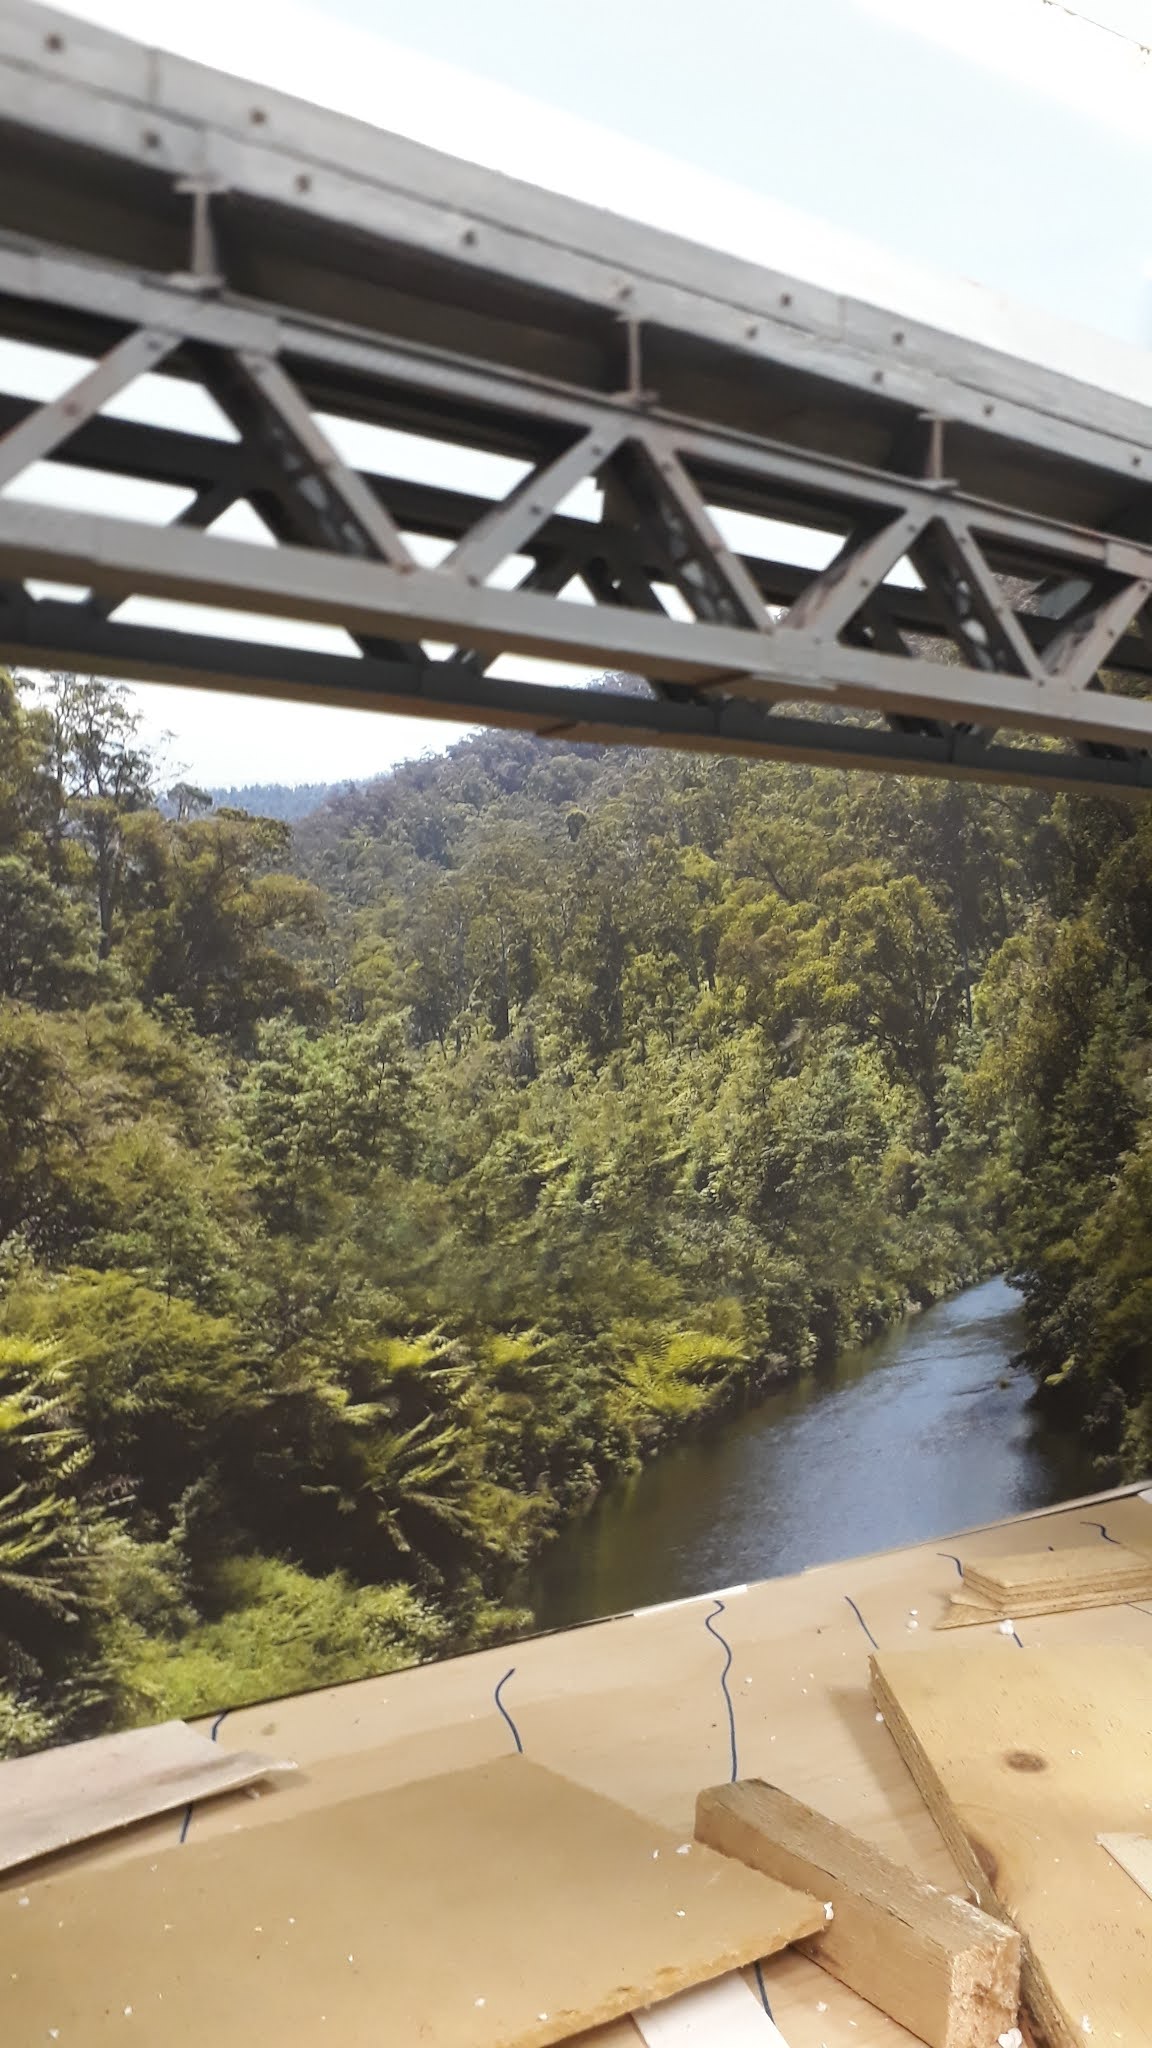
How's it going to look?
 |
| Backdrop backboard |
On asking then for a price on pre glued vinyl I was surprised when the young lady said it would be $37. All that for a 2 metre x 50cm picture. There is a 48hr service for this, as I suppose they have to fit it in with other printing. I collect it two days later. I thought it would be a bit much to start rolling out a two metre long picture in the shop, so I hoped for the best and waited till I got home. I was very impressed with the end result.
For the time being I made the backdrop frame removable so I could lay the picture down on a flat surface. I took it up near the house and engaged the services of my wife to help roll it all out. Between us we did manage to get it rolled out and stuck down. There was a bit of 'overrun' when we got two metres away from the start point, but that can be tucked over or cut off. It was always going to be hard to match the wall colour to the sky colour on the photo but looking at the finished product, you look down on the bridge and don't notice the top too much.
 |
| A distorted panorama view from across the room |
As logic would say I needed to complete the backscene and work forward. I still need to make up more photos to join onto the existing photo on the left and right hand sides. This will involve getting more suitable photos for cloning and modifying. This I am working on at the moment.

An overall view of how the bridge fits in
The bridge base and trestle supports in the above photos are just sitting there and haven't been secured at this stage. I am not sure how much access I will need when the river construction commences. When I look back over the years to the original temporary track on this baseboard to how far it has now come I am happy with the progress.
I think it will work! NA6 sitting there for scale
So not sure if I will reach my goal by getting the track down over the bridge before years end but it is not far away. But if not we will make it in 2022.
Bare trees now that will become a forest
 |
| Going to be a great spot for photos |