Sunday, 4 July 2021

Pambula Pride

 I am a member of the 'Modelling the Victorian Narrow Gauge Railways' on Facebook and in a recent posting I mentioned that by changing scales I was introduced to a new set of friends. I met a few at the Narrow Gauge Convention at Erina back in Easter 2019. Others friends I have made online.

The conventions and exhibitions are a great way to socialise with friends you may not see otherwise. Many a time at exhibitions I have spent more time talking to people than actually looking at the layouts etc.

I have been blessed with two significant 'gifts' to South Coast Rail. The first was the actual piers of the Thomson River bridge (you know the one I have been building for the last few years). They were 3D printed and were perfect models of the real thing, something that is the first thing you will see at the bridge. So many thanks to Roger Johnson for this great input. We have been emailing each other now for a while and it is interesting to compare notes with modellers with similar interests.

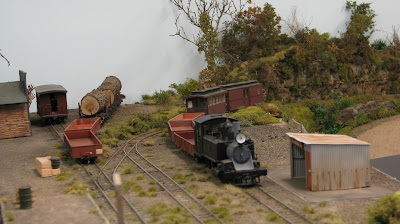
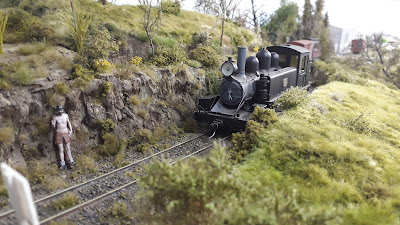
The second 'gift' also out of the blue was a Mallee Shed that another member of the FB site sent to me. Amongst the hundreds of things that go into making a layout are little details such as these sheds for a few locations. The model was all assembled, weathered and even included the nameboard "Pambula" something I won't have to make. This is also another piece in the layout puzzle ticked off, so thanks to Mick Bennie for the shed. I have included some photos of Pambula including the shed and the first passengers to use it.

This is a great hobby (And don't worry, I have been working on the bridge!)


Thursday, 27 May 2021

Nothing to see here

Yes it has been very quite on South Coast Rail for a while with no new work to show off. That doesn't mean I haven't been in the shed of late.

After a dose of recent rain some which found its way onto the shed floor that had leaked through the lower wall. I have a pile of carpet tiles stacked waiting the time to put into place but I have to make sure that there is complete waterproofing before that happens. The floor has progressed from a plain concrete floor to a gloss grey painted finish. I think I will call in a plumber to get the outside sealed.

In another few days it will be June halfway through the year and still the bridge awaits. Its hard to drag yourself back to do more work on it especially when the next work to be done will be underneath and not normally visible. It seems easier to go into the room and pick a job that will give immediate visual results.

I have taken a few shots of the layout which have been posted on Facebook but repeated here.


That's my lot of photos for this posting but today was our groups day out for a layout visit, a chat, a drink and a barbie over at Phils. His layout would qualify for a finished layout and I believe it is in the queue for an AMRM article, lets hope soon.

A very photogenic layout and a fitting tribute to his lifetime in model railways. So here are some more photos for you to enjoy.


So hope you enjoy these few photos, that all for now.


Sunday, 28 March 2021

Cornered

Okay, the bridge is still on the agenda, but when you go into the shed, the location of Pambula is visible. It is looking a lot better now there is a backscene in place. In the last post I started to fill in the gap between the backdrop and baseboard but hadn't reached the corner. So I spent a few hours and sorted the corner out. There is an awkward corner here that the backscene bends around so I was trying to disguise it with some scenery.

The corner at Pambula

As in the last blog I got some more yellow foam cut up and sceniced up to the corner. I cut up larger pieces so that they could be randomly glued together on the corner. This allows the backscene to go behind the rocks and the focus becomes towards the rocks at the front.

First section of foam is cut and glued into place

First lot of weathering


As usual when you find something that works, stick to it. I have been using a sample pot colour called 'Harold' and acrylic that can be watered down to suit. And with the base colour being yellow, you can vary the intensity of the top coat and it takes on a sandstone effect. Once this has dried then I dry brush on other light highlights and then some black oxide can be brushed on the give an aged look in certain spots.
The corner is vanishing


16A poses with the re Ford pickup. The backscene is blending in nicely

The greenery ties it all together

The big rocks appear

The corner scene went fairly quickly as it was only a small area. When you start off with the yellow foam you start wondering how it will come out, but after the colouring is done and you start adding the greenery it all starts looking good. As can be seen in the above photo, don't worry about trying the fit the foam together tightly to eliminate the cracks as these can be all filled with greenery. A variety of brands were used and the peel and stick grasses were placed in front of the cracks on the baseboard to hide them.

The big rocks are all "Haroled' up

More greenery arrives

And a few tall trees and bushes

Nearly done

There still needs a bit more done to this section, but I am pleased with how it has turned out so far, the corner almost disappears!