Tuesday, 8 August 2023

Bits and Pieces

 No major projects have been worked on since the last post, possibly because it is cold in the shed. With no pot belly stove and electricity prices sky high. If I go down there too early you must dress like an Eskimo which rather restricts movement with the gloves. As the day progresses, and with sun up you can feel it getting a little warmer. No it is not really that bad, and with only another few weeks of winter and spring approaching it will be more conducive to work days. We have been blessed with a few mid twenty degree days. Up the afternoon end of the shed is a metal roller door where you can feel the suns heat radiating on the inside of the shed. I like to call this natures heater but it is still not enough or early enough to be of any use in heating.

So the concentration is on the right hand side of the layout as you go in the door. As probably explained the 'right hand' side is made up of modules that can be readily evacuated when the need arises and being on the 'Stairway to Heaven' (or is it the Highway to Hell?) I want to see at least one section finished.

Layout building is made up of many elements, all enjoyable and while there is a certain order in construction the finishing of a layout is flexible. Of course the baseboards need to be made and then the track can be laid. Once it is wired up the the scenery work can take place, that's basically how it goes.

Another part in the layouts progress is coming back to a scene and adding the extra detail bits that finish a scene. One of the things I have been doing around the layout is adding signs and notice boards, these are what we expect in real life and rightly so should be included. The plus side is that it gives scenes some completeness.


 A simple warning sign 'Beware of Trains' would be expected in real life and so is recreated to this scene. It only required a piece of stripwood for the post, some styrene for the sign and a computer generated sign readily stuck on. The whole sign was hit with a diluted Tamiya khaki drab colour to weather it up.


 Another sign is a level crossing warning which was made with some styrene glued to a timber post and painted in accordance with the standards. This is the approach 'X' is white and the rear is painted black. A simple quick sign that adds to a scene.


 Again in similar fashion the larger warning signs for road traffic are made with styrene arms fitted to a timber post.

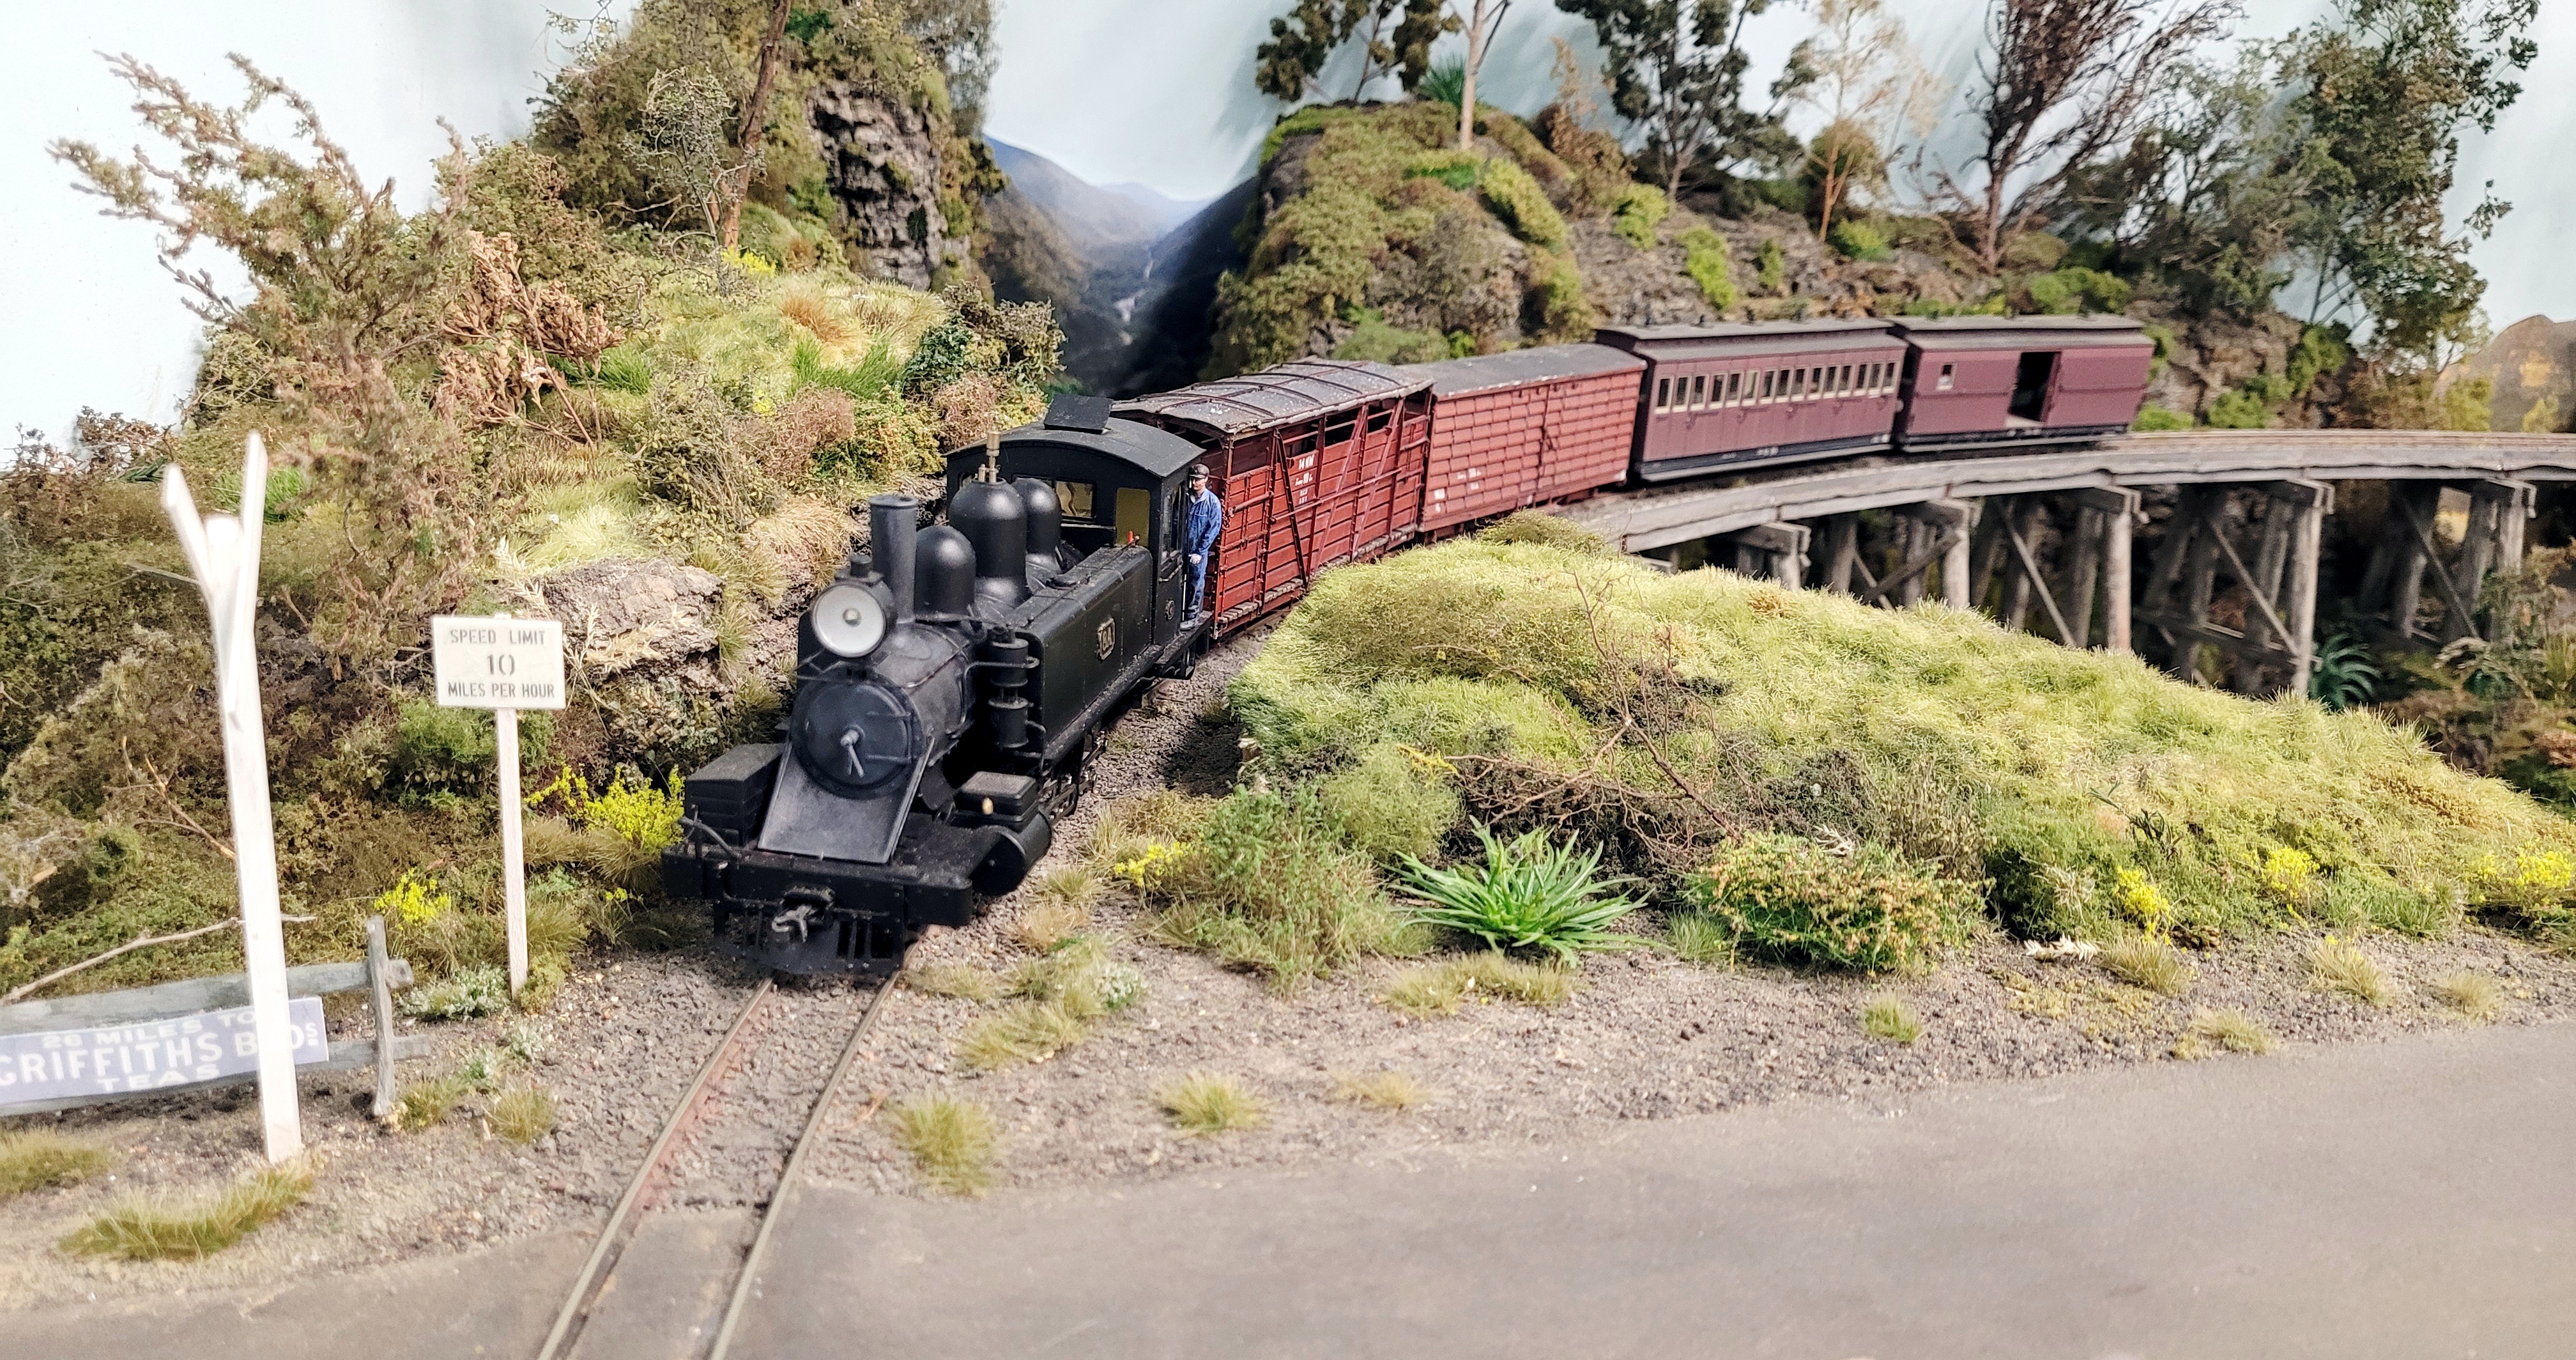
Speed signs are also set out around the layout where speeds need to be indicated, the one in the above photo shows a speed limit of 10 miles per hour over the Thomson River bridge.

So apart from making some signs I have started work on the station building for Broadwater. The building is an Ian Lindsay station, purchased a while ago luckily when they were still being made. It is fairly straight forward and I will do a future post on it when completed.

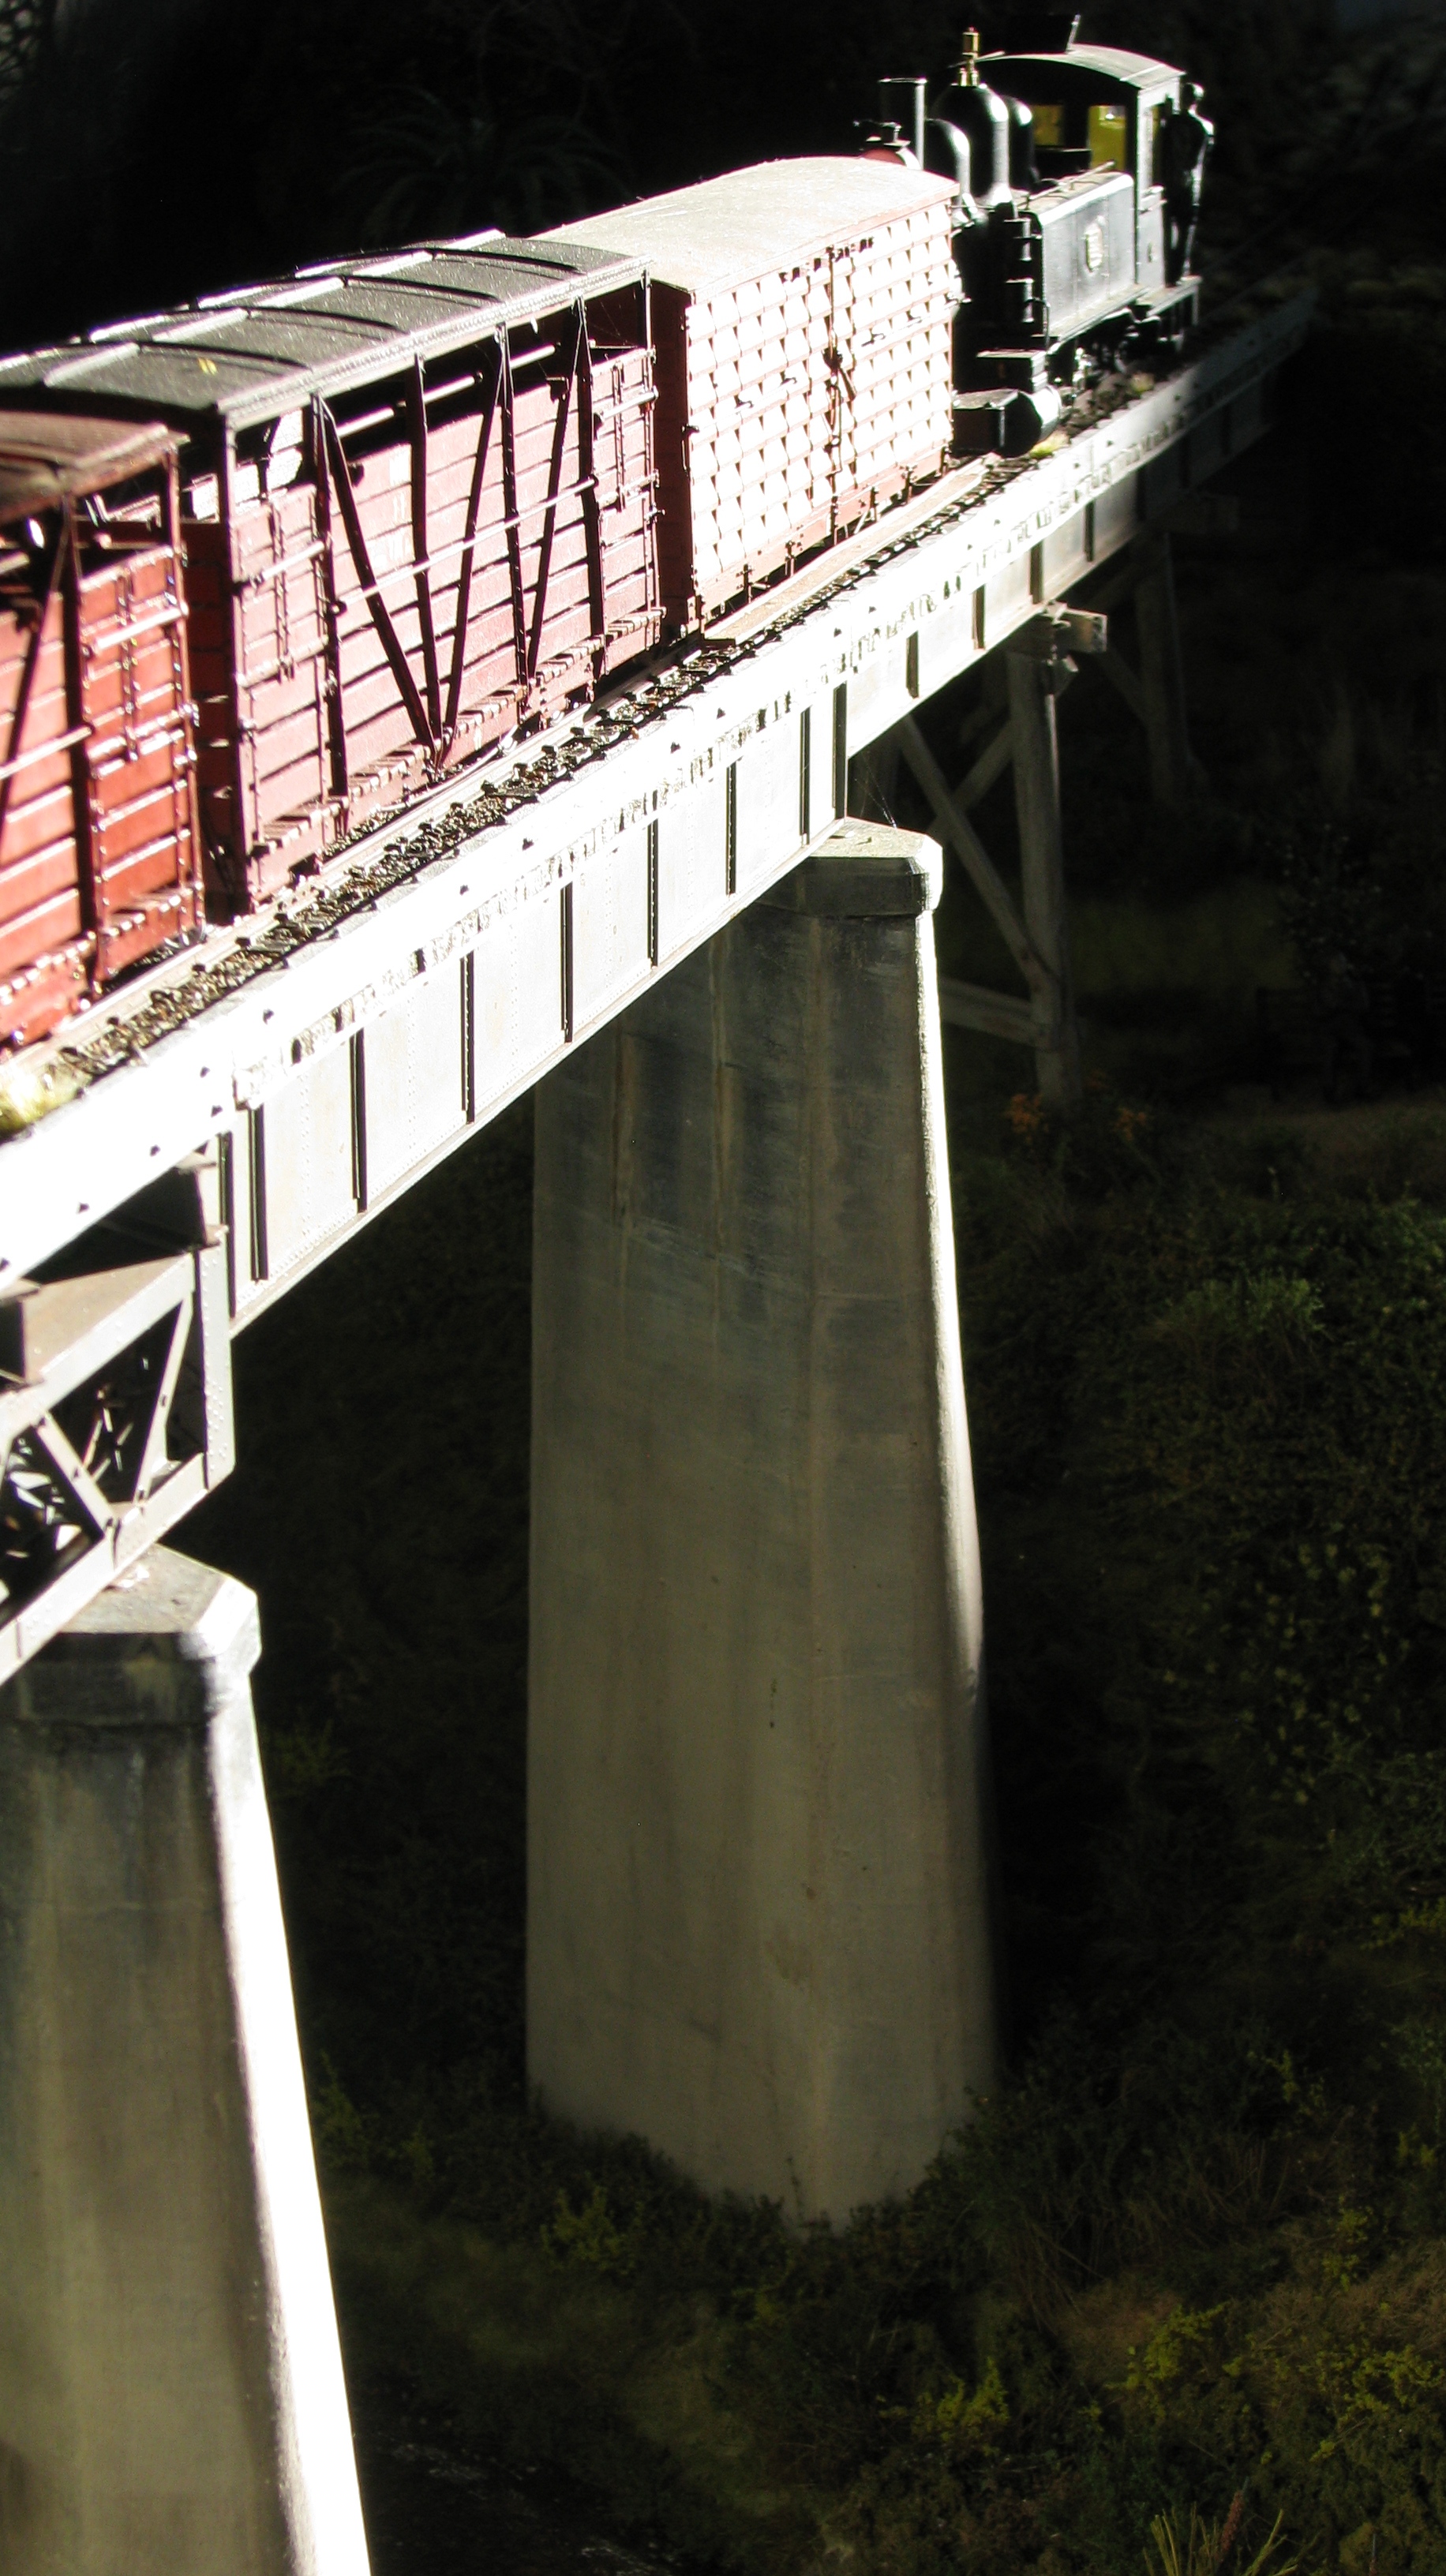
Another thing I wanted to try out is to take some photos of the bridge and try to replicate sunrise/ early morning with it just getting light. I needed to use my 35mm camera for these shots for time exposure. I used some multi colour lights I got from Aldi some time ago and after many discarded shots some of the better ones are shown below.


 I'll finish off with a selection of other photos taken around the layout and include a few with the late afternoon sun shining into the shed.


That's all till next time


Saturday, 24 June 2023

Still here

 Firstly, I haven't passed on even though it has been three months since the last blog update. The main reason is because not much has been happening around the layout.

Winter time is no excuse not to go to the shed as by the time I am ready to get there the day has warmed up and mid to late afternoon can be comfortable. I have no heater there, only a small window air-con that only pumps out cool air in the summer.

Being winter the northern sun hangs low and in the later afternoon if I open the roller door the sun for a brief moment will shine onto the front of the layout. But you have to be quick as within a half hour the sun is gone off the layout.

Many excellent photos are taken in the full sun rather than under artificial lights. So recently I went and took advantage of the big bright light when it shone on part of the bridge. Not low enough to see the whole bridge but enough to grab a few shots. The results are below, next blog I hope to have more to show.


Tuesday, 21 March 2023

About time

I was down the shed the other day and had a need to proceed around to what I call the 'dark side' of the room. I call it that because that is the end of the shed that I don't normally work on. To explain the shed used to hold the former HO 'South Coast Rail' which terminated around the end of 2015. The shed is on the large size being around 14 metres long. It happily contained the HO layout but when the narrow gauge came along, in theory it would be easier to fill as I was modelling in O scale. This was eventually accomplished and now the track fills the shed. But I am concentrating on one end that contains the bridge and the terminus of Eden.

So with a large shed I found that there id plenty of room underneath to hide what I shall call junk, most of us have some. I say most but not all, there are real tidy modellers who I reckon verge on the edge of OCD and there is not a thing out of place. This where I would like to be but have never reached that stage yet. Examples of neat freaks would be the new AusModelco hobby shop at Thornleigh, a pleasure to be in. Then there is a modeller Al Judy who runs the Facebook site On30 Railroading. His layout and workbench are classic examples of neatness. He also posted a picture outside his home where all the boxes he was taking to a model exhibition were neatly stacked and even when they were in the back of the wagon every box was perfectly in line. My friend Jim Harris who has a blog 'Camden Railway' also fits into this category. I don't know what he thinks of my mess when he visits.

One of the most important items you can have is the thing called time and it runs out faster when you get older. So what happens when I go into the shed I see all the things that I should be cleaning and sorting out. SO why spend good time looking for a file when if it was sorted once then it would be easier to find them doh. But the urge to actually get in and do some scenery or construction is stronger than the need to get in and do the cleaning and sorting (every time).

One thing I have had on hand for some time now, must be around three years is a pile of second hand carpet tiles designed to make it all look better in there on the floor. Construction of the layout has been slower than expected and what happens is now if I have some scrap form a worksite it goes straight onto the floor. And maybe worse I don't always sweep it up that day, preferring to finally get sick of it and do something. I also figured it is easier to sweep than to crank up the vacuum cleaner. And I was also lucky that last year with all the rain, at one time water came into the shed and laid on the floor. Not doing much damage but then I thought I was lucky I didn't have the floor tiles down. An unintentional bacon saver.

Well finally getting back to the first paragraph around the far corner of the room, right under the town of Wolumla I had a maybe fourth hand bookshelf, brown timber grain bookshelf that was maybe in a house forty or more years ago. Well I am not sure what had happened but the top shelf had collapsed, down onto the next shelf, taking that one and ended up spewing all the junk over the floor.

Junk city
As can be seen in the photo there is a bit of everything. I have calculated it would have been there around twenty years, not a bad effort for lasting that long anyway. I wasn't sad as I never liked that colour which was in vogue some time ago. When I looked amongst the pile on the floor I had some good luck as I found things that I hadn't been able to find (read I am unorganised). There was a tin of Humbrol green gloss paint. I haven't had the time to open the lid to see if it is still OK or needs a trip to the bin, so I have put it with the other thirty or so similar tins that with one day receive a shake of the hand and listen to see if there is any liquid rattling around in there. I have made an executive decision, no liquid rattle, out it goes. I also found a small square I had been looking for recently. It sat on the floor looking miserable covered in rust and twenty minutes later after a good rub up with the sandpaper it got transferred to a safer and know position in the shed closer to where it can be found. Stuffed if I know how it got there in the first place. The top shelf also became an orphanage for stanley knives, box cutters or what eve you want to call them. So I must have found around ten of them, complete with their blades. I have so many blades now I can loose that 'I have to press harder' with the knife feeling. So the daggy ones have been binned and the good ones have progressed around the corner to some new ex kitchen draws where they will see out the rest of their life. There were about ten screwdrivers of all persuasions binned, I figured out I can only use one at a time why do I need that many for?. Why do we collect so many nut and bolts, nails, screws etc. Most of them have gone into the 'Nail and Screw' draw for another day for sorting. (I bet it doesn't happen)

I went so successful that my bin was overflowing. It will all go out this week in the garbo collection, just hoping there is plenty of grunt in the lifting mechanism. The timber shelf were a right off and now preside at the front of the shed awaiting June when the local council cleanup will move them on for me. Now with the shelves gone I found that the floor was not painted under them, but you wouldn't have known that. The bottom shelf was starting to corrode as maybe the water had got in that far last year.

All in all a good few hours worth of cleaning up, most gone to garbage and the items worth keeping gone to some other place in the room. It all begs of the saying 'Out of sight, out of mind' Now I must start on the rest of the shed, and get rid of that old VHS player, TV, radio that doesn't work, wow I am on a roll.

There have been other sections on the layout I have been working on so I will put up a selection of other shots around the layout, most of them are in favourite spots that may be familiar to the reader. Until next time..............


Sunday, 12 February 2023

Thomson River - 13

 I expressed surprise that it was the end of 2022 and how quick the year had gone on my last blog, and here it is nearly half way through February 2023. I swear that time is speeding up (anyone in the older boat will vouch for that).

This is the first post for 2023 and I will finally announce that I consider my build of the Thomson River bridge done!

Early planning 2016

 When the layout was initially planned, I wanted to put in a few signature structures, what could be more impressive than a few bridges. The one that most people would be familiar with is the curved timber trestle over the Monbulk Creek and just outside of Belgrave on Puffing Billy. So that was the first one that was tackled. It wasn't all that complicated to build and it's construction was probably covered in some of my earlier blog entries if you are interested.

The second structure I chose to model was going to be the Thomson River bridge located on the Moe to Walhalla line and thankfully still in service on the Walhalla Goldfields Railway. Both of these iconic bridges are luckily still accessible  for viewing. The original baseboard constructed in the photo above was mainly guesswork on how long and deep to model would take up. This section was always going to be 'a coming back to finish' baseboard, so a temporary track was located towards the back to enable initial construction to commence (one day)

Parts of the bridge are laid out in their approx. position

 Luckily a set of unreadable plans of the bridge were available and they were a great help in the bridges construction. During the early days I was lucky to get help from two friends, Roger Johnson who 3D printed the piers and Nathan Wakim who laser cut the lattice and side girders. Without the help of these two gentlemen the bridge would not have turned out as well as it could.

The lattice girders slowly take shape

 It was a slow build as there were many unknowns to overcome along the way. The centre lattice girders were probably the most complex to construct. They required the drilling of many holes to insert a styrene rod that separated the two sides, then X shaped spacers were made and inserted with the tweezers. Luckily I only put the rivet decals on the visible side. It was success when the outside girder was made, then the realisation the second one had to be done as well. What is even sadder is that when the bridge is in place most of the wall side girder is not visible.

Centre lattice takes shape.


I won't go fully into the individual sections of the bridge and how they were constructed but give a general idea on how all the bits came together. Thankfully over it's build I took a few hundred photos for the record. All together I reckon that the build has taken around three plus years to complete and I admit there were also other sections of the layout that were worked on when I needed a break from bridge building.

Core strength of the bridge
The photo above shows what the bridge was constructed around. This piece of U shaped aluminium was cut to the bridge length - around 1.9 metres long and was eventually sandwiched with all the pieces of timber and styrene required. In fact it was that solid, it could be suspended from both ends and have no significant sagging. The above photo outlines maybe why it build took so long. The short pieces of timber had to be cut to around 5mm long and then glued right across both sides of the near two metres of bridge, there are probably a few hundred in position.

Underneath the centre span
There are some saving graces when structures are constructed. One is the fact that will all surfaces be visible when it is finished? The first time saver in my bridge was the fact that I didn't need to replicate all the rivets on the wall side. These decals were a pain in the butt to get into the right place. I had close up photos I had taken and tried to duplicate the positioning of the decals to match the real rivets. Time consuming but satisfying in the end.

I decided right from the start that I would model the underneath of the bridge even though most will never be seen. So even if I got it wrong in the build most will never know. It is mainly in the section across the river that upshots can be taken. So when the underside was finished I decided to give it a rusted effect, this I was particularly happy with, alas never to be seen.

An ant's view of the bridge all weathered
With the completion of the underneath of the bridge and the top, it was time to start developing the scenery on both sides of the bridge down to the river. Some of this work was covered in the previous blogs.

Landform down towards the river

 Also mentioned earlier was the piers produced by Roger were forwarded to the maestro painter Ian Fainges for him to paint up and weather. He did a fantastic job as can be seen in the photos. As another distraction I made up the five timber trestles that hold up the outer edges of the bridge, no two were the same. These were based on the original plan drawings and not what are currently there.

So all these elements eventually came together, the two river sides were sceniced, the river was poured and all that remained was to place the piers and trestles into position and place the bridge on top. Most of the scenic work and river pour took place when the bridge was not in position, which made it a lot easier to work on.

Bridge section aligned with existing baseboard

As the above photo shows both sides were secured to the existing baseboard, with some shimming required to get the level perfect. Also can be seen the temporary track that was in position for a while during construction. One by one each pier was shimmed up to allow the base rest up against the base of the bridge. A small spot of glue was put towards the back to hold in position and also the base was glued. The bases were to be surrounded by scenery so any evident glue would be hidden. Then it was just a matter of securing the timber trestles into position. Just to complicate the build, the piers and trestles were at an angle and not perpendicular to the bridge structure. I had made an angle template at an early stage that came in handy towards the end.

Overall picture of bridge
The photo above shows the bridge in position and also the offcut piece of aluminium that was screwed upside down over the centre section for support. It was necessary to reduce the supporting web of aluminium to accomodate the higher lattice section. There was only a thin section left and that eventually had the supporting timbers glued to it. This work of milling out the centre section was performed by Russel Freeman on his milling machine, a task that I could never have completed. It was only when the whole bridge was resting on the piers that this section of aluminium was removed, otherwise it would have buckled.

The supporting aluminium ready for removal

 With all piers in position it was then time to remove the supporting aluminium and think about the track laying. I thought back about all the work I had done on the bridge and wondered if some hand laid track would look okay. I didn't think for too long and went back to the standard Peco narrow gauge track I had been using. I had used it on the Monbulk bridge and when ballasted it came up looking alright. There are two things I don't really like about the Peco track, one is the ends are modelled too decrepit for my liking and also what the heck are those rail fastenings modelled on? They must be big spikes. So what I did was to cut off some of the decayed ends of the sleepers with a blade and then reducing the size of the rail fasteners which was also a pain job to do. It basically required going across the two metres of bridge four times to reduce the size of the rail fasteners. See the photo for what I mean.

Reduced size rail fasteners on left hand side, original on right

 The sleepers if matched up against the real Puffing Billy ones are too short but other than hand laying we are stuck with this track. Another thing I did was to cut the rail at 25 foot intervals and insert fishplates around the cut. Probably something that won't be noticed with visitors, but I know they are there. The track and rail sides were also painted.

Fish plates and painted track


Ballast slowly creeps outwards

Basically the last job to be done was to lay the ballast across the bridge. I laid some out from the baseboard edge to see how it would go rather than do the lot and find  something wrong. It was just one of those jobs where you do it bit by bit and finish off.

Ballast is all in place
It was just after I had all the ballast in position and I thought 'that's it, I'm done' but looking at the actual bridge there were two safety refuges hanging off each side of the bridge I forgot to install. I had actually made both timber bases some time ago, but needed to make the steel railing around the edges. The current one has an intermediate railing but the plan shows the original with just the top rail support. I used that plan as my justification to copy that model. The model had their railings installed and suitably rusted up and then glued to the sides of the bridge. A supporting steel pipe held it in position.

Safety refuge

So after the safety refuges were in position I declared the bridge finished. It was one of those projects that seemed to go on for ever but it was something to enjoy at the end of the build, now I can annoy people with countless photos of trains on the bridge!.

Drone shot
 
The bridge being put to the weight test

As with most new sections of track in the real world, freight trains are often used to settle the track down before passenger trains are operated over the same track, so although you can see that freight is now using the bridge, the official opening is still due to happen, I hope this will happen soon.