Wednesday, 16 January 2019

Going Loco

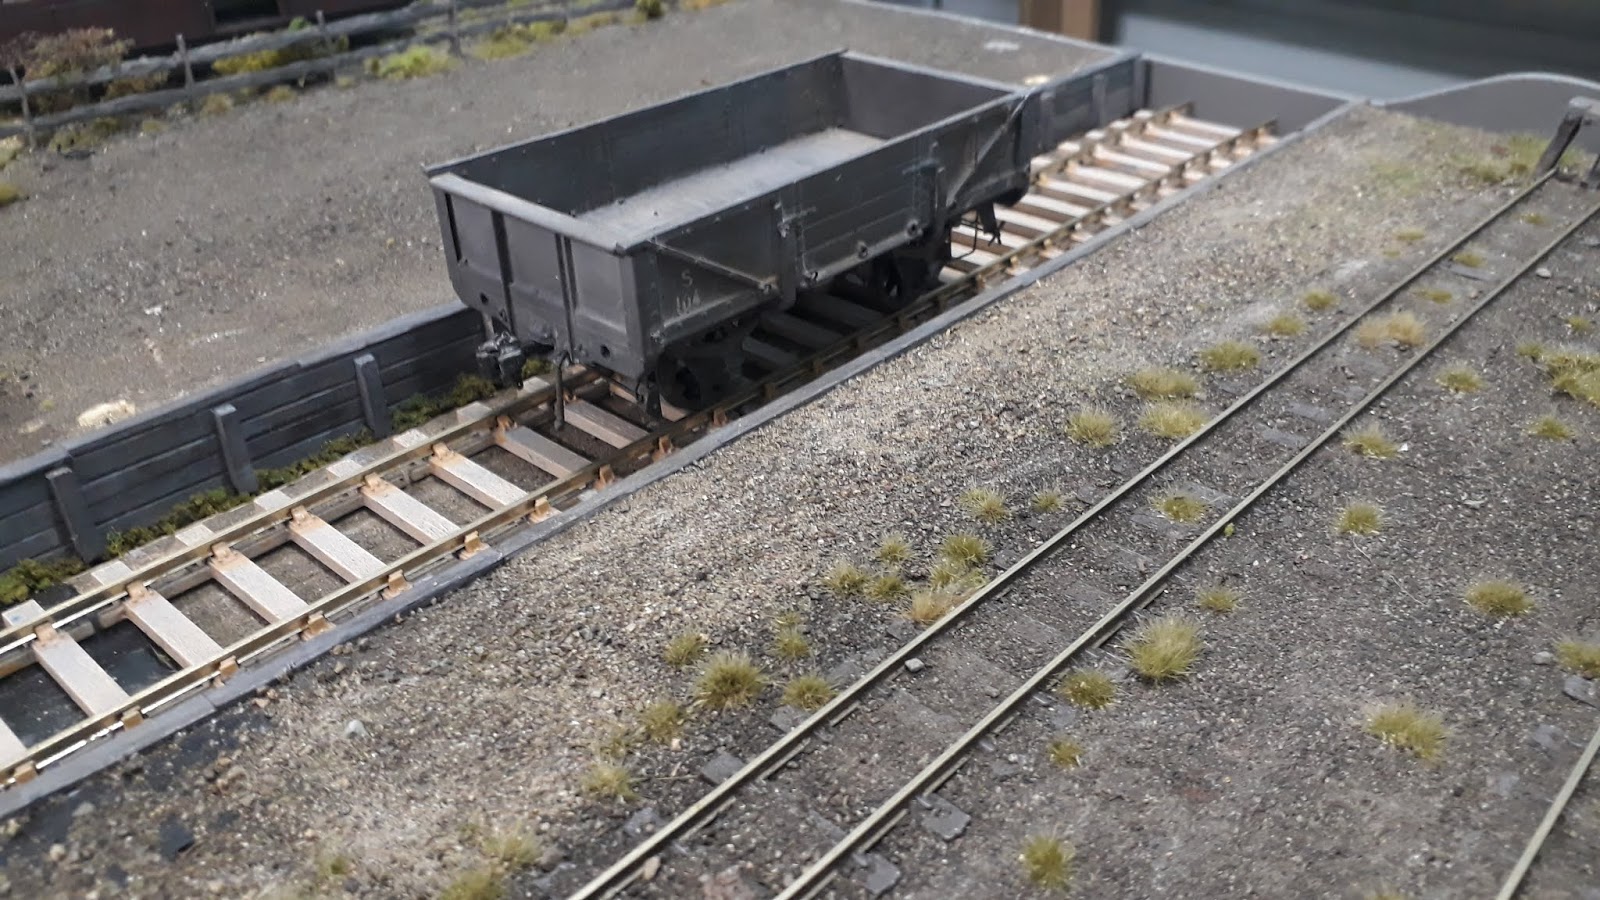
Ash pit at Eden
Welcome to 2019 already on its way at a fast gallop. Time for more updates, the first for the year.
It gets hard when I go into the shed to tackle the next project. So many things to do. At the moment I am concentrating on getting most of the scenery done on the two Eden boards.
One area I thought that would benefit from a makeover is around the loco area. I have already completed the track up to where the coal loading platform will be and the ash pit has been constructed.
The area where a loco shed is to go into has at the moment a lot of bare baseboard. I thought that if I conentrate on at least getting the base of the engine shed made then when it is in position then the ground around it can be finished off. I am not planning at this stage to actually complete the shed until later.
One thing I find hard is getting plans that suit what I am trying to model. I was lucky to obtain a plan of the loco shed at Colac in Victoria. It is unusual in that the roof line is curved. As my layout is based in NSW I plan to have a pitched roof with the top vents. 
 
Current track to be removed for construction looking towards Eden station.

Styrene base cut for size. NA 8 trying it out.


The loco shed will only fit one loco mainly because the space I have to fit it in is restricted. There is minimal clearance in the above photo on the right hand side. I have satisfied myself that all my locos will be able to get past the shed although close. This is one of the aspects of narrow gauge modelling that I like.
The white point rodding in the above photo was one of the first things that was installed and that meant everything else had to fit around it. So the only position for the shed had point rodding in the way and when the hole for the pit was being dug out Mr Murphy turned up and there was a cross supporting timber in the way. Not a lot but enough to be a nuisance.
A hole lot better now
Unavoidable was all the dust from the jig saw that was spread around the whole hole area. Use of the vacuum cleaner inevitably sees many of the 'weeds' disappear 'up the tube'.
Basic floor and pit walls are completed
 I find working with styrene a bit easier than working with wood. You just need to score and then snap, so if I can do it anyone can. Construction was made with materials on hand and only the rail support beams were made using timber.
Rail supports and cross timbers in place.
 The pit is made from the plan and also doing what worked on the day. One thing I needed to incorporate was a drain at the bottom of the pit. Digging in my 'scrap draw' I found a piece of channel that I maybe bought 30 years or so ago. I knew it would come in handy one day.
Floor is in position with supports.
I came across a photo of a loco shed that had a brick floor and as I had a sheet of styrene sheeting I used this on the bottom of the pit. I was surprised with myself at how well the construction was going. I was doing some of this work today when we were sweltering in near 40c temperature.
8A is back to try out the pit
 In the above photo the white square blue tacked to the end of a NQR is a styrene clearance gauge representing the widest and highest known locos that will travel over SCR. It also works as a clearance car for scenery that gets too close to the tracks. I found that out the hard way recently when the shay decided to get entangled in some scenery. In real life this wouldn't be a problem, but half an hour later in the model world, the gears were free from the trackside scenery.
Will that be bricks all round?
I decided to complete the floor with the brick sheet. Not sure if any or many were actually done this way but it looked okay. The shed is certainly small only taking one NA with any others overlaying at Eden will have to stay on outside roads.
What a difference a spray makes!
Progress was bettter than I had expected so once I had all the floor and pit components in place I was ready to get the spray into action. I might as well make full use of the hot day and go and spray outside. With the heat of the day it was only a short while and the shed floor was then put into its final resting place. This meant when it is glued down then the bare patches around the shed can be finished off. There is plenty of weathering yet to happen around the shed both inside and out. I will possibly have the top of the shed removable at least until I get the track in position and dirtied and greased up. I have greased up some track at the passenger platform using Tamiya Smoke colour which gives a good shiny/greasy finish.
Looks like 8A has settled into its new home
This project took a few hours to complete but I think was the easier part of doing the shed. Now to source some windows and work out how to construct the sides and roof.


Friday, 28 December 2018

Its the Pits

Wow, still can't believe how quick this year has gone or nearly gone. I think back a few months when it was a lot colder and I was writing up my third Victorian trip blog report. That beautiful feeling when you rock up to Belgrave station on a very cold morning and the mist is hiding the narrow gauge train we are about to travel on. The smoke from the loco giving away its location. Now compare today when I am writing this in mid thirty degree temperatures.
I have been keeping a photographic record of the construction of South Coast Rail for various reasons. One reason can be help is when the scenery is in place and you want to check where wiring, baseboard joints etc are located. Handy. It also lets you look back and see how far you have come and progressed. Looking at the photo folder for SCR I discovered that I have been underway with the current narrow gauge layout for over three years. The oldest folder is dated December 2015. Prior to this I have collected the older HO SCR photos. They are in monthly folders and the better photos are still available on the top right link on this blog under Flickr hosting.
So far on the layout apart from a few humans strolling around, a mock up building and various trucks and cars, viewing the layout without a direct comparison with the narrow gauge track and standard gauge makes it harder. All the Victorian narrow gauge systems had transfer locations where goods could be transferred between gauges.
Pit area outlined ready for cutting out
When designing Eden yard the transfer track was an essential inclusion. I didn't have a lot of room to include one but another problem arose when trying to match the model with the prototype. As the floor levels of the narrow gauge and broad/standard gauge wagons didn't align it was usual to ramp up the narrow gauge track so that the floor of the narrow gauge wagon was at the transfer platform level. On my version I didn't have the luxury of length to ramp up the narrow gauge track so I reversed the idea and lowered the standard gauge track instead.
The pit has been cut out and lined with styrene and S truck added
This was the only way it would work for this location. Initially when laying the narrow gauge track, the points were operated with the wire in tube method. The track was laid furthest from the side the point would be operated from so that the channels could be routed for the tubing. Initially I had laid the tubing in across the location where the pit would eventually go. If I left it there then there would have been some tubing going across the top of the pit. So I had to bend a few 90 degree corners to lower the point wire under the pit bottom. It plans to think ahead. (sometimes)
Sides of the pit have been lined with Cyclone sticks
I lined the pit with some styrene which enabled the old tried and true Cyclone ice block sticks. These were provided by my wife. She doesn't call it an addiction to them but they are always high on the shopping list. Just cut them in half for O scale and they work out well.
An 'S' truck in its final resting position.
I needed a wagon to place on the standard gauge track in the pit. As my layout is placed on the far south coast of New South Wales the cheapest, smallest wagon I could get was an S truck one of over 10,000 that were built in the past for the NSWGR system. I was able to get a just released O scale kit and had help from one of the group members (thanks John) who assembled it for me.
A lone S truck waiting for some work

The Peco O scale track is laid in the pit


View from the other direction
  John who had also converted from HO to O scale was able to supply a surplus section of Peco track to fill the bottom of the pit. Some of you would have got out the packet of spikes and hand made sleepers and done the job properly. And even though this section of rail had rail chairs instead of spikes, these ease of using the ready to run track over hand laying track was a great time saver.
Ready for the dirt!
 The side of the pit was also painted up with some Tamiya dark grey paint and supporting upright timbers were also glued into place. A timber capping was also laid across the top of the pit timbers.
Weeds in place already, known to grow quick!

Layer of dirt applied, starting to look better
 Another trip to the local oval for some more dirt which was spread over the bottom of the pit. I am sure the local council is wondering why these holes are appearing in the car park.
Finally the weeds are applied and it looks like a decrepit pit
After an application of various weeds along the bottom of the pit it is pretty close to my vision of how it would turn out. I may need to install some type of buffer stop at the far end of the pit.


 The hard part of the pit has now been constructed so if I don't get to revisit it again it looks complete. This is only the first construct for this area. The next build will be the transfer platform between the standard and narrow gauge tracks. Then I will need to build a transfer shed over this area. Once this is all done then I shall build a transfer crane. The pit is shoe horned into its location but this gives the eye plenty to concentrate in one place. All the yard junk that you find like drums, crates, timber etc still needs to be placed.
So this will be the last post for this year and 2019 will hopefully see the majority of the remaining scenery at least started. I have many structures to do but I will keep plugging away with it all.
I hope 2019 will be a good one for all your layouts, thanks for all your nice comments over the past year on the layout and will catch up in 2019.

Monday, 26 November 2018

More on Pambula


Work has continued on at Pambula after the fascia has been put in place. It is not a large location so I thought I would finish off the layout between the fascia and the outer tracks.
I made the scenery higher in this section and cut the fascia to suit. It was then I needed to fill in the missing bit. Over the years I have tried a few methods, the old layout used the well used chicken wire and plaster where I was able to reduce our pile of newspapers into the plaster mix. This makes it interesting when demolishing the old layout and I always tried to locate some old newspaper with a date left intact so I could get an idea as to when this section was done.
I have moved on from the old plaster days (although it still has its place) and tried either the yellow foam board or foam. The corner section at Pambula called for a large piece of foam and having scabbed up two large foam pieces from a clean up pile I then looked for my electric knife to slice it all up. The electric knife was on its last legs for the last piece of foam I cut when the switch broke and was running as soon as it was plugged in. The knife had definitely cut its last Christmas ham long ago. When I plugged it in there was this burning smell and at the risk of loosing the shed to a fire, it was decided to chuck it in the bin, except for the blades. So this piece of foam was cut out using an electric hand powered blade. I must admit it took a little longer than using the power but I eventually got the job done.
Replacement electric knifes seem to be rare in the shops these days but as luck had it, two days after the knife went kaput there was a local garage sale supporting the local Mens' Shed. I was just about to leave and I spotted a Sunbeam electric knife. Beauty and after opening the box  and seeing no residue of ham on the blade I asked the guys 'How much?' He said $5 but as I only had a $10 note I made a donation for their cause. I was more than happy with my purchase. I tested it at home, it worked but it is yet to be introduced to its first piece of foam.
The foam was glued into place and then came the decorating. The photo shows some yellow cloth which is a cut up piece of 'Shine Wonder cloth' that I purchased at Woolworths. I have used it often on this and the past HO layout and it works well to represent grass, at least I think so and is way cheaper than using commercial products. They used to make it in a green colour but I can only find it in yellow now, but it colours up nicely with Tamiya Flat green.
Scenery slowly greens up

The last time I used the foam for the scenery was when I did the scenery around the trestle area. I had almost forgotten how toxic the fumes were when I applied the soldering iron to the foam. It had to be done outside otherwise I reckon I wouldn't be typing this now. It was then painted up with my usual 'Harold' paint colour and some black oxide also used for highlights, plus some drybrushed lighter Tamiya paints. Most of this cutting won't be visible from the normal viewing angle so I only gave this location my 80% effort.
Mallee shelter location
One thing in my favour in regards to station buildings on the narrow gauge is that they were hardly elaborate structures. Many locations only had a nameboard which let you know where to stand for the train to stop and pick you up. More upmarket places had at least a corrugated iron shed with a seat at the back. At least it would keep the sun and rain off you while you were waiting for the train. Pambula is to get a mallee shed when I get around to building it. The layout will need a couple so I will make them all in the one go. I made a full size paper mockup which you can see in the photo. It helps visualise how it will look in the end. They didn't even have a platform so I have used some cork, coloured it to represent tarmac. Its the least I could do for them.
Two recent constructed vehicles by Stephen Postma have pulled up at Pambula
So that's all that has been happening around Pambula recently. I conclude with a few other shots taken while there.


Wednesday, 7 November 2018

A bit on the side

Wow a month has gone by since the last post. Having a large layout has good and bad sides to it. Being a member of various forums I often see finished layouts. The builder is able to make this claim because the layout measures around 2 foot by two foot in size. You wouldn't need to have a shed to put it into. Even set up in a garden tool shed it would get lonely and have enough room to invite three mates over all at the same time. I keep working away on various projects and there are multiple jobs to be completed.
There is no point making a pecking order list of jobs, I would invariably ignore it  just do the next thing I saw when I entered the shed.
As I expect this to be my last layout, I want it to look good and operate well. I hope all the years of practice can be consolidated into this layout. Some modellers are very good at whatever they lay their hands on, but for me it takes a little longer. Have a look at some of the following photographs at my woodwork to see I am not a master carpenter. The layout is strong and guaranteed to hold me up if I ever had to walk on it but why?
Climax 8 with a coal train and an NA on a mixed cross at Pambula
One of the quickest ways of making a layout 'look nice' is to cover up the sides of the layout mainly to be able to hide the junk underneath. This can be achieved by using drop curtains or solid sides. I intend to use both but have been recently cut up some 3mm mdf to make a start on making the layout look pretty. I ordered 5 sheets of 2400mm x 1200mm sheets of mdf and these were brought down to the shed. A shunting manoeuvre was needed to get them around a corner of the layout to their resting place for the time being. Then the next fun bit came when I had to try cutting them up vertically to save another trip outside. After getting some of the sides and baseboard edge bits done I moved them out onto the lawn to give them an undercoat. I didn't use a proper primer paint as I always seem to have leftover 4 litre tins of paint and it was good to be able to nearly finish off a leftover tin. It was a hot humid day and no sooner had I got one sheet done, it was dry and the second one completed. I don't know what drives insects to think they can land on wet paint and then take off again. Sadly it doesn't always work and quite a few insects on the day gave their life up for South Coast Rail. A very light sprinkle of rain on the day saw me rush to put a few up on their sides.
Top and bottom panels in place. Bottom panel to be fixed.
The leftover colour  that the panels were painted in was a pleasing colour called 'Abstract'. Nice as it was it was not a deep enough colour to avoid the inevitable scratches  it will receive over the years to come. It will be painted a more suitable darker grey which is shown in the left hand photo.
I have also fitted another piece that goes directly onto the baseboard edge. I decided to do this section so that I can complete the baseboard of Pambula between the edge of the baseboard and the back scene board.
I must admit it lifts the look of the layout immediately even without its final coat.
Underneath the side panel I have fitted extra boards to support the sheets of mdf. A few spots of contact adhesive will see them fixed into place.
My next project before the sheets are fixed on will be to get some carpet tiles for the floor. Once they are laid under the bottom of the sheets then they will be fixed into place. 
I was asked once why I didn't make the panels removable and couldn't come up with a reason other than once they are there they are there for good. The next time they will need to be removed is when the layout will be demolished. 
The 'corner' at Pambula

The above photo shows off my attempt of carpentry but it has resulted in a solid support despite the final finish. But the good news it will all disappear shortly under scenery.
Pambula - looking better
 One of the downsides of finishing sections of layout is the vanishing work bench space. The above photo shows how quickly unfinished sections of the baseboard become parking areas for junk. So they gradually disappear to other areas when a section becomes finished.
Pambulas corner heading towards Bega


The far end of Pambula
The above photo shows the Bega end of Pambula, the dead end siding is also visible. It also shows the area where the new baseboard work was joined into the original part of the SCR. As rough as it looks now it will all be better when it is finished off complete with scenery.
It looks like the summer 'humidity' switch has been turned on and last week I had my window 'skinny $20' air conditioner switched on. It doesn't do a brilliant job in the whole shed but enough to ensure I will find a project to do down 'that' end of the shed.
Another shot of the crossing of the two trains.
 Another project I have been doing in the shed is to try and get items relative to the Victorian narrow gauge. On the wall of the above shot is a genuine x Puffing Billy timetable that I purchased back on our first visit to Gembrook back in 2016. It was quickly grabbed from the shop at Gembrook station for only two dollars, my prize find. I had to roll it up and even had to carry it on to the plane back to Sydney. I only wish I could obtain more of these genuine Puffing Billy type memorabilia for the shed.
See you next blog.

Saturday, 6 October 2018

Leftovers

When I get an area on the layout basically finished I like to get a 'photo' record and take as many photos as I can. This is mainly because for every 100 I take I seem to get about ten good ones! This is all about the amount that turn out OK.
I have ordered some MDF 3mm sheets to enable the partial enclosing of the layout sides. I will use a cloth to cover the remaining sections, after all I still need to access the 'junk under' some how.
Here is a selection of  'other shots' in the area I have been working in.


Friday, 14 September 2018

El Plastico


A big part of my layout is trying to get the scenery looking right. Sometimes it works and sometimes doesn't, but more good than bad.
I have joined a Facebook site On30 Railroading which is mainly USA narrow gauge based. I am aware of the East Broad Top railway with its green environment in the north east corner but the remainder seem to be in the wild west where the scenery is totally different to what I am trying to achieve.
Take the Rio Grange a well know narrow gauge line based in rocky territory. Most of the scenery is 'rock based' as opposed to 'greenery' based which I prefer. Just a personal preference.
My choice of modelling Victorian narrow gauge really didn't leave me with the rocky scenery option as all their lines were basically forest based. I could have run my fictional line and base it around the Ayers Rock (Uluru) area. I may have had it finished by now!
You only have to take a ride on the Puffing Billy to fall in love with the magnificent scenery complete with their tall trees and abundant tree ferns. Replicating this type of scenery is a challenge, so what we do is to use the materials available to represent it.
The modeller of today has way many more scenic material available today to make it all happen compared with when I started modelling many years ago. I think the best we could do for green scenery was to buy a bag of green lichen and place it around the layout. We accepted it at the time because that was all that was available. Todays modeller is spoilt with the choices now and you often wonder why it wasn't available sooner as what we have now is not rocket science.
Take a look at the products that Woodland Scenics, Mininatur, Scenic Express, Busch and Heki now provided and there is no reason that a great outcome cannot be achieved. I have been using a combination of those brand products and they all work well together and I will never buy another bag of lichen.
The leading photo shows an area where I have been working around a level crossing that divides one baseboard. The last post has shown a photo on how this area has progressed. You look at your bare baseboard and wonder how it will all come together. It does but slowly and as each item of scenery is placed it all comes together. You can then go back into an area and superdetail it. When your layout is finished and the scenery is completed, the scenery takes second place to a train running through a scene, the eye will follow the train and not stop at a tree that doesn't look right.
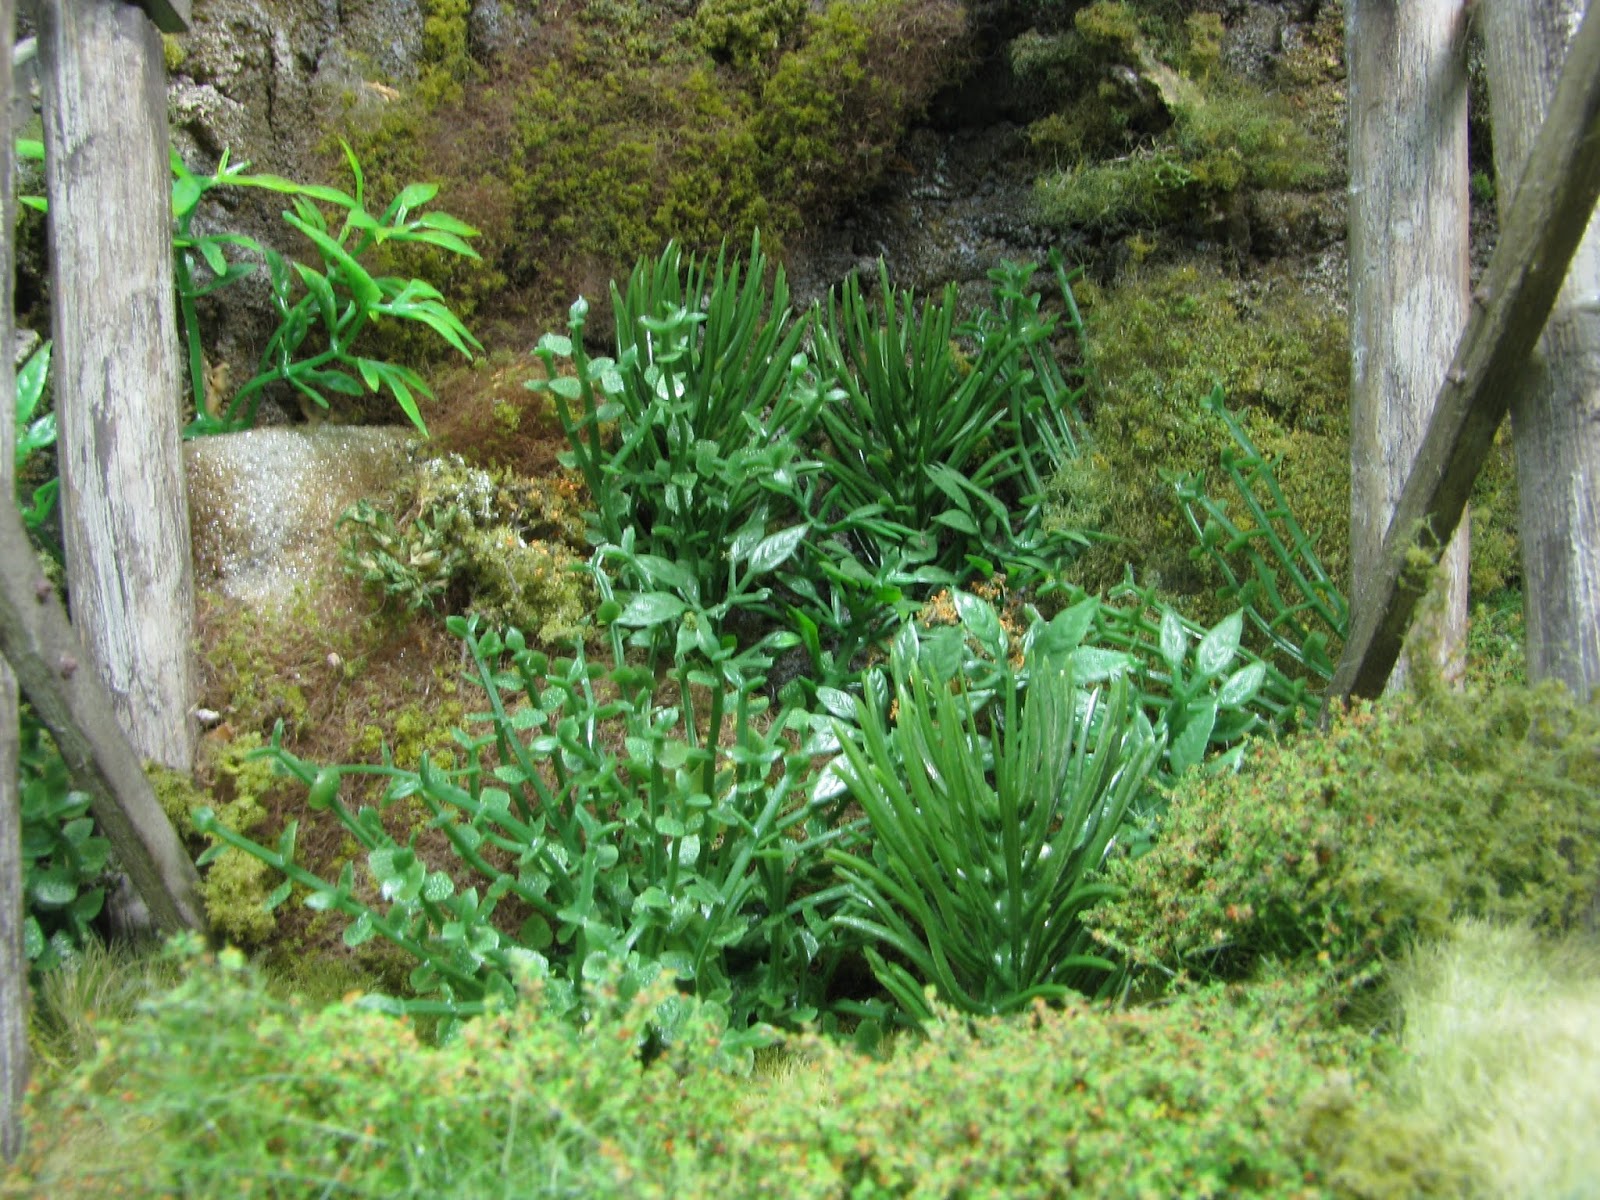
Now moving on from that last sentence there are some items of scenery that just aren't available commercially but placed in the right spot they blend quite well. Having upscaled from HO to On30 now makes it easier in some way to have more use for various plastic artificial plants that I have spied at various 'two dollar' shops and other outlets.
The picture on the left shows two of the plastic artificial 'plants' that I have removed from the 'donor' plant. One thing is for sure is that looking at them they don't readily identify with anything I have seen growing in nature.
Again it doesn't matter as they are there to represent a slice of scenery you are making.
I suppose the plant on the right may look like a birds nest fern, maybe more if I try and spread the leaves flatter.
The driver would measure out just under 6 foot tall so the plants are on the larger size.
I haven't paid any more than $15 for these plants and also look out for bargains when their price is reduced.
A few months ago our local Aldi store had some artificial plants for sale. I spotted them as a possible candidate for South Coast Rail. While they seem to be getting better with plastic representations of real plants many of them linger on the shelves as they just don't look right.
In the photo above I was lucky to score the plant in the white bowl after I was watching the price drop after being in the store for over a week. It was already down to half price and I noticed there was a chip in the bowl. When I took it to the cashier and showed him the chip and asked if he could lower the price more he then knocked it down to around $7 which I considered a bargain. You can see when it is bunched together it can form a type of bush to be placed into the scenery. The top right ball in the above photo contains all the 'birds nest ferns' and as can be seen there are quite a few encircling the foam ball. They just pull out readily from the foam with a spigot that holds them in place. The plant on the bottom was just another one I spied at another place. You must remember that I am modelling in O scale and I don't think any of these items would work in HO. Sorry guys you will have to join the 'black sheep' modellers as we have been tagged by the US fraternity.

My latest acquisition today was another Aldi special. It was a supposed model of a bonsai tree. The end foliage on closer examination looked once again suitable for inserting into the scenery. Initially when they came out they were priced at $25 which I though a bit rich for what I wanted them for. While I was happy to play the waiting game and see if they would reduce the price a week later and it was a chance that they would all be sold and I would miss out or that they would just return the unsold plants back to the warehouse. As there were about 25 of these plants available I took my chance as on the following week they had been reduced from $25 to $15. I was still not budging on purchase and took a gamble they would still be there a bit longer. Our local Aldi had recently enlarged the store and now had a larger area for unsold overflow. I went in there today and there were still quite a few there left but on closer examination I saw they had come down further to $12.50. My wife who knew what I wanted it for was quite happy for me to purchase it. The cashier was not the slightest bit interested when I told him I didn't want the pot, the pebbles or the trunk and only wanted the green bits for my model railway. There would be nearly 100 separate plants I was able to get of this one plant. Maybe I might consider getting another one if they go down in price again. Still a bargain for what you get.
The following photos are to show how some of these plastic plants readily blend into the scene.


You can see  from the above photos that these 'plastic plants' blend in quite well and suit the type of scenery I am trying to replicate. Some of them might appear a bit crude in the photos above but viewed at normal level they work in well.
I would also like to put in a plug for the Modellers Warehouse run by Dave McPhee. He is a great guy to deal with a just deals with scenery products. He will be at the Liverpool Model Railway Exhibition, Sydney in around two weeks time. Check him out while there or his web site.
So next time you are in a 'two dollar' shop or Aldi check out their range of plastic plants, you might come out of the store a winner!