Sunday, 17 April 2016

Progress

It certainly came as a surprise to Dad and Dave, when they stumbled to the edge of the layout and looked out over where there was once a layout they enjoyed riding on. Sorry boys no more.
Progress has been made since this shot was taken, in the middle of the photo above is now a baseboard that was formerly Bega. Luckily Bega was made up of baseboards 1.8 metres long, so two were dedicated to form the new town of Eden.
It has been decided that at least the first build of the new layout will be on modules that can be taken apart for whatever reason.
Two boards now reside in the centre of the shed, wingnut bolted together. The legs are also wingnut bolted together, the finished product seems fairly sturdy.
Since the last blog finally some track has been laid. I have started on the main board that has most points on it. This includes the loco shed area and a few goods sidings. The main line out of Eden will be on a left hand 30" radius curve. Although it's stated that the NA's will handle an 18" radius curve I hope I don't have to go down that sharp. The broader the better. My lottery dream is to one day have a G class garratt run on the line, so I have to provide for it now.

NA's where a loco shed will end up and coal hoppers in goods yard
Well as can be seen with the above shot, the track laying has commenced. I am using the Peco narrow gauge track. I am not a great fan of the ragged edges of the track as I don't think photos I've seen of the VR track looked that bad. I might be able to cut the edges straight. In the end it will be well covered in dirt/ballast and won't be so noticeable.
30" radius curve out of town


Being new to DCC is have sought wire advice from Marcus Ammann. The gauge of the wire is certainly much more thicker than required to get my old layout going. I have cut the webbing under  the rails to hide the solder joints, just a bit fiddly lining up the holes. Although the Peco package containing the point advises that the points are DCC ready without modification I have chosen to run a wire down from the frog area in case its required in the future. I hope not as that will require further switches being installed.
Two NA's have a chat in loco


I was wondering what form of point control I would use on the layout. Initially I was going to use the Peco point motors, but after the fun I had under the last effort at Candelo on the old layout working out diode matrixes to enable route control, I decided to virtually go mechanical. I was given some wire from a mate Kevin many moons ago and it was stored under the layout. Surprisingly I refound it and decided to use it for point control. I drilled a quarter inch hole under the middle of the throwbar. Into the centre hole in the throw bar the rod was bent 90 degrees and fed back to the layout edge in a channel formed with a router (thanks Kev). Around the rod I placed an 1/8th tube. At the edge of the baseboard the rod will again be bent up 90 degrees and a 44 gallon drum will be placed over it to form a knob for point operation. Although this will be not as quick as electric point operation it will be more realistic to my mind.
Rod for point control
Rodding cover with 1/8th tube
The trough with the rodding in can be filled in later with either tape or pollyfilla to make level with the baseboard.
Rods at baseboard edge


The above photo shows the rodding at the baseboard edge to be finally cut later. I will finish this off with the drums for knobs. The channel to the edge of the baseboard for the rods were made perpendicular to the point, this resulted in a few channels crossing over each other, but one channel was made slightly deeper to overcome this issue.
As can be seen in the photo is the outline of the old HO track. I am laying the track directly to the baseboard and don't see any need for underlay on this section of track. The former Bega was also directly laid to the plywood.
Today I have started to lay the track on the second board. This will have the station, transfer shed and a few good roads on it. The tracks have to cross over the join here. It would be nice to be able to just lay straight across the boards, but if it is to be truly portable I will have to do the hard yards now, so it can be pulled apart in the future.
With a bit of luck I may have all the trackwork laid soon and then the test will come with the power applied, hoping it all works.

Sunday, 10 April 2016

What Will Be.......

What will be.... hopefully. Well after many months thinking, planning, demolishing, selling, thinking, painting, cleaning, coping, building, typing and soon to be laying and wiring. I feel I am getting over the 'ing' disease. All those 'ing' words involve an amount of physical and mental attention.
I enjoyed building the old SCR, its plan was developed with just a pencil on paper and the route it would take for the main line traced out. When developing a track design, depending on the state or railway you follow there are certain elements that needed to be included. Following NSW's railways for most of my modelling, the final design, especially Bega the main station, followed that ideal.
So when it comes to modelling another style of layout, now being narrow gauge, you have to get your mind around that particular way of laying things out. Armed with all the books I could get on the Victorian narrow gauge, it then became a case of trying to follow narrow gauge design.
In building the new layout, I decided to begin with the terminus and work my way out from there. I have called the terminus station Eden, trying to maintain the South Coast line flavour at least in names by not necessarily true to history. That part is where the imagination steps in. It will contain the usual elements of a terminus that being a station, engine shed, goods shed and a typical transfer shed based on what is at Colac. It will be interesting to shunt, making and breaking up trains all part of operational interest.
I have included the diagram above of probably one of many versions of the intended layout. The intention is to start on the left hand side of the entry label. To date the old layout in this area has been demolished, the walls repainted and the floor rediscovered. What will be the final design for Eden is shown on the diagram. The plan is to have a 180 degree turn to the wall at the top. At this stage I will try and include a small area to unload the coal wagons. This will be their final destination having come from the "Coal Mine" to be unloaded and returned for more. This will be on the top board but will only have provision for emptying two hoppers at a time. This will require three local shunts out from Eden to unload the coal. It will include a van which will be left on the main line while the wagons are being unloaded. Plenty of scope for operation.
The brown shape will be a factory based on the Nobelius siding on the Belgrave line. It will take louvered vans and maybe a few open wagons for loading/unloading.
As can be seen from the plan the layout is eventually going to continue around the complete shed and will form full circle by way of a liftout section at the doorway. A triangle leaving Eden will also aid operation with the ability to go in either a clockwise or anti clockwise direction. This will also allow certain types of locos and rolling stock to be turned removing the need for a turntable.
Four crossing loops will be on the outside wall layout. When you move up in scale its spooky at how the distance between stations gets smaller. I'll just run the trains slower!!.
All the baseboards on the left hand side will be made on modules and not permanent. This means if I move I can take it with me or if I cark it then it can be sold off. Win Win. But by the time I get around to building the right hand side of the diagram, I think I will just build over the old layout. Some of the scenery around the gully and the far right hand wall can probably be slightly modified for the new narrow gauge style.
To add to further shunting operation I have included a branch line. This will involve shunting the train at the junction station before heading to the end. On the branch (In blue on diagram) coal and timber trains will need to head to the terminus and shunt before reloading. Coal trains will reverse down to the mine for loading then have to reshunt the brakevan, proceed back to the terminus, again reshunt, then head back towards Eden. All part of the fun.
Two features that are the benchmark in my mind for the narrow gauge railways are the trestle bridge outside Belgrave and the Thompson River bridge on the Moe to Walhalla line. The Thompson River bridge scales out at around two metres long and I look forward to the challenge of building it in the future.
Well thats the current planned outline of the new layout. We all know how things can change but we will see how it all pans out.

Tuesday, 22 March 2016

What Was and What Will be

Hopefully on the last post, I raved on enough to explain my reasoning for switching over to the "dark side" and into modelling On30.
It didn't happen overnight, but when I made the final decision it was all action stations. The HO layout was situated in a shed around 11 metres long and around 4 metres wide at one end. It was the effort of over fifteen years of building and one I never regretted doing. In the end it was complete as far as trackage went and the scenery was fairly well done. With the scenery side of things I did what I called the first passover and it was always an intention to revisit locations and improve/finish areas. This takes away the plywood central look and for me, scenery was a big input to South Coast Rail.
We often strive to get the locos and rolling stock looking 110% but often fail in the scenery department.
The plan above show the South Coast Rail layout in its maximum extent. It was basically a single track around the room twice and the main station Bega was located right down the middle. This was my staging yard where consists could be laid over or broken up and remade. Carriage sidings were located on the left hand side and a small goods yard was located within the circle of track on the right. This area also contained the loco depot. Track was planned for this area but never laid or operated. A turntable was to be constructed that was to lead to a 9 stall roundhouse. Also located at Bega were a cement plant and a flour mill. A secondary loco depot was located up near the carriage sidings

The above shots were taken on the layout way back in April 2006, ten years ago, how time flies. Every item shown in the photos has now gone to new good homes and enjoying a second life.
As mentioned on previous blogs, the layout was DC and driven by a control panel with all good intentions to give operators flexibility. All it did was give the panel operator (usually me) a headache trying to remember who was on what controller, where they were and what they were driving. One spin off from this was to add an extra lap of the layout by building a track across the aisle over to the branch. (See right had side of plan)
Track in middle went across the aisle over to Bega (Ignore signal settings)
This meant an extra lap of the shed going via the crossing loop at Kameruka. Kameruka was the crossing loop station on the Candelo branch and was originally designed as that, a smaller loop, but when twenty wagon trains were thrown at it for crossing then the loop also had to be lengthened.
In the last photo showing the two 49's can be seen the Candelo mine in the background. Luckily the branch had it own separate controller which allowed an operator to be out of the way and plenty of shunting to be had. If they weren't shunting Candelo then the arrival of a twenty car train of BCH hoppers would see them tied up for an hour breaking the train up into 9 car lengths for loading. A brakevan had to accompany the train and be dutifully shunted onto the rear for the return journey. This was the part I enjoyed, shunting and operation.
So currently only half of the layout still exists. All the baseboards that were in the left hand side of the plan have been demolished. That part of the shed has had it's walls painted.
One of the bonuses of rebuilding a layout is that fact that its a good chance for a cleanup. Stored in the shed ever since we moved here was my record collection from the 70's, two nice speakers and my original Dual turntable, a Garrard turntable I picked up at a garage sale for $2. Now trying to get rid of all this stuff was going to be hard and take time away from the new layout. Having siblings that grew up in the same era was handy. An email to my next down the list brother snatched an eager donor for the collection. On the arrival day I hiked up all the items from the shed to the house. His eyes sorta lit up when he flipped through the titles. I said you can't pick and choose,you have to take all or nothing (including the Hugo Montenegro ones). You could see the frustrated look on his wife's eyes saying, 'No not more junk' But mine were saying, 'great more junk gotten rid of'.

The above photos show a reduced pile of 'stuff' that will eventually be further reduced  as we move on. The baseboard frames in the above shots are for the new terminus. They are 1.8 metres long. This will form a terminus 3.6 metres long which will sit in the middle of the shed. The 'back half of the shed still contains most of the original SCR layout still untouched until I get the time or eventually track extensions will deem this necessary.
When dismantling the old layout one of the things I did was to salvage most of the scenery items and sorta sort them into takeaway food containers. Our traditional Thursday night take away Chinese dinners in containers has certainly made a great contribution to the safekeeping and sorting of these scenery items. As can be seen from the photo below, we have been eating Chinese for a long time. Labels will help in the future.
During the week I also picked up a supply of points and track from my local hobby store in Hornsby.
I want to support them and hope they will be around for a long time. Yes maybe could have saved a few dollars via the internet but having them around when I need small items is a blessing.

So with the points and track on hand, I am hoping over the next week or so to get some legs attached to the baseboards an make a start on the Sapphire Coast Rail. 
The "What Will be" part of the title will be explained next blog. Stay tuned.


Tuesday, 1 March 2016

Time March is on


One of the things I have discovered since I have come over to the 'dark side' of narrow gauge modelling is that there is so much diversification in this side of the hobby.
Firstly there are so many different gauges/scales. This is also true of main line modellers, having to be able to choose from G scale right down to Z scale. I won't start here and try to give an opinion of all these multi scales, but overall I feel there are just too many to choose from. Maybe if we were only given three choices, there would be more availability for the different scales.
Back to narrow gauge, one of best magazines (sorry the only) devoted to narrow gauge is the Narrow Gauge Down Under magazine, published four times a year. For me coming from being a HO NSW modeller I had a pre-conceived idea in what I wanted. Firstly it had to be an Australian railway to model, so that it would be easy to visit. I could have selected the Rio Grande in the USA. Plenty of models are available for purchase, but to visit there and see it all was a long way to go.
The closest I could get to a 'smaller' railway system was the Puffing Billy Victorian narrow gauge. This was run as a real railway in miniature. The availability of the Haskell NA locomotive was the catalyst to start modelling  the VR. Currently you can still obtain the great Ian Lindsay range of the VR narrow gauge wagons. Also available are other items to get you on the way such as VR portable station buildings, buffer stops, good sheds and other bits.  Maybe my only regret coming over is the fact that all the rolling stock is now in kits and require assembling and painting before being able to run. Something we were all spoilt in other scales now, gone are the days of putting kits together to get an 'S' trucks etc. Anyhow I am hoping there will be a sense of satisfaction and achievement once this is done.
Getting back to some of the obscure choices in the narrow gauge world, there are some of the weirdest looking things on the tracks. Like boxes on wheels, towing wagons that look like they have come from the scrap yard. Most of these 'things' seem to run on layouts that are pointless, they could be just a circle of track, or a long  track going through the bush where the end bit is the same as the start bit. Just nothing. This is how I started my modelling career with a circle of track. True I was very happy when this happened, at four years old you don't know what a point is. Luckily this circle was soon joined by more track giving the layout a purpose.
This purpose is what I want to build into the new layout. I like operation and a reason to run trains. If I suffer from one thing  in layout design it is the fact that I probably over design my layouts. I can't help myself, I have designed my new terminus with around 19 points. When compared with the average prototype narrow gauge layout design there seems to be minimum numbers of points. The VR narrow gauge track layout designs are mainly boring but practical. The most interesting layout to my mind is the one for Beech Forest on the Colac to Crowes line. Two things make it different to others, that is the scissors crossover and the balloon loop at one end. Why they had to go to the trouble to especially fabricate a scissors crossover is unknown to me. They had plenty of room to just have two single crossovers.
Another balance that needs to be juggled is the ratio of buildings  to scenery on the layout. I would like to think I can build scenery better than I could build a scratch built  shop for instance. If you get the wall out of square it's there for all to see, but it doesn't matter if you have one too many trees or grass that is too short or long. It's just easier to fudge scenery.
And the day is getting closer for when the first layout boards will be built. I will start with the terminus and work my way around the shed to at least the first crossing loop. That way I can send the trains somewhere and then bring them back.
The last remnants of the HO layout were taken down today and the walls are waiting to have their scars filled, sanded and repainted with the proverbial blue.
So below are some of my thoughts on the reasons I have chosen to go VR Narrow gauge.


REASONS TO MODEL VICTORIAN NARROW GAUGE On30
1. COST OF MODELS
HO Consider the modern era HO modeller who wants to model the Hunter Valley coal lines. For one coal train you will need:
3 x 93 class                          $900
9 sets of NHRH hoppers - 63 wagons will cost $350 x 9 = $3159
So one coal train will set you back around $4000 and this is before you get any track and a large shed where to put it all.
On30 Currently there is only one loco available ready to run which is the Haskell NA Puffing Billy locomotive. These will set you back $449. And for rolling stock there are currently no Puffing Billy models available ready to run but Ian Lindsay models and Outback Model Company make some very nice kits for various wagons.
2. EYESIGHT
As one ages the eyesight apparently gets worse. This is why N scale is not a popular scale with older modellers. Buy upsizing to On30 the models are easier to see.
 3. LIBRARY
Your library shelf of books can be reduced in size. For modellers interested in NSW railways there are hundreds of books on the topic. Many buy these books for "reference purposes" only, but how often do you find yourself with nothing to do, then reach out for a book to look at? All of my books have been looked at at least once, but there are thousands of words contained within them that I will never have time to read.
In comparison because the subject of modelling, is the Victorian narrow gauge, there are only a handful of books of the subject. I have managed to collect a good selection currently available for "reference purposes". So the shelf of books has shrunk.
I prefer picture books for referencing. I am not particularly worried about why things happened back in 1902. As they say a picture is worth a thousand words.
One lot of books I have acquired is the Train Hobby Publications books. What makes these books excellent is the fact that they are in colour which shows up the style weathering and all aspects of the era they were photographed. Most of the photos were taken around the mid - fifties. There is a three series of books on the two G class in action over the lines. Coloured photos are especially great for weathering purposes. They also show loadings such as potatoes and timber and the various ways in which it was loaded into the NQ wagons. Many photos were also taken of water tanks. Nearly every line seemed to have its own unique design. Some round tanks were steel supported and others wooden. Ballast seemed non existing, just use dirt for the model and it will be prototypical.
4. TIMESAVER
After conversion to On30 every time you go to a model railway exhibition, because there are rarely any narrow gauge layouts, you can get in and out quicker. At the Liverpool exhibition this year, I spent most time at The Railcar stand as they cater mainly for narrow gauge items.
Currently there is only one Narrow Gauge convention as the name implies devoted purely to narrow gauge modelling. But it is only held every two years. And they share it around and it is held in different states each year. Next year it will be held in Geelong, last year it was held at Bowral, NSW.
Although I haven't attended one yet, they seem to have a similarity to the old Branchline Modellers convention that were held in Sydney some time ago and was recently re- activated at Coffs Harbour late last year. These conventions make you feel part of the show where you are invited to participate by bringing along models for sharing and showing. If you have that competitive edge then there are contests to enter. This is opposed to the general exhibition where you pay at the door, do a couple of laps of the hall, have a sausage sandwich, have a yack to long lost mates that you only see once a year, finally leave the hall with a goody bag of models and maybe a few bargains from the second hand stall if you are quick enough on the Saturday morning. Then you race home full of enthusiasm, and head for the layout while the creative juices are still flowing strong.
Every issue of the Australian Model Railway magazine that comes out has heaps of ads for new HO models.
Some people just can't help themselves. I have heard that some modellers have to collect the same amount of locos that actually exist in real life. Not so bad when you buy the six models of the 43 class but when it comes to the NR class with over 100 units in real life it gets an expensive exercise.
Some sympathetic manufacturers have offered twin packs of locos which can help these collectors.
Gone it seems are the days when you could by a single carriage or wagon. No sorry sir, the minimum is a three pack.
On the other hand being in On30, you might go a year or so before any new models are announced. So it becomes a cheaper proposition.
6. SIGNALS
When modelling HO scale you would expect that signals are provided on layouts. And depending on the layouts  complexity, this would determine how many signals are needed.
There are basically two choices, either semaphore or colour light. Both choices have very little to offer in the way of readily available to plonk on the layout. Kits are available but these all need assembling and painting.
So come over to On30 modelling and you won't even have to think of them, because most lines never had them! No cost, no worries. The Upper Ferntree Gully line was the only one of the four lines that had any great use for signals. Two signals were provided at Beech Forest on the Colac to Crowes line, and there could be others I am not aware of.

So these are just a few of the reasons I have jumped "to the dark side". Sorry no photos this posting, I had better get on with building the layout.


Friday, 19 February 2016

I'm In

Well, I didn't think I would ever get there but I have finally joined the DCC club. Over to the dark side as some call it. As my loco fleet was going to be a lot less than the HO fleet, I thought why not. As I slowly strip out the kilometres of wire that faithfully kept the old SCR running, I realised this was the right move. You certainly don't get out of putting in wiring, just less of it.
I haven't reached the wiring stage as yet as the demolishing of the layout continues. The last week or so has been packaging up of HO items bound for the second hand stall at the Forestville exhibition in a few weeks time. It takes a while to get it all sorted but worth it in the end. Any unsold items are already packed for the Epping exhibition second hand stall in June. Eventually it all goes.
As well as going DCC I decided to adopt sound for my NA's and got a Loksound unit for it. Not cheap but a necessary item to get the maximum enjoyment out of the hobby.
I received great help from Marcus Ammann in organising the fitting of the sound decoder. Not a five minute job but to hear it come alive at the end was worth it all. The NA whistle is certainly well reproduced. The unit was lucky enough to do a trial on the Main North layout. (but restricted travel due to Ardglen tunnel mouth)
Well the exciting part was getting it home and down to the shed to put in on some remnant track of SCR for testing purposes. Red light on and we were in business. My first DCC loco running on DCC.
I was running backwards and forwards (all the track I had) having fun with the sounds and getting used to the throttle and its settings. I was so excited with it all, I had to share the joy with someone else. Going inside, unlucky for her, I got my wife to accompany me down to see and hear it all. Well after about 30 seconds of seeing and hearing and faking enjoyment, she retired to the house to leave me to go backwards and forwards again. This time I put a few coal hoppers on the tracks.
After a while when I tried to blow the whistle when the loco was the furthest away, it refused to blow. There was also a button called 'direction' and when pressed it did not change. Oh no. I sent an email to Marcus telling him of my dilemma. I had only gone one day and the bad gods were raining down on me. Was I to believe that this DCC wasn't all it was cracked up to be? Another meeting with Marcus, the answer was to replace the circuit board with a replacement board. This seemed easy enough to do but when the new board was tried, it didn't respond either. Well eventually the problem turned out to be a bad solder joint not on one but both boards. A quick hit with the iron has fixed the problems.
So one sound loco done two to go. I will have to order two more sound decoders soon so they can join the fleet. When this is done I should be able to do some detailing on them, numbers, builders plates, coal in the bunker etc.

My venture into On30 would not have happened if Haskell hadn't done the NA. It was with great joy when I read the latest AMRM that Haskell has announced that they are doing the bogie NQR open wagon. Soon hopefully to be ready in April this year. The NQR is the equivalent of the S truck on the NSWGR. Photographs show the G class garratt hauling up to a dozen of these NQR's behind them. They were used mainly for loading pulpwood and bags of potatoes or whatever other goods were offering.
The other drawcard to the scale was the availability of On30 kits made by Ian Lindsay models. These are made by Ian Storrie and are fine excellent kits. Most of the range of 2'6" gauge wagons have been made. I got an initial batch of vehicles, but also received a further order this week of more vehicles, a goods shed, a victorian station building and a few narrow gauge buffer stops. It seems like I am reliving the good old days of HO models. You used to buy kits because you always believed that "if you didn't get them straight away" they might disappear for good. How many of you still have Freidmont kits etc waiting to be assembled?
There is one section of layout left to be demolished soon. The walls will be repainted and then I should be ready to get some baseboards ready for the terminus.
There is a Yahoo group specifically for  Victorian Railways Narrow Gauge 1:48 Modelling.
I have joined this group and notice since joining that the member numbers are slowly increasing.  Hopefully member 100 will join this year. Jointly, there is also another group in Yahoo called Australian Narrow Gauge Railways. Sometimes there is similar discussion on both groups. I have joined both as answers are often forth coming to queries.

Monday, 25 January 2016

Mug Shot

 
Well how about that, the mugs have arrived. The above photo shows the mugs in the position where the photo was taken a few years ago and is also the header photo for this blog. The photo reproduction has come out quite clear, but that all depends on how well your sample photo is taken.
I have only one complaint that the yellow in the word "rail" on the mug is a little patchy, don't know why. Couldn't be bothered sending them back, will just live with it.
I got excited about their arrival when an email was sent on the 12th January saying they had been sent. They were coming from Melbourne (I hope) but they only arrived here today the 25th January.
I reckon I could have walked to Melbourne and back in that time and picked them up. Not sure if Australia Post has slow mail but this I reckon is definitely snail mail at its best.
So do yourself a favour and get yourself a mug to remember your railway by. A great novel idea.
Have been busy cleaning up the shed the last week and have quite a few more bags of rubbish to go out in the red bin.
I actually got to get a coat of paint on the ceiling as well. Not the best thing to do ceilings but it looks a lot nicer now.
Photo of recent painted ceiling
After much hole filling on the southern wall I finally got to put the first coat of paint on. The blue was slightly darker than the previous coat but looks a lot fresher. I don't normally hate painting and putting on the first coat is always good. You get to see it refresh right before your eyes, but I hate doing the second coat. Almost seems a waste of time. I reckon they should sell paint thicker and call it a one coat paint. It seems a great waste of time doing the second one.
Photo of recently painted wall


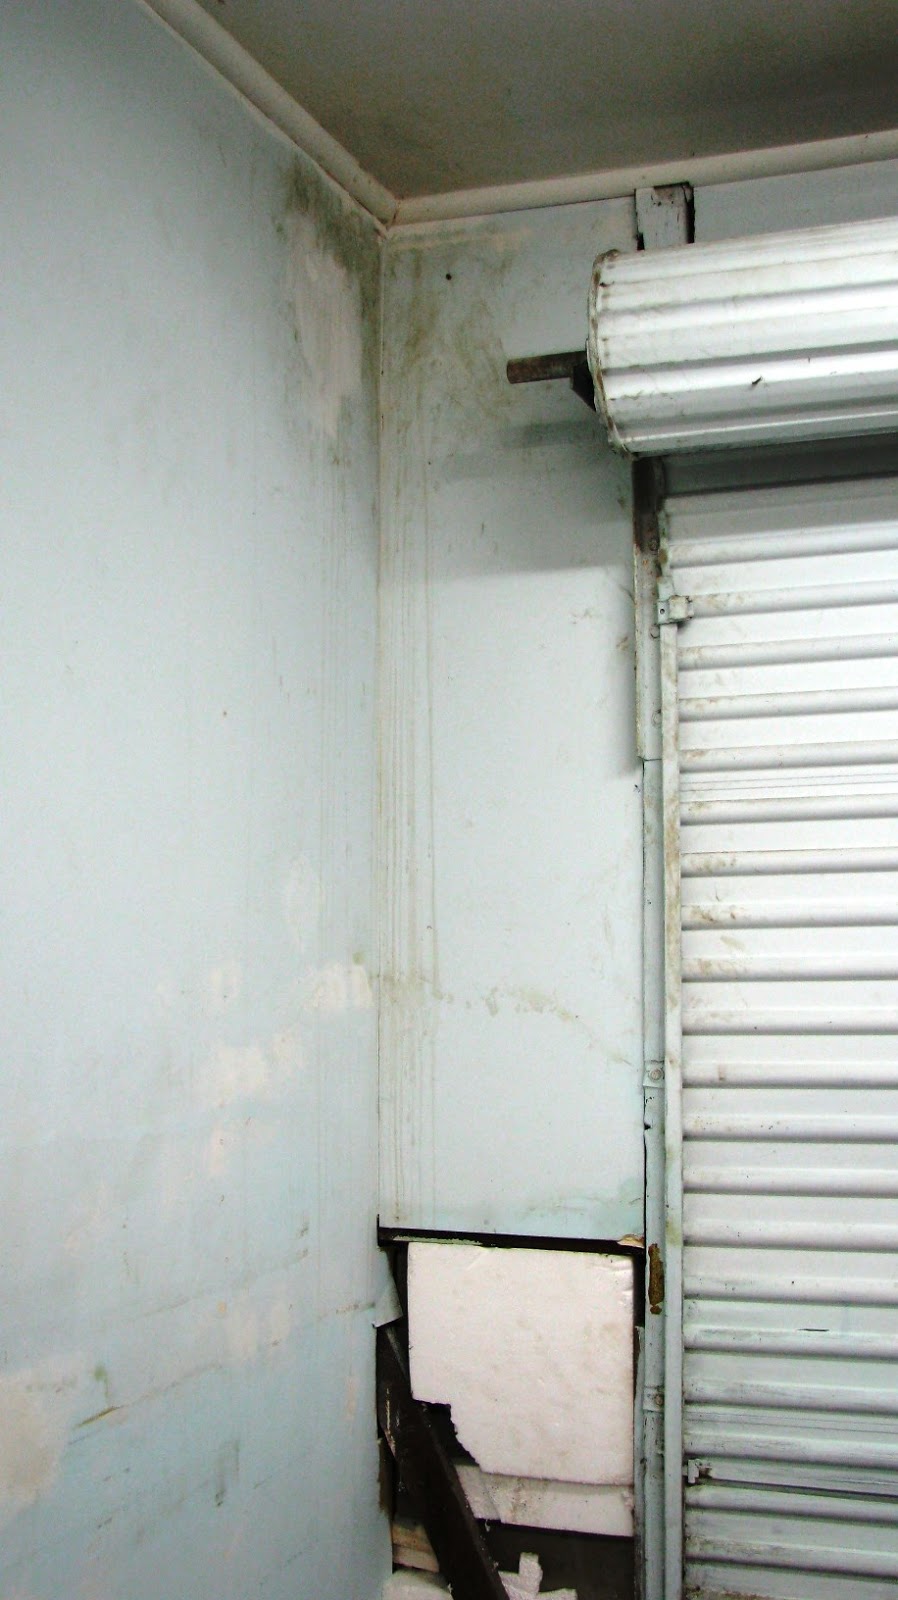
Again I thought I wouldn't have to mention the possum again. No he's not back but I had to remove a layer of his calling card (piss) from the very top of the roller door. You could not see it from the room but maybe that's where the smell was coming from on the hot days. I asked the wife if she could supply me with some old towels, very old towels I requested knowing full well their next assignment. So armed with the towels and a bucket of hot water I went down to attack the job. I took three towels to lay out across the door and after twenty minutes, took the external hand brush to the job. Boy did he lay it on thick. The brush was hardly making a dent in the job. So remembering the ballast removal exercise, I then entrusted the job to the wire brush and drill. Making sure the drill and brush was at a 90 degree angle to my face, I started on the job. It worked well, even going down to the bare metal.
So along with the wall the roller door was painted and looks so much better, fresher and smelling better.
Before
After 


So the progress is slow but starting to look way much better. I can't believe some of the hidden thing I have been finding under the layout. Not sure what I was going to do with all those PMG lever keys, they are now in the bag waiting to go out. I was also able to try out our new vacuum cleaner, a bagless one this time. I was sick of keep having to buy all those bags for the old machine. They were treated as eternal and were never disposed of when full. Usual comment "I wondered why the machine wouldn't pick anything up!" The first to go were the daddylong leg spiders. They had no toilet manners, they just let it rip where ever they were. Usually over the top of the layout. I gave them a fighting chance by turning the suction down a bit but they were no match for the machine. Hopefully I got a few breeders amongst the lot.
The final shot shows the nice clean roller door and wall. It seems a shame to start putting the pictures and diagrams back up, but there is still a lot more cleaning and painting to go before I make a start on the new baseboards.