Tuesday, 31 January 2017

Look Before You Leap

I have recently obtained the timber for the next two baseboards coming off from Eden. Knowing that I am crap at carpentry, so much so that if I see termites queuing up I will put out some of my work for them to enjoy. Better than getting embarrassed with the end results.
But the choice of model railways for a hobby has allowed my deficiency in carpentry to be all covered up so nothing shows. I even went to the extent to go to the local hardware store and obtained a corner clamp to try and ensure that the corners would be at 90 degrees which I am told is the ideal angle for corners.
Being armed with a corner clamp and also a drop saw which only comes out of the shed on special occasions I started on the baseboards.
The timber was measured up and was put under the drop saw. Now I am not sure if it was my inexperience with the saw, whether it was the model of the saw ( I always buy the cheap ones) but the finished product didn't look too straight. I was hoping that the two crook pieces put together might work but only nearly. So the basic frame was laid out on the concrete and my corner clamp now got its first workout. I think I would have designed it slightly different but for $10.40 I couldn't expect too much.
The twisting in the timber frames will hopefully straighten when I get the cross braces in. With a bit more head scratching, I was able to work out how I wanted the base boards to be assembled to allow a slight grade.
The first "new baseboard" is put into place
The first new board (above) will be "L" shaped to allow the track to turn 180 degrees coming out of Eden. I have butted the new baseboard up to the exit board from Eden and used bolts with wingnuts to hold. As previously explained this part of the layout will be transportable. Where to at this stage I don't know but it is movable. It will be virtually a fixture for the foreseeable future. In the photo above the corner near the door has been screwed into architrave. The screw is hidden and can be easily removed if the layout needs to be moved, it also saved making another leg.

Looking the opposite direction to the first photo. The level was part of the posed photo.
 When I got the first board into place I felt that things were starting to happen. It has been a while since I had assembled the two baseboards for Eden. It was here I was able to test new things (1) a new scale and (2) a new operating system - DCC. So far all has gone well but I need a destination to run trains to.
Yesterday I received two sheets of plywood that I can use for the baseboards. There will be enough to get me down to and across the roller door, the site of the first station. Once I had screwed the corner to the door it was surprising how the rest of the baseboards became more rigid. The second baseboard can be seen standing up in the above photo. Most of this timber came from the old window surrounds from recent renovations. It was destined for the skip until rescued, it is too expensive for landfill. 

The proposed track and structure placement

The next stage after laying out the base - boards is where everything is going to go.
I often just pull up a chair and seem to sit there and stare at the boards for ages. Eventually when something comes to mind I do a dry run with a bit of track and a few buildings, cars etc to get the feel of how it will turn out.
Having made the changeover to On30 modelling the brain has to recalibrated to think differently from mainline modelling. You are now allowed to have sharp curves and get away with it. And O scale certainly fills all available spaces quicker. On the other hand this makes the modelling quicker in that there is less detail to provide in the same area as HO.
In the left photo can be seen the track wandering off up the hill towards the roller door. I will explain the curved turnout template more in the next blog.
Where the black truck is, is where the coal unloader will be and further up the hill is another siding. Think Nobelius siding on the Puffing Billy railway and that's what it will be.


Looking back towards first baseboard
 The photo on the left shows how the track will wind its way up the hill. In this corner behind the track at the bottom will be a trestle bridge on the corner baseboard.
I try in my model design to not have too many tracks that run parallel to the edge of the boards. Trains looks so much better running through curves and it also allows for super elevation to be included. I have stuck a tree into the foam to give a sense of scale. The track is the old code 75 HO used here because it holds its shape better than the O scale narrow gauge track. As well the good old paper templates will show if it all fits.
The baseboard in this area will be around 50cm wide, which is wide enough to have enough detail and also it has to provide enough space for operators between this board and Eden.
I have one piece of plywood leftover that was part of the old Bega yard. I will move it over to the first new baseboard as soon as this stinking hot weather goes. At least the hot weather has given me a reprieve from the painting inside the house.


A two wagon siding, industry to be decided.
 The last shot shows the siding to be provided on board number two. It will hold two wagons and can only be shunted by trains moving away from Eden.
These sidings around the layout will eventually form part of the operation of the layout overall. I will eventually have job cards that will show where all the wagons on a train will end up.
I will outline the reasoning of the curved point and the working of the coal unloader in the next blog.
Sorry gotto go, dinners ready.

Monday, 23 January 2017

Floor Shine

This time last year I was right in the middle of a demolition job. That was taking down the old South Coast rail HO version. And almost to the day this time last year I had repainted the ceiling in a new splash of white and then the walls in their new blue colour.
This refresh was truly needed as it had last been painted when the HO layout was started in 2000. No matter how careful you can be there are always going to be marks, stains and dead spider remains all over the wall.
So having done the wall and have it looking nice the floor was not looking too good either. The floor seems to suffer much more abuse than the walls can take. Even a mop over didn't bring them back to the original colour. The floors were last painted way back in Easter 2009. I remember the date well as I was going to meet two Texan guys, Lance Lassen and Blair Kooistra who were out here on holidays. NIce guys, both modellers and interested in the prototype. Prior to their visit the floor was just bare concrete, so this was the catalyst to get some work done. Thankfully a four day Easter break gave me time to get every thing out and up from the floor, have it painted and then put it all back.
The layout is now at the stage where I want to get the future baseboards made so the track can be extended and finally a bit of operation can take place.
I realised that I needed to get the floor painted for its second time so this could happen. Recently, late last year yet another hardware store had succombed to the Bunnings giant and decided to close and there was the inevitable sell off of everything in the store. One of the things I spotted was a four litre tin of Berger Jet Dry paving paint at half price. It showed it being a grey colour which was a similar colour the floor is already painted but I wasn't sure what shade of grey. As you know there are fifty shades of grey.
I planned to get the painting done today, but yesterday after having gone for a walk, purchased the sunday paper and had roll for lunch, the weather wasn't too bad so I put up the roller door, rolled up my sleeves and got the roller ready to go. A lot of rolling going on yesterday.
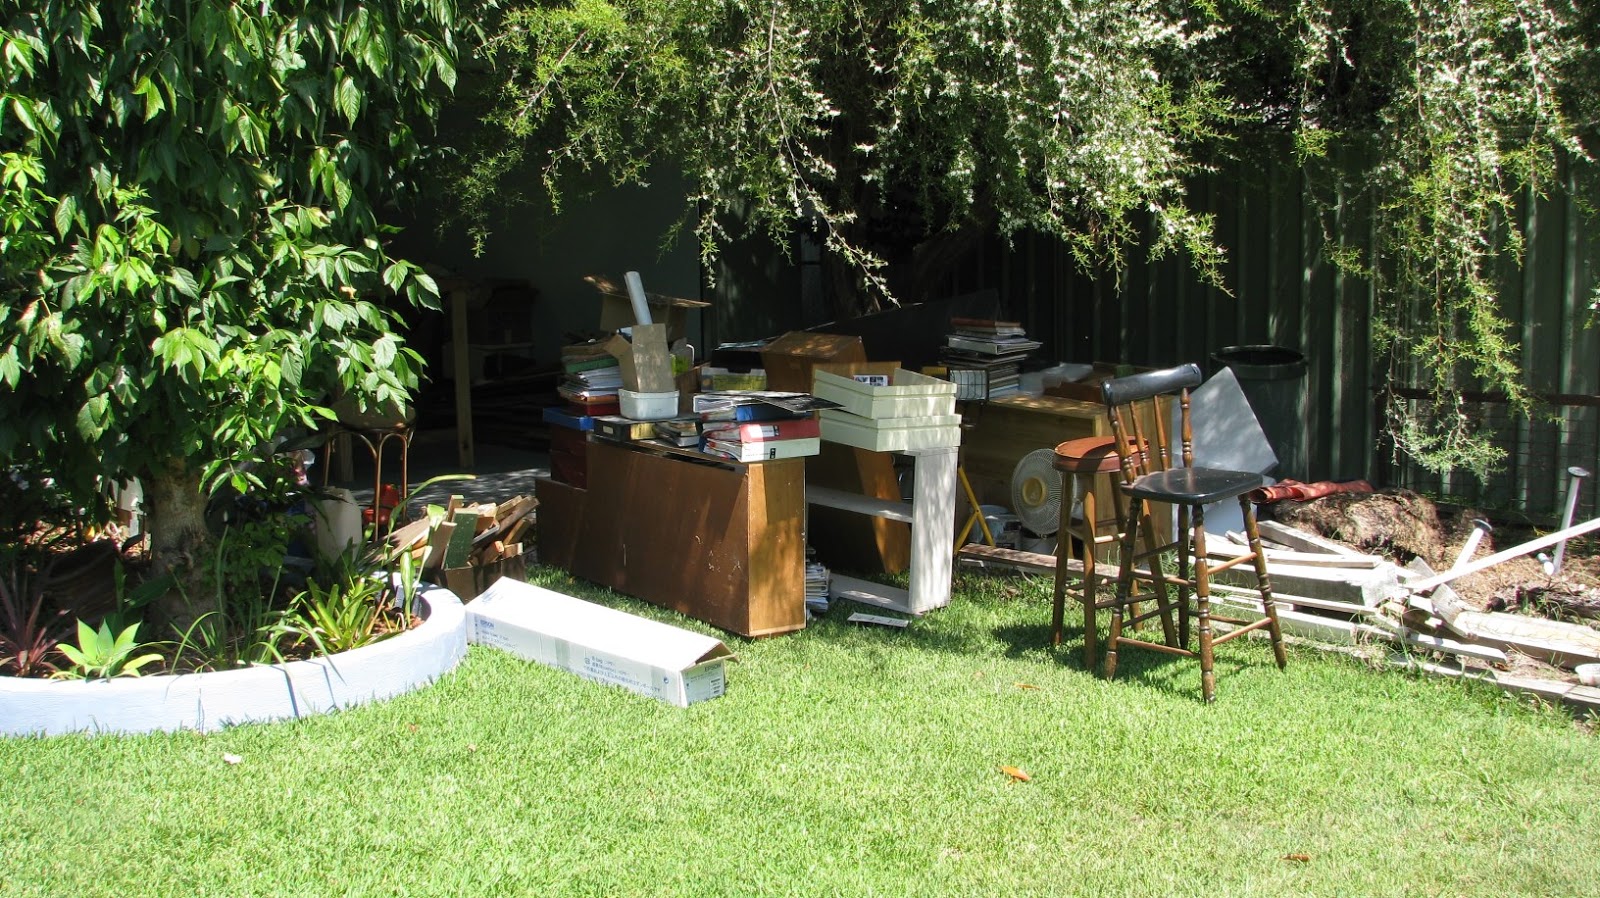
I carried all the "junk" out onto the lawn ready for the work to begin.
The "pile" outside the shed.
With the can opened and stirred, I had to hand brush along the edges of the wall where the roller couldn't reach. The rest of the floor was gradually painted and I worked my way up towards the roller door so I had an escape route. This also helped in the ventilation as the paint was turps based and a bit on the smelly side.
You can see why it needed re-doing. Not sure I missed the bit on the left hand side

AH the smell and look of new paint!

The next day and looking good
 The pile of timber in the above picture at the left is for further baseboard construction. It is some of the remains from the old layout and other timber acquired. When all the baseboard construction is done then I will try and get rid of the leftovers. It is surprising how often you just need a small bit of timber and is costly to purchase. Above this pile of timber will be the future Thomson River bridge module.
From the outside looking in. Would be good to only have this much in there all the time.
Today I have moved most of the "rubbish" back inside despite the intense humidity. (I hate summer) Luckily most fits under the baseboards. We have two council cleanups a year so I am getting ready for the one in June.
I have already assembled two future baseboards for the next section and hopefully tomorrow I will go to the local timber yard and purchase timber for the legs that will hold up the next five baseboards.
Things are moving on SCR.

Saturday, 14 January 2017

Reasearch and Development

Freelance modellers have it made. It basically means anything goes or do what you like.  Design your own rolling stock and locomotives and your own colour scheme, road names etc and you won't be wrong.
Then there is the rest of us that need a guiding hand in following a prototype. But there is also a mixture option built in. You can faithfully follow a prototype such as the NSW railway system but have it set in an imaginary location. This was the option I took up on my former HO South Coast Rail layout. It had real place names but had my interpretation of how that location would look. But no one could tell me that I had Bega station laid out wrong!.
Then there are the sticklers who need to model a location exactly as it was. I can only admire these people, who go to extraordinary means to achieve their goal.
Changing scales for me to On30 and more particularly the Victorian narrow gauge made me need to go out and chase up as many publications as possible in order to have that important 'reference' material. Currently I have purchased twenty four books so far devoted to the VR narrow gauge. These are invaluable to be able to provide information as to how it was done.
Most of the VR lines finished around the late fifties and even though they started at the beginning of the last century there seems to be a big gap in the middle for information.
We have books devoted to the building of lines such as "Steam on the Lens" Volume 2 that was dedicated to the building of the Moe to Walhalla line. It is a goldmine of information. Then there is the other end of the story when it was inevitable that these lines were to be closed in the late fifties and then photographers flocked to these lines to capture was was left at the time. We are lucky they did.
Remembering to my time back in the 60's colour film was very expensive, black and white being the norm for photos. It was a fairly simple process to develop the black and white films yourself as long as you took the precautions of not letting any light get to the undeveloped film or it would be ruined.
How lucky we are now with the digital age of photography that gives us instant results.
Your were either considered lucky or rich if you had coloured film and even more so if you could afford coloured movie film. I remember my first Bolex 8mm movie camera where you would run one side through the camera and half way turn it over and finish it off. Around just over four minutes per film reel didn't make for instant or long viewing times. Added then the film had to be posted to Kodak in Melbourne for developing. A week later we would watch the results.
I came into possession some time ago of some coloured movie film that I thought should be shared with viewers. The quality is very poor and it is silent film but the subject is priceless. The film covered NA7 locomotive coaling at Upper Ferntree Gully then moving to its train for a run up to Belgrave. Reading some of my 'research books' I was able to deduce that this film must have been taken around 1956 or earlier well over sixty years ago. 7A had it buffer beams and handrails along the water tanks painted in red mid 1956 according to the Hobby Publications book on the 'NA's"
Any way enjoy the film, also to be noted the use of child labour on the coal stage and for shunting!!. 

Wednesday, 28 December 2016

Land of Make Believe


Well I might just squeeze in another post before the New Year. This post title is the name of a song from the Moody Blues, my favourite music group.
Make believe is what we get involved with when we create model railways. Some make believe better than others but as long as you are happy with your end results, that's all that matters.
Currently we are going through a period of very hot weather and I haven't ventured from the house towards the shed. I can still fill in a day doing various projects I have to do.
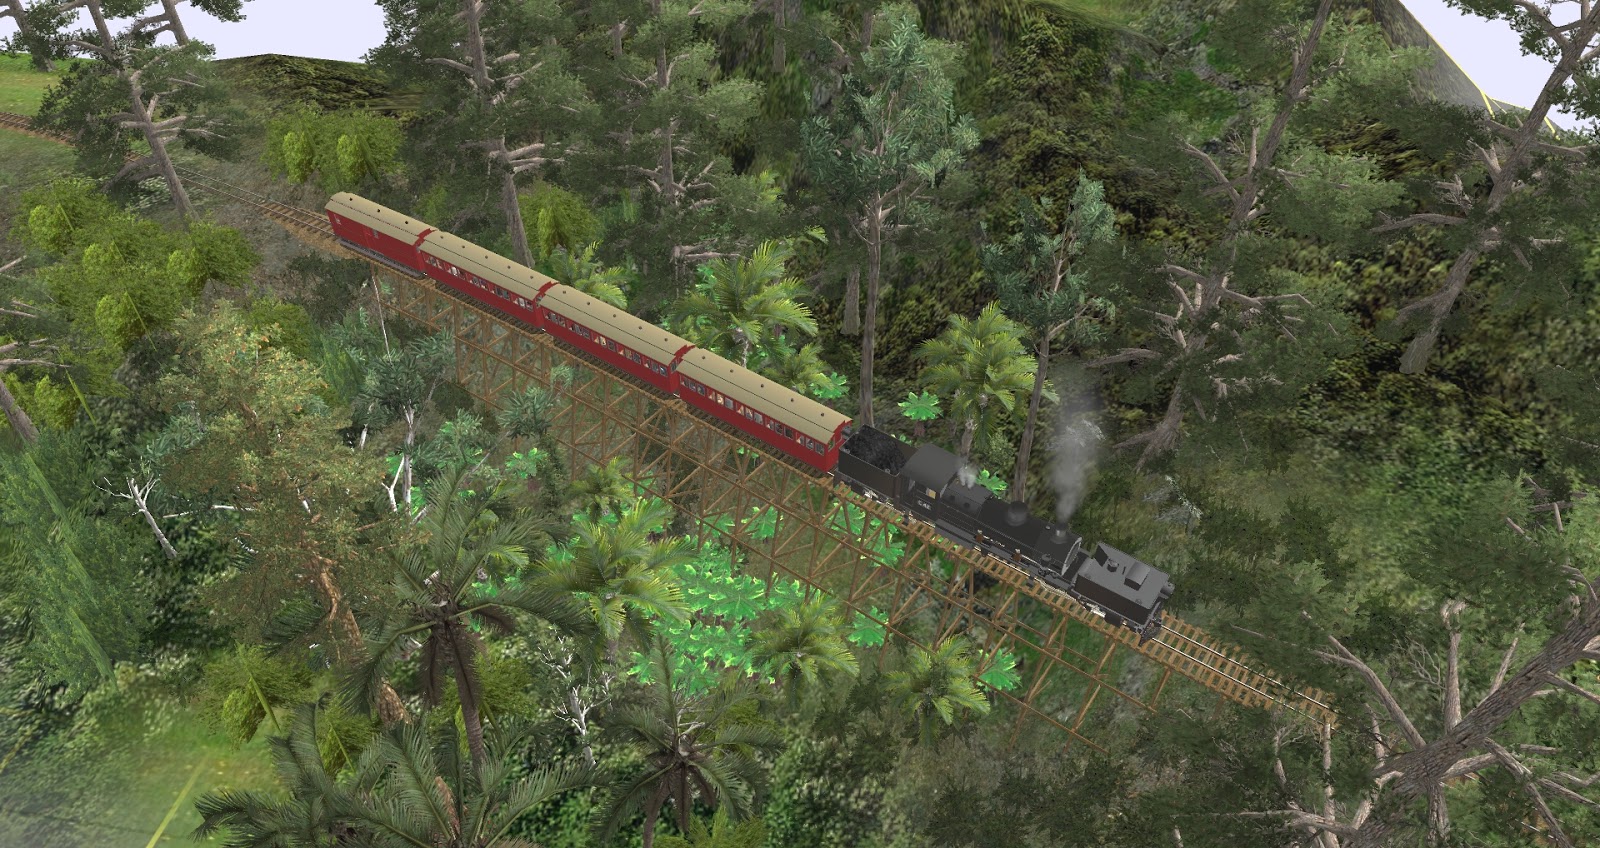
Another time waster that I have enjoyed over the years is the train simulator game called Trainz 
I believe this is an Australian produced game. Although this has never really a big part of my time , I have enjoyed playing it over the years.
They have just released another version centered around re-creating a model railway. This can be accessed through the link to Trainz above.
What this game allows is the ability to be able to create your model railway set up and let you operate and test various aspects before you commit to your spending money on your model railway.
If my shed ever burnt down and the layout was gone then I would have to be happy playing this game instead. Once past the initial purchase price, everything is free. Unlimited track, points, rolling stock, locos, all the accessories you could think of to go with it. It even has the ability to say load a coal train with simulated coal, then you can take it to a power station and unload it. There are many other features best found out by looking at the site.
Having moved over to On30 modelling, when I checked out Trainz, someone had produced some NA locomotives, the G42 garratt and some VR narrow gauge rolling stock to go with it. 30" track is also available to allow you to build your system.
I had a go of building the Beech Forest layout as I found this to be the most interesting narrow gauge plan compared with other stations that mainly had plain parallel sidings.
Although I am not building this location it was fun to do. Once built and sceniced, you can place trains on the tracks and have some operation fun. The NA works OK, but for some reason the G42 doesn't have any sound. I no complain, the guy who built it has done a good job.
This latest version of Trainz has the ability to take screenshots, and I have taken a few to show how far you can take this game too. These are really basic shots as you can spend hours super detailing the scenes.
Approach to Beech Forest. NA arriving from Colac and the G42 on its way to Crowes

While the detail in this programme is acceptable you can see there is room for improvement for crisper and more detailed realism. With the rapid advances in computers I am sure this day won't be far away.


Another heavily timbered region complete with trestle bridge
So these above images show a few things you can do with this Trainz programme. Time waster or just having fun, who cares, as long as you are enjoying your railways.

Wednesday, 14 December 2016

End of year slow down

Work on South Coast Rail has almost ground to a halt recently due to house renovations taking up the slack time.We have had five windows replaced with new ones. Not only have we had the colour changed but now windows that will actually stay open with out the need of a stick. The stick was a solid piece but had one disadvantage in that the window was restricted to open to the size of the stick. I could have a range of different length sticks nearby but nowhere to leave them except maybe along the window sill. They were also a blast from the past being that mission brown colour. Just as I was going to get rid of them I was told that brown was having a re-run but the name changed to "chocolate" maybe to trick newbees.
They have all been installed over the past few weeks and now comes the chore of repainting the window surrounds plus having to undercoat the raw timber of the architraves. I was trying to get away with repainting the rooms but to no avail. Tick one box, my sons room has been done and he chose to get a new desk in there to celebrate. Another room I wasn't so lucky with, had the window measured wrong which entailed some of the bedroom wall being cut out to allow the new window to fit in. Bugger this was now another room to paint, seeing I had only done it last year.
And on top of it all we are getting the bathroom completely remodelled. So more painting of the roof, windows and doorway. All this hoping to be finished by Christmas time, wish me luck.
I have made this choice to throw all energy into getting this work done in the house and next year will be my time down the shed.
Now just because I haven't been down the shed doesn't mean nothing has been happening in other ways. We were told some time ago that Haskell who made the NA locos were also doing some NQR wagons to go behind them. I saw actual samples at the Liverpool exhibition in October and knew they were on their way here. I put in an order for two packets with the local hobby shop and recently took delivery. The models were available in three different shades to cover various periods for the modeller. I hope these open wagons sell well as future Puffing Billy models may be dependent on the sales of the NQR's.
The NQR's make an appearance at Eden

NA8 with a few new wagons on SCR
I haven't done any weathering on the Haskell models yet but all wagons on SCR will be suitably dirtied up. The first wagon behind the NA in the left hand picture is an Ian Lindsay NQR which has had the weathering treatment, but no decals added at this stage. These NQR's were the mainstay of the Victorian narrow gauge railways hauling everything from potatoes to timber and anything else in between. Photos exist of trains with well over a dozen of these NQR's ably hauled by a G class garratt.
Closeup of the Ian Lindsay On30 NU van
In the photo can also be seen a NQR flat wagon with bulkheads and a louvre wagon coded NU. These three wagons were some I was able to recently purchase already assembled. Slowly but surely the fleet is expanding.
The assembled but as yet unpainted NU

In the overall scheme with the layout there will be the  VR narrow gauge side, but also provision has been made to employ other locos and wagons that will entail a hand over of both the locos and brakevans at junction stations. This will add the element of operation to train working. I have two NC brakevan kits currently in the hundreds of pieces they come in to assemble one day. So at the junction station they will be replaced by a different brakevan. While trawling on Ebay recently I came across two Bachmann American style cabooses (cabeese?) The colour was close enough and they didn't have any lettering which was one less job to do and remove it. I was hoping that if I could remove the cupola and replace the roof with a flat one it might be passable for another type of brakevan. So I have de-americanised it!

The original caboose on the left and so far modified on the right
The above photo shows the work done so far.  The cupola was removed, also the ladders from the ends. On the roof I cut some styrene and glued it down over the hole where the cupola  was. I put masking tape over the styrene on the roof, this sorta worked and was designed to give the roof some texture trying to represent some canvas. I have dirtied the van up with some Tamiya Khaki drab thinned with Isopryl alcohol. I am not sure if I will leave the end grab handles there or not. Also tossing up if I should paint around the windows with a different colour. I have to put the stovepipe on the roof and I will add some ventilators if I can source any in O scale. The only other thing I might do is to replace the step into the middle of the van with a full door length one similar to the ones on the NC vans. The second van in the picture will also get similar treatment eventually and these will provide branch line service. These vans are lit as well. I will look through the narrow gauge decals to see if I can come up with a suitable code for it. Was there an ND?
Eden Yard
Well I reckon this will probably be my last post for 2016 and I would like to wish all the readers of this blog a merry Christmas and a great modelling New Year in 2017. We are always looking for new starters into narrow gauge modelling. Come over to the dark side, you're always welcome.

See you all next year!

Wednesday, 30 November 2016

G'day USA

Cranking over the 100K on the hit counter was a milestone. But keeping my eye on the meter showed it raising at a great rate of knots.
As reported on my past post  of August 3, I noted there were a great number of hits coming from Russia. There is a general consensus that there are good and bad guys out there, just watch James Bond or Rambo movies where the Ruskis (bad guys) match up against the US (good guys).
The hit meter for some reason has gone haywire with hits from the USA. For this weeks counter it show 872 USA and 271 for Australia. Maybe the CIA or FBI or whatever they are called this week are onto it. But then again it could be just a bunch of modellers. Whatever it is guys, I hope you enjoy the rebuilding of South Coast Rail here. If you delve back to older posts you can see how it has evolved from a HO layout to the now On30 layout in the making.
Having said the above I welcome any Russian modellers, the translating feature might make it easier to understand. It would be interesting to see if it can translate Australian slang into other meanings.

Back to Bega

Having now allocated location names to the individual towns I am concentrating on Bega so that there is a place for trains to go to.
Above photo shows where the former terminus of Candelo has been laid flat. Part of the rockface wall has been placed onto the back wall temporarily rather than bin it. Having been painted way back in 1999, the rear wall is now overdue for another coat to freshen it all up. The can of paint is ready to go and is on standby waiting for some one to apply it.
The pile of HO track and points are bundled near the window. These will be eventually sold off to provide funds for future expansion. It is a very different feeling to pull apart an old layout to build a new one, there is so much stuff to move around and get rid of. Very different than building a new layout from scratch.
I know it has been said many times about using pineboard (Homasote USA?)for baseboards but having used it previously on another section and that it proved stable for fifteen years I am again using it on the new portion of the layout. The piece in the above photo came from an old bedroom cupboard and has been patiently waiting in the shed for its callup. The dodgy bit on the right hand side was cut off and then using some old leftover paint it was covered all over for protection from moisture. It is planned to run some MDF vertically along the baseboard facing to freshen it all up.
Looking from the other direction the board is temporarily supported to see how the new width will work. I have decided to leave in the former base of the lower town of Bodalla to form a shelf that can be accessed from the front when the facing goes on.
The former town of Candelo has now been flattened and repainted. All that needs to be done now is to fill in the former turntable pit.
The matching piece of baseboard has been cut and put into place. The crack visible is not earthquake caused but will be duly patched over shortly. Now with the boards in place I couldn't resist the urge to dry run the track layout for Bega. The passenger station will be located on the right and the goods shed on the left hand side. This allows the road access to the goods shed. I have incorporated a gentle curve to the tracks in the station area. It could have easily been straight but to my eye a gentle curve looks better.
Looking in the other direction an NA is in the loop with a six car coal train and two passenger cars are at the station. When trying to set out a layout it is easier to visualise how it will all look and fit together when the items are placed on the board. Compared with a plan on paper, this works so much better. This applied to the track as well and I have many template paper points downloaded from the Peco website. This then accurately shows how much room they will take up.
At the far end of Bega will be some loco facilities. This track comes off the station loop. At the far end of board can be seen some of the former SCR scenery. I have decided to leave it in place and then run the new track through it. This will save me plenty of time in not having to do the scenery again at the back of the layout room.
This is where SCR is up to  at the moment.

Thursday, 24 November 2016

Location, Location, Location

The new narrow gauge layout situated on the far South Coast of New South Wales is located in a similar area to its predecessor which was standard gauge.
A new layout also requires new names for the stations, some on the layout will be the same such as Bega and Candelo that were on the previous one.
There was no real reasoning behind picking the new names. No study of the towns on the internet or any personal trips to the area to try and capture the flavour of the place. Well for one thing there was never a railway there in the area so no old fellas can tell me that its wrong.
Basically I opened a map of the area and picked names that I thought would suit. The stations will be at Bega, Wolumla Junction (Happy Phil?) )This is the junction to Candelo), Pambula, Greigs Flat, Snug Cove (love that name had to include) and terminating at Eden.

Location Diagram

Location of South Coast Rail

The last post had the town of Dunno, quickly made up because I was too lazy to look at the map and give it a proper name. This location will now be Bega which will be my second attempt at this location. I have obtained all the required track and points to lay here. I have stuck with the Peco track and points. I would have preferred had Peco made this track not so rough in appearance but its not worth the extra cost to move over to Micro Engineering track to resolve this minor irritation. Once the track is ballasted and weeded over it looks OK.

 Layout Diagram

Updated diagram with town names added  
This may not be the final track layout for the whole layout, we are allowed to change our minds as we go along. One thing that the old DC layout suffered from was the style of control panel once prepared in perspex and holes cut for switches and push buttons. This meant the track plan was virtually locked in, but with DCC, control panels are virtually none existant.
The shed is partly through its transition from the old to the new layout. I still have tons of crap to get rid of that is sitting on the layout. It will have to go before the new track gets laid. I will also repaint the floor to make it look better, it was last done back in 2009.

Demolition Derby 

Work has commenced on getting the town of Bega ready for track laying. The lovely photo of the garratt on the last post has now gone. This was one of my favourite sections and came up nice with the trees and the cutting around the tunnel mouth. We will have to wait and see what pops up here.
 
Snowing on the South Coast?

The above photo shows that the scenery has started to be stripped back to allow removal of this section. This will then allow this portion of the wall to be repainted to match the front of the shed. You get a sad feeling when all the work end effort goes in a third of the time to demolish than what it took to build in the first place. You have to get over it and move on, I have many photos of this section.

Where Bodalla once stood
This photo shows where the locations of Bodalla and Candelo (upper) were located. One of the down sides of going to O scale is that it takes up much more room. Also shown in the photo is another location where the old track will stay forever (or until the whole layout is demolished). I cannot get to it for removal and the time and effort is also not worth it. Looking at the plan above in this post all of the baseboards to the right of the entry door will be left in situ and I will rework the track through it. There is no point in demolishing it all to lay the track onto modules at this stage.
Bodalla Goods siding - never to be shunted again
The rock wall that has separated Bodalla from Candelo has been removed for future re-use. Luckily I was able to prise it away with little cracking. Bodalla was never a complex yard which is surprising for me. It had a goods siding and another siding that was to go to a livestock unloading point. Never had a single shunt into it!.
A high shot showing the removal work
In the above shot can be seen the second location of the turntable for Candelo. It was never operated in either location. This may show up the downside of having a large layout, too many projects and not enough time to complete them all. One of the O scale buildings is in place to  gauge how much more room is gobbled up in this scale. A lonely NQR wagon is also there to provide some atmosphere to the scene.

So there is progress on the town of Bega. When I get it connected to Eden I will finally have somewhere to come and go from.

Tuesday, 1 November 2016

Planning the next part

Well firstly thanks to viewers who visited over the many years since March 2009 when this blog started to record the history of South Coast Rail. The hit counter has just tipped over the one hundred thousand clicks which I suppose is a milestone in its self.
Since 2009 when I look back to some of my early work on the HO layout I suppose I can only hope that my modelling has got better. Old code 100 track was replaced with code 75 which I found to be more realistic looking. Its all part of trying to improve with age I guess. What really astounds me is when I look at the dates when the photos were taken and realise how quickly time has gone by. We only have a limited time on the planet so get in quick and finish that dream layout.
When I read that book 101 Track plans for model railroads, I seemed to get stuck longer on the page showing a huge layout and was inspired to one day have a larger layout myself. In the end I built the shed to contain the HO layout that was South Coast Rail. And now that it has been handed over to the On30 scale it is being refilled without any trouble.
This size shed has enabled me to try and create my version of the Victorian Narrow gauge as I see it. I have sort of made the shed two halves. The left hand side has been repainted and now contains the baseboards of the nearly completed Eden. The right hand side will retain all the former baseboards and have the new track laid onto them. If the retirement village calls early then this side is dispensable and stays, the portable section will be coming with me. In my opening I was amazed at how quickly time flies so the next ten years will come as quick as the last ten have gone.
So I am preparing the baseboards where the former towns of Bodalla and the branch line terminus of Candelo once stood. The end result is that I will only get one town out of two as the scale has doubled. I have attached the proposed plan for the next town planned. So far I haven't named the place yet. I will sit down one day with a map and throw a few darts I suppose and get some names. If I am a bad shot this would be how the town of Broken Hill would end up on a South Coast layout.
One thing is for sure when I plan a town layout it always seems to have plenty of points in it. Don't ever ask me to model the Camden line, not enough points. I guess this end result comes from the fact that I like operation on a layout, plenty of shunting and a few mongrel track designs to make the job harder. Having looked at all the track designs of the VR narrow gauge lines I can say that to me most are boring and too easy to shunt. Yes this is exactly what they were looking for in real life and the tracks were designed with that in mind. The only VR track plan with any interest to me was the one at Beech Forest which was unique in two ways for a narrow gauge line in that it had a scissors crossover and also a balloon loop.
6039 about to burrow under Candelo in an area now removed


I have temporarily named this town Dunno until something better comes along. I will have a crossing loop, goods siding, two industry siding, one on each end of the town, a loco shed area, a livestock siding and a few roads for rolling stock storage. This town won't be cramped by any means as the total length is over five metres in length. It will also be a junction station as this is where the track from Eden will join in as shown in another diagram. I didn't want to but I will end up with a liftout section to complete the full circle around the outer wall of the shed. It will also form a triangle which will be handy if any items of rolling stock require turning.
Proposed town of Dunno (its name yet)
The above drawing is fairly to scale. The road will come up from the right over a level crossing into the town and run along the back of the wall and disappear off behind the factory on the left. A platform for about three passenger cars will also be provided. Plenty of light is available in this section with a large window looking out over the garden.
The first diagram is not that clear as to where the tracks on the left hand side go to, so this diagram shows how the lift out section fits in with the rest of the layout. The tracks will be slightly upgrade from Eden to Dunno. Hey this might mean trains heading this way might require an extra loco? More operation, that's what I like.
Well I'll leave you with that lot for a while, so now you know where SCR is heading to.

Monday, 17 October 2016

I've finally Climaxed!

Don't read too much into that heading!. Since changing over to On30 scale as I previously mentioned I always had a wish list of locos and rolling stock. It started with the NA locomotives and they were the reason I moved over to this scale. Other locos on the wish list were a Shay, a climax and a model of the G42 garratt which probably will never happen.
The last blog showed that I managed to get another box ticked when I obtained a shay off Ebay. The shay has managed around a week or so running up and down Eden yard wearing the track out. Albeit slowly. I was shunting it into the engine shed road and it stopped moving but still was making its usual sound. On close examination I was still no wiser into getting it running again. It could be a DCC issue or a mechanical gear issue, I am not sure but have put it aside for the time being until I meet up with an expert in Bachmann shays who might be able to offer some suggestions. But for now it can just sit there and idle away.
It seems I had better luck last week when a Bachmann Climax came up on Ebay and I was lucky(?) enough to win the auction. I fired off a question to the owner to verify if there were any gear issues, something apparently Bachmann and indeed other makers are famous for. The reply said it was a fine runner. It was received today and has been fitted with a dcc decoder although not sound. Obviously
whoever wired it up doesn't know the difference between forward and reverse as it does exactly the opposite to what is selected on the throttle. I'll just have to remember that this loco is the odd man out until I can get a sound decoder fitted to it, then it should be rectified.
The loco sometime down the track will also be weathered to make it look like it has been doing some work. The shay and climax are unusual style locos and I plan to utilise them on coal and timber working. The branch that will contain the coal and timber industries will be some time away so I will have to find some other work for them to do. Maybe shunting duties.
It is certainly noticeable when you operate non sound locos with sound equipped locos. Could it be that cars and pedestrian accidents increase on the layout because they didn't hear it coming?
Another problem has arisen. What is it about the number 8? There are literally millions of numbers out there but this is now the third loco I have amongst a fleet of five that has the number 8. Is it a Chinese lucky number that all their locos have to have this number? The first number 8 belongs to the only modified NA which was number 8 - non negotiable, it has to remain number 8. Then the shay turns up with also number 8. OK one option is to make it number 18 or just invent another number. Then as the photo clearly shows the climax is already numbered 8. I guess I just have to renumber the shay and climax to other numbers. I offer the following photo as a means of getting rid of at least one number 8:
This photo is the first of a series of irregular comments on various aspects of the layout that could be worthy of a laugh. I hope you may enjoy.
Here are a few more photos of the Climax working its way around Eden Yard.


I have also been working around the former sites of Bodalla and Candelo by stripping out the scenery and former HO track. This will be a later blog entry.

Saturday, 1 October 2016

You can Shay that again

When I made the choice to go to narrow gauge, the choice was made easy when Haskell had made the NA Puffing Billy type locomotives. They have just recently followed that up with the common NQR open wagon that was the most prolific in number of VR narrow gauge wagons.
To me modelling the VR narrow gauge is like modelling a smaller version of the full size railways. Narrow gauge modelling encompasses a huge range of styles, sizes and almost anything goes.
Having said that there is one type of narrow gauge locomotive that is almost ugly and unique. That loco is the shay type. I'm not sure in what order the shays sisters were built but the climax and heisler type locomotives were certainly out of the box thinking in design. Their major use was in the logging and mining fields, their design adapted to get the job done.
In building up my fleet of locomotives I have put a few must haves on the list. The top one is a G type garratt of which two were built for the VR narrow gauge. A ready to run one would be nice and although limited brass ones were built, I think now a ready to run model would make me hear those famous words from the Castle "tell him he's dreaming."
Another model is the Climax and Shay. Bachmann have made both models in On30 and luckily last week a Bachmann Shay weathered and sound equipped turned up on Ebay. I started bidding on it and had a limit which was reached within the last minute of the sale. Sorry to the other guy if you are reading this.
No. 8 brings its first log train into Eden
It has certainly been weathered and finished off far better than I could have achieved. This fact alone gives me more layout building time when the job is already done. It also has a driver who looks happy (all the time actually) The timber load might need replacing with something more authentic than trying to burn plastic. The loco turned up and guess what number it was? Yes number 8. Of all the millions of numbers out there in the world now I have a double up with 8A the one off unique NA loco with the straight stack. I'll have to work out something with the numbers. This loco is intended to be able to work the logging branch down to the main line where it will hand over to another loco. More planned operation.
No. 8 holds up traffic over the goods yard level crossing
I suppose the benefit of  being a slow runner is that it takes a while to get to where ever its going. Well that's loco number 4 for the moment. I have some diesel body kits to assemble one day in the future. And to make matters worse we will loose an hour tonight when clocks are put forward for daylight saving.
Another benefit in starting out again is the chance to strip out everything in the shed and refresh things. The walls and roof have been repainted up one end with the usual blue sky paint colour. It certainly made a great improvement over what was there. Fifteen years is too long between paint jobs. So it was looking pretty smick, but missing something to break the "sky".
During my recent August visit to the Puffing Billy railway, I made sure I went into the shop at Belgrave to try and buy anything that would be suitable for the walls of the shed. I was beyond the Thomas the Tank posters but bought the only suitable poster that being a shot of a train on Monbulk trestle with two vintage cars in the foreground. It was purchased for $5 and rolled up to hopefully survive the plane trip back to Sydney. It seemed to be OK.
The Puffing Billy poster safely posted up on the wall
It would look very bare up on the wall alone, but I was lucky to be sent from photos from Alf Batchelder that he had taken on Puffing Billy. I emailed Alf re getting high res copies so I could blow them up and frame them onto the wall of honour. He kindly agreed and sent me some great photos of which I selected four. I had Office Works enlarge them to A3 at a reasonable under $2 each cost onto thicker type paper. These were then put into frames and now run down one side of the shed. It's starting to look good. I still have the opposite wall to decorate yet - plenty of time.
The narrow gauge wall in honour of Puffing Billy
 Its great to be able to theme up walls and your layout area with what you are modelling. I'm just not sure where I'll put all that NSWGR memorabilia now.